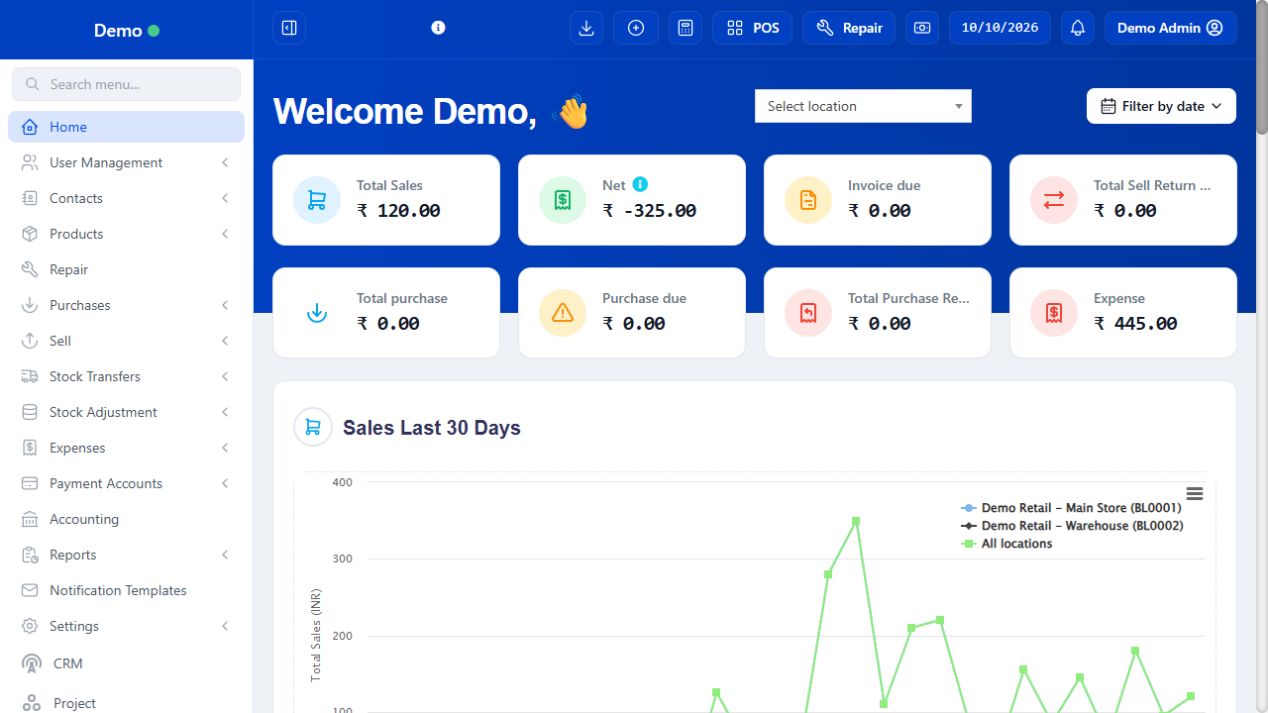
Compact connects your shop’s products, stock, customers, purchases, sales and money records. Start with the web portal for business setup. Windows and Android provide the counter POS features described in the app chapters. Screenshots use a sample Demo business; your currency, menus and permissions may differ.
4 procedures · Field reference · Practical example · Common questions
Think of a day as a chain of checked records: catalogue and opening balances establish the starting point; purchases and transfers bring stock to the outlet; a sale consumes stock and can create a payment or receivable; expenses record money spent; register close reconciles actual drawer cash. Dashboard sales are not the same as cash in hand. Read the module page for the action you intend, and use its contents list to jump directly to a procedure.
SCREEN GUIDE Getting started — module overview. Select the screenshot to enlarge; optional fields may differ in your business.
Field reference
Use this while completing the form. A required field is marked with *; conditional fields appear only when enabled.
Field / control
What to enter or understand
Business / Location
Check the business and outlet before recording anything. A warehouse and a counter can show different stock.
Date filters
Lists and dashboard panels may show only a period. Empty results are not proof records were deleted.
Actions
Commands for the selected row: view/edit/print/payment depend on access and record state.
Draft / final
Draft is saved work; final is a transaction. Do not use finalization simply to test an unfamiliar form.
Notifications
In-app notices and external email/SMS are different. Sending a message requires a configured channel and intended recipient.
Before you start Ask your administrator for your own username, password and permitted location.
Steps
Sign in at https://31compact.com/login. Complete the CAPTCHA when requested. Check the business name before entering records.
The owner sets up locations, users, taxes, invoice layouts and product units. Products and opening stock come next.
Record stock received from suppliers as purchases. Sell from the correct location in POS. Record expenses separately from sales.
At the end of the shift, synchronize any offline bills, check register details, count cash and close the register. Managers use reports to review sales, stock and dues.
Check the result The same business records support the web and the connected POS apps. A draft, quotation or suspended bill is not the same as a completed sale.
Before you start Menus depend on your role, subscription and enabled features.
Steps
Use Search menu to find a page. Expand a sidebar group such as Products or Sell to reveal its pages.
On lists, set location and date filters first. Use the table search box to narrow records. Use Actions on the correct row to view or edit it.
Use page numbers or Next for more records. Column visibility changes what is shown; it does not change the saved record.
Export CSV, Excel or PDF when offered. Check the active filters before exporting. Use Go Back, a page Back control or the main navigation to leave a detail view.
Check the result You can locate a record without recreating it. Empty lists often mean the location, date or permissions exclude the record.
Before you start Use sample data and an account with the intended role, not another person’s credentials.
Steps
Check the business and outlet, then open a sample product. Read its unit, price, tax and stock before adding it to a basket.
Open POS and a permitted register. Select a sample customer by name/mobile, add one product and review quantity/price/batch.
Save a draft or quotation to practise without treating it as a completed purchase by a real customer. Reopen it and confirm the contents.
With approval for demo trading, complete one sample payment and find the same invoice in Previous bills. Compare total, payment and stock changes.
Read Register Details and compare cash collected with non-cash payments. Follow the closing checklist only when the demonstration shift is ready to close.
Check the result You understand how one action becomes a record in the next module.
IN PRACTICE
A practical example
Receiving ten mugs is a Purchase; moving four to another store is a Transfer; selling one is a Sale; collecting money for yesterday’s unpaid mug is a Due payment; paying for cleaning is an Expense. They are different records even when the same amount of money is involved.
Common questions
Which device should I use for setup?
Use the web portal for the full product/settings/ERP workflows. Windows and Android focus on the native POS tasks described in their module.
Can I share one login with every cashier?
Use individual authorised accounts so permissions, shifts and actions remain attributable.