
31 Compact logo31 COMPACTUser manual
Open application ↗Complete manual

Web portal

Customers & suppliers

A customer buys from you; a supplier provides your stock. Keeping one correct contact record makes searching, invoices and ledgers easier.

In this moduleUnderstand the workflowField referenceAdd or update a contactRead a ledger and collect a due paymentImport contacts and use customer groupsSearch customers by name or mobile on the counterEnter opening balances and credit terms oncePractical exampleCommon questions

Understand the workflow

Keep one contact per real customer/supplier rather than making a new record for every visit. Customer/Supplier/Both selects the business relationship. A customer group, credit limit and payment terms serve different purposes: grouping affects classification/pricing rules; a limit restricts credit; terms describe when payment is due. A contact ledger combines transactions over time and must be read with opening balances and returns.

Customers & suppliers — module overview
SCREEN GUIDE Customers & suppliers — module overview. Select the screenshot to enlarge; optional fields may differ in your business.

Field reference

Use this while completing the form. A required field is marked with *; conditional fields appear only when enabled.

Field / controlWhat to enter or understand
Contact type / Contact IDCustomer, Supplier or Both and its unique reference. Choose Both only when the same party buys and supplies.
Individual / Business detailsPersonal name fields or supplier/business name as offered. Use a clear display name for search.
Mobile / alternate / landline / emailAccurate contact/search values. Do not put multiple unrelated phone numbers into one field.
Tax number / address / state / country / postcodeInvoice and delivery identity. Check details before credit/GST bills; shipping address can differ.
Customer groupClassification such as retail/wholesale. Do not assume it creates a selling-price group automatically.
Opening balanceVerified amount owed at the agreed starting date. It is not a new sale or today’s payment.
Payment term number / days or monthsCredit period for billing. Ten days differs from ten months.
Credit limitApproved credit ceiling where enforced. Blank/unlimited behavior depends on the business configuration.
Assigned users / CRM source / life stageRestricted contact ownership and sales tracking where enabled. Visibility depends on the user’s access.
Custom / shipping / export fieldsOnly business-defined extra details relevant to the transaction; not required for every contact.

PROCEDURE 01

Add or update a contact

Where to go Contacts → Customers / Suppliers

Before you start
Search first to avoid duplicate contacts.

Steps

  1. Open Customers or Suppliers and search by name or mobile number. If a record exists, use its Actions menu to edit it.
  2. For a new contact, choose Add and select Customer, Supplier or Both as appropriate. Enter a recognizable name and accurate mobile number.
  3. Enter address, email, tax number, customer group and credit/payment terms only where relevant. Review opening balance carefully before saving.
  4. Save and search again. In POS, select the existing customer by name or mobile; use Walk-In Customer for anonymous sales.
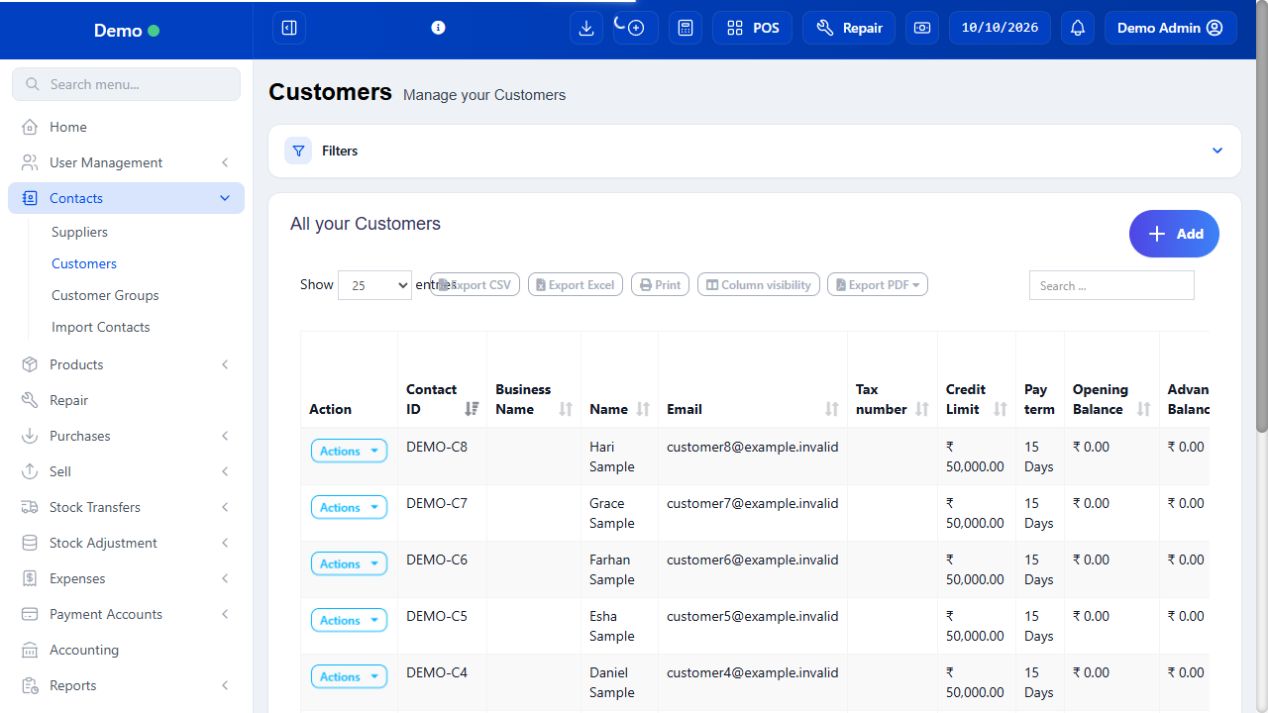
Add or update a contact — look for the controls described in the steps
SCREEN GUIDE Add or update a contact — look for the controls described in the steps. Select the screenshot to enlarge; optional fields may differ in your business.

Check the result
The contact is available for transactions, subject to the user’s access.

PROCEDURE 02

Read a ledger and collect a due payment

Where to go Contacts → Customers/Suppliers → Actions / Ledger

Before you start
Confirm the contact and unpaid invoice before taking payment.

Steps

  1. Open the contact ledger and set the date range. Read invoices, payments, returns and opening balance together.
  2. Use Add payment on the relevant unpaid invoice or the contact payment action when collecting an outstanding balance.
  3. Enter the actual amount received/paid, date, payment method, account and a reference or note. Review the allocation before saving.
  4. Reopen the ledger and invoice. Check remaining due and payment history. Reprint a receipt where needed.

Check the result
The recorded payment reduces the correct outstanding balance.

PROCEDURE 03

Import contacts and use customer groups

Where to go Contacts → Import Contacts / Customer Groups

Before you start
Use the template downloaded from your own Compact page.

Steps

  1. Download the import template and read its column instructions. Prepare a small sample first and check phone numbers, contact types and required fields.
  2. Upload the file, review any validation errors and correct the source file before retrying. Search for imported contacts after success.
  3. Create customer groups for a business reason such as wholesale or loyalty. Assign customers to the correct group.
  4. Check the selling price and discount rules for a group with a sample bill before regular use.

Check the result
Contacts are grouped and searchable without unnecessary duplicate records.

PROCEDURE 04

Search customers by name or mobile on the counter

Where to go POS → Customer selector

Before you start
The contact must exist and be accessible in this business.

Steps

  1. Activate the customer search and type a distinctive part of the name or mobile number. Wait for matching results before selecting.
  2. Compare name, phone and any identifying details to choose the correct customer when names are similar.
  3. If there is no match, check phone formatting and try the last digits. Search the web Contacts list before creating another record.
  4. Offline app users search the downloaded snapshot; a new online contact will not appear until downloaded.
  5. Confirm the selected customer on the basket before payment, especially for credit sales or invoices requiring registration details.

Check the result
The sale and any resulting balance belong to the intended customer.

PROCEDURE 05

Enter opening balances and credit terms once

Where to go Contacts → Add / Edit

Before you start
Have an agreed migration-date balance from the owner/accountant.

Steps

  1. Search for the existing contact. Check its ledger before entering an opening balance to avoid bringing the same old invoices in twice.
  2. Enter the approved opening balance and the intended payment term number/unit. Assign an authorised credit limit if relevant.
  3. Save and read the ledger with the full applicable date range. Verify the opening entry and total balance.
  4. For new credit trading, select that contact on a sample bill and review the due amount/terms and server permission or limit checks.
  5. If the starting balance is wrong, ask the manager to use the authorised correction flow; do not invent a sale/payment to hide it.

Check the result
The opening balance and new transactions remain distinguishable.

IN PRACTICE

A practical example

A customer owing 500 before the starting date receives a recorded opening balance of 500. A later credit sale of 200 and payment of 300 leave a balance of 400, assuming no other entries. Entering the old 500 both as opening balance and another invoice duplicates the debt.

Common questions

Why can another staff member see more contacts?

Check assigned-user visibility and role permissions. Offline snapshots can also be older.

Can I collect a balance using Cash on an empty POS basket?

Use the contact/invoice due-payment action, not a new empty or duplicate sale.