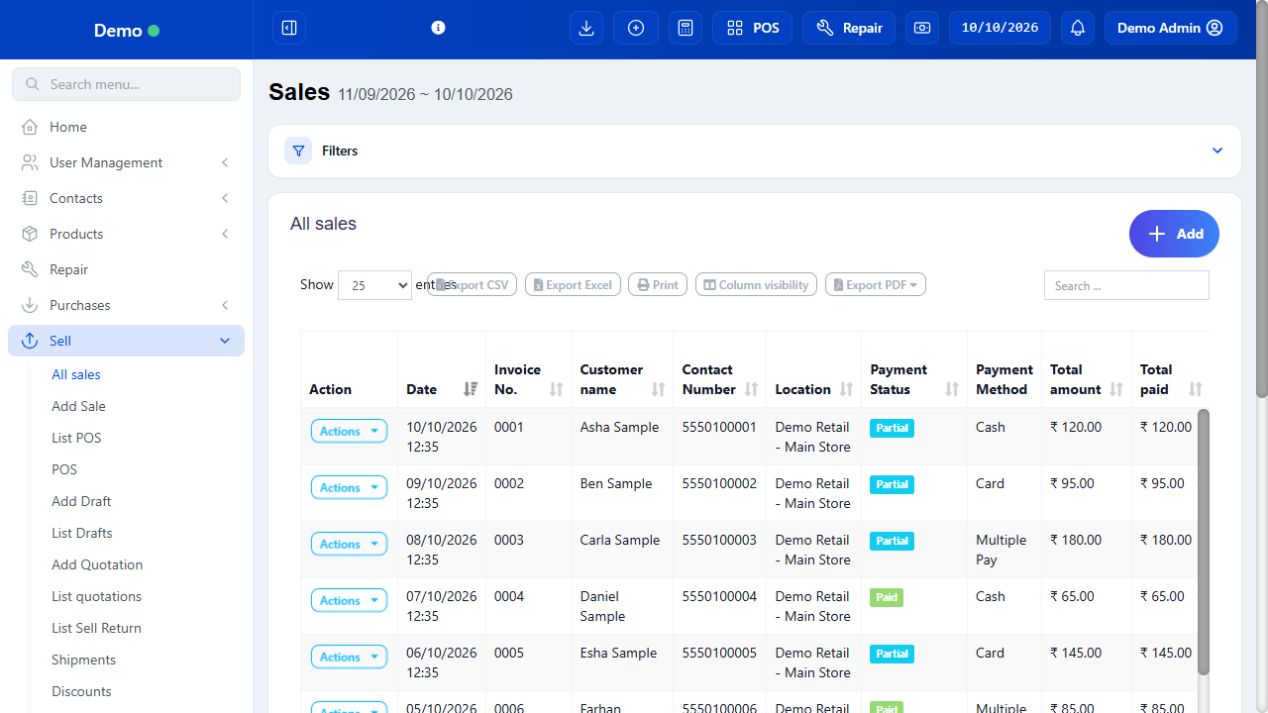
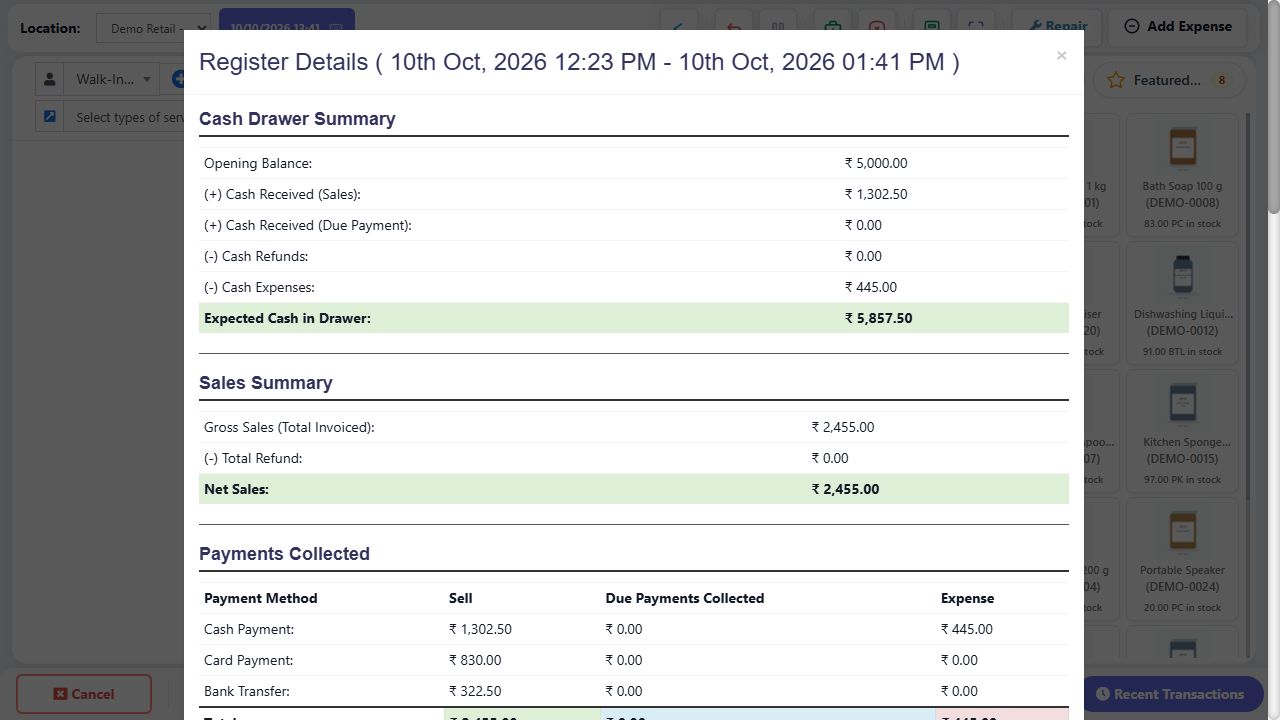
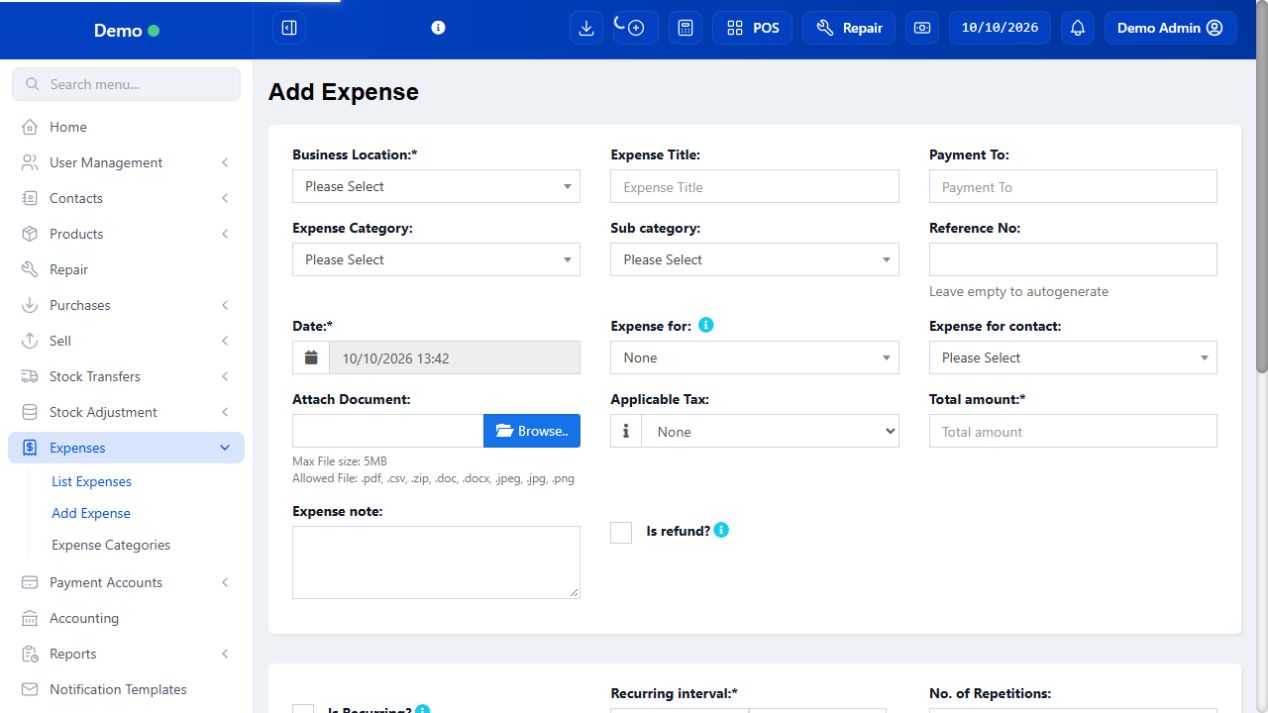
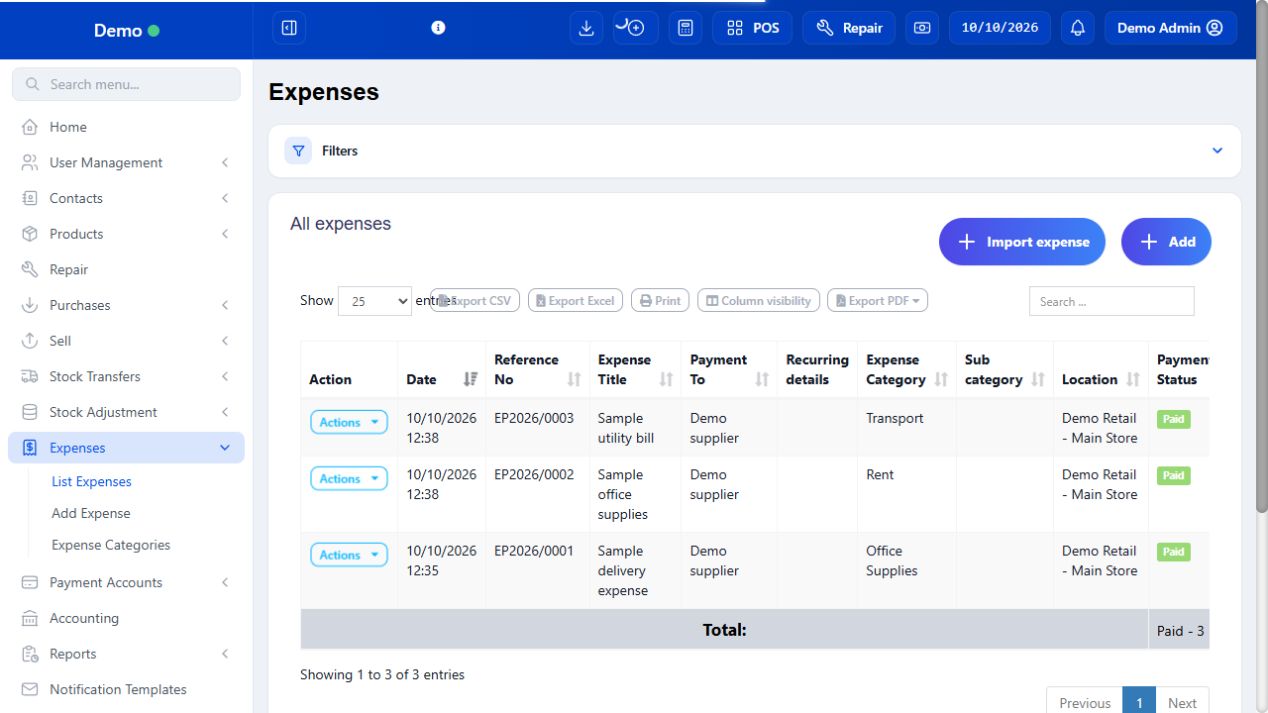
All module guides in one document. Print this page for the complete manual, or use the module library for individual tasks.
All users
Getting started
Compact connects your shop’s products, stock, customers, purchases, sales and money records. Start with the web portal for business setup. Windows and Android provide the counter POS features described in the app chapters. Screenshots use a sample Demo business; your currency, menus and permissions may differ.
4 procedures · Field reference · Practical example · Common questions
Think of a day as a chain of checked records: catalogue and opening balances establish the starting point; purchases and transfers bring stock to the outlet; a sale consumes stock and can create a payment or receivable; expenses record money spent; register close reconciles actual drawer cash. Dashboard sales are not the same as cash in hand. Read the module page for the action you intend, and use its contents list to jump directly to a procedure.
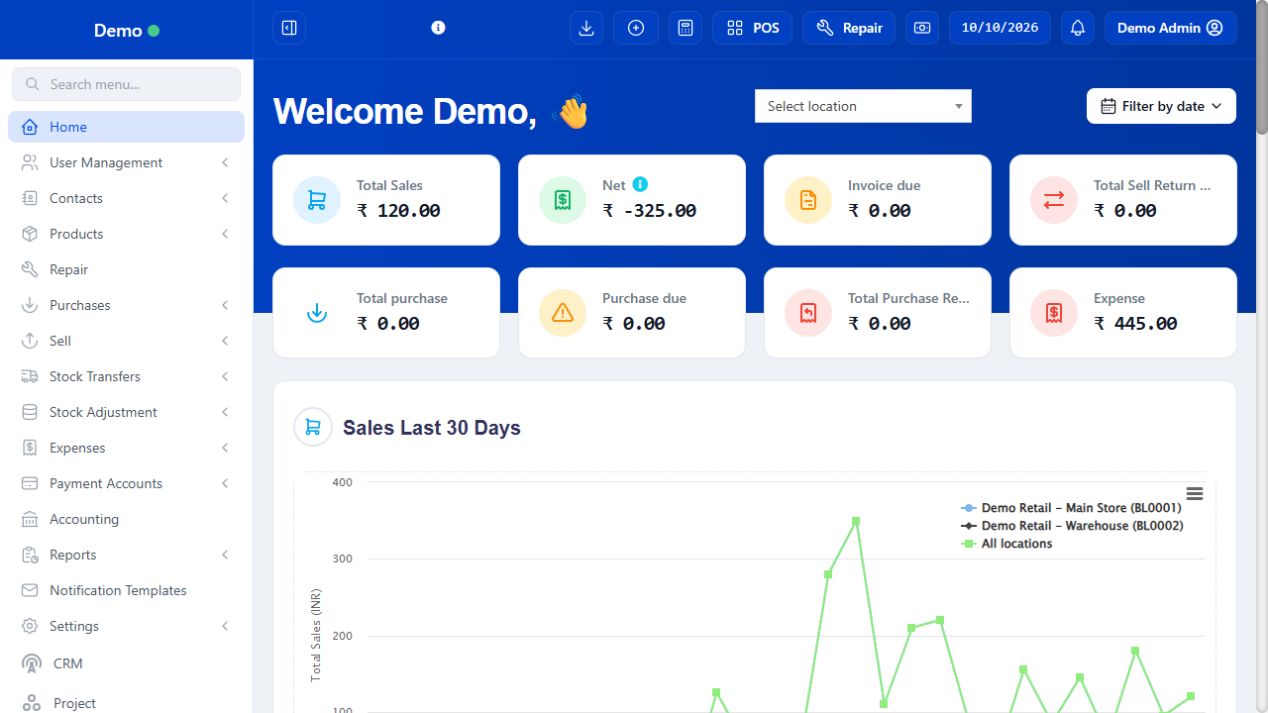
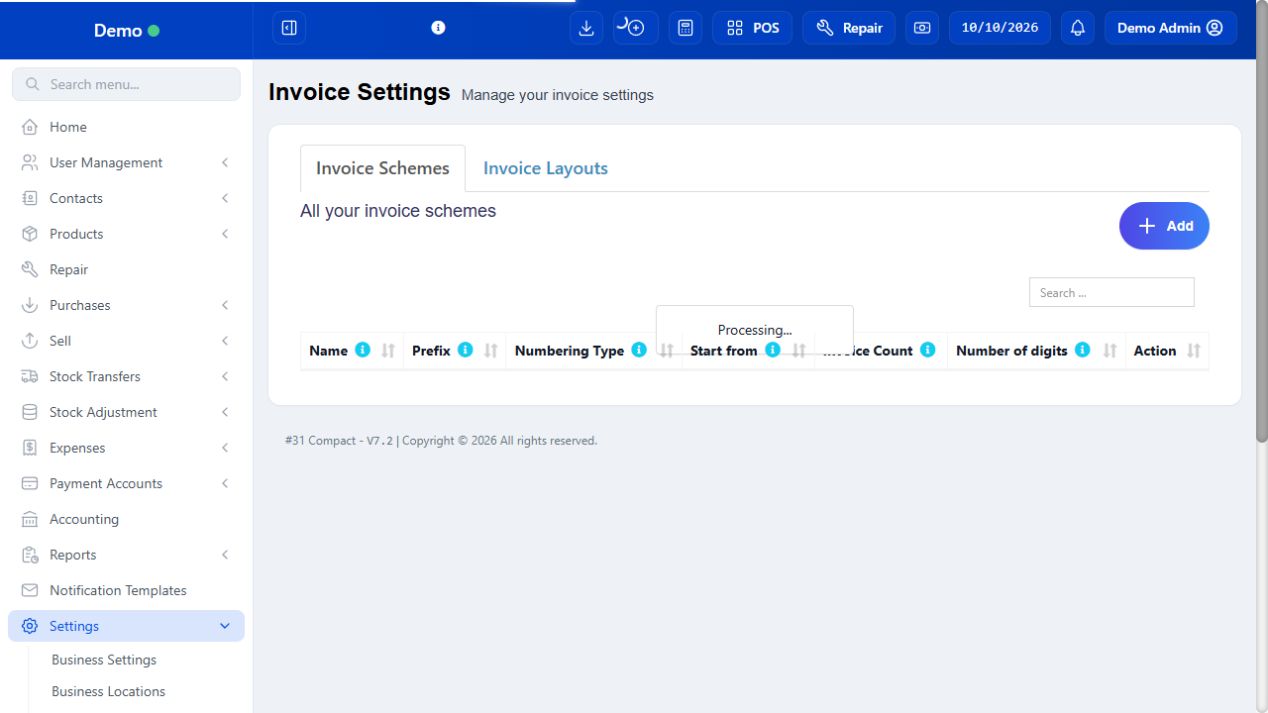
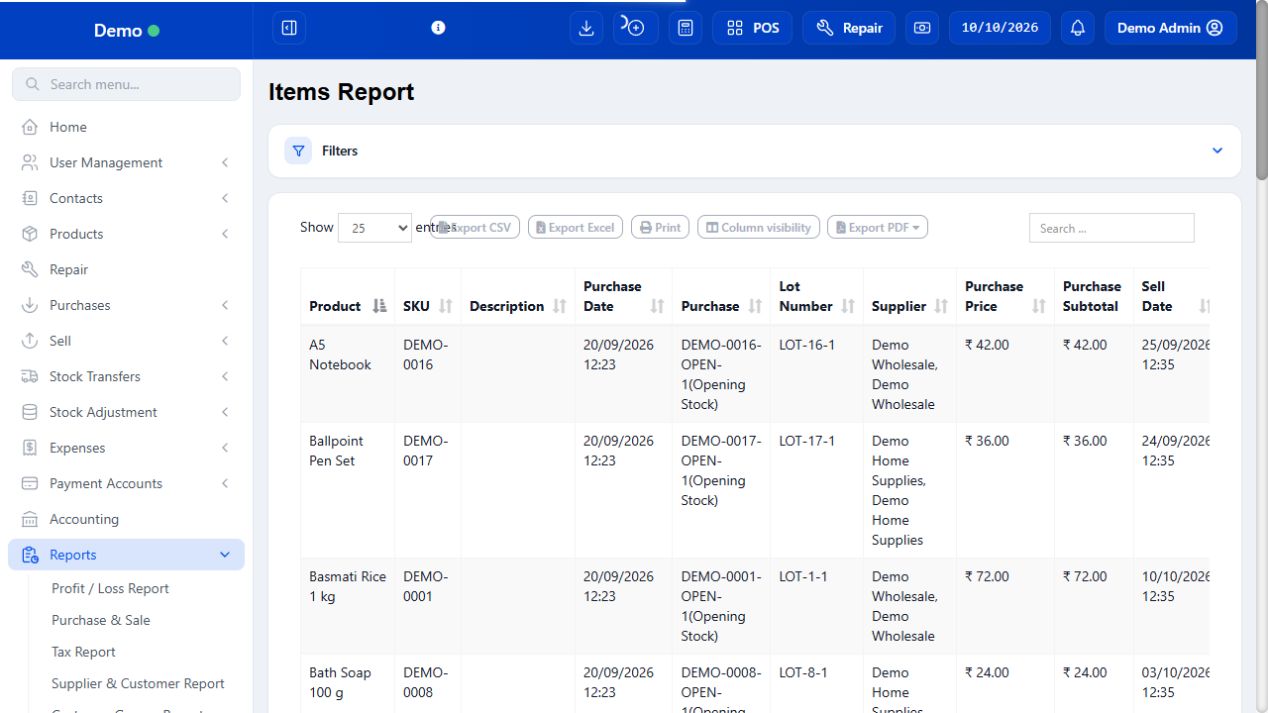
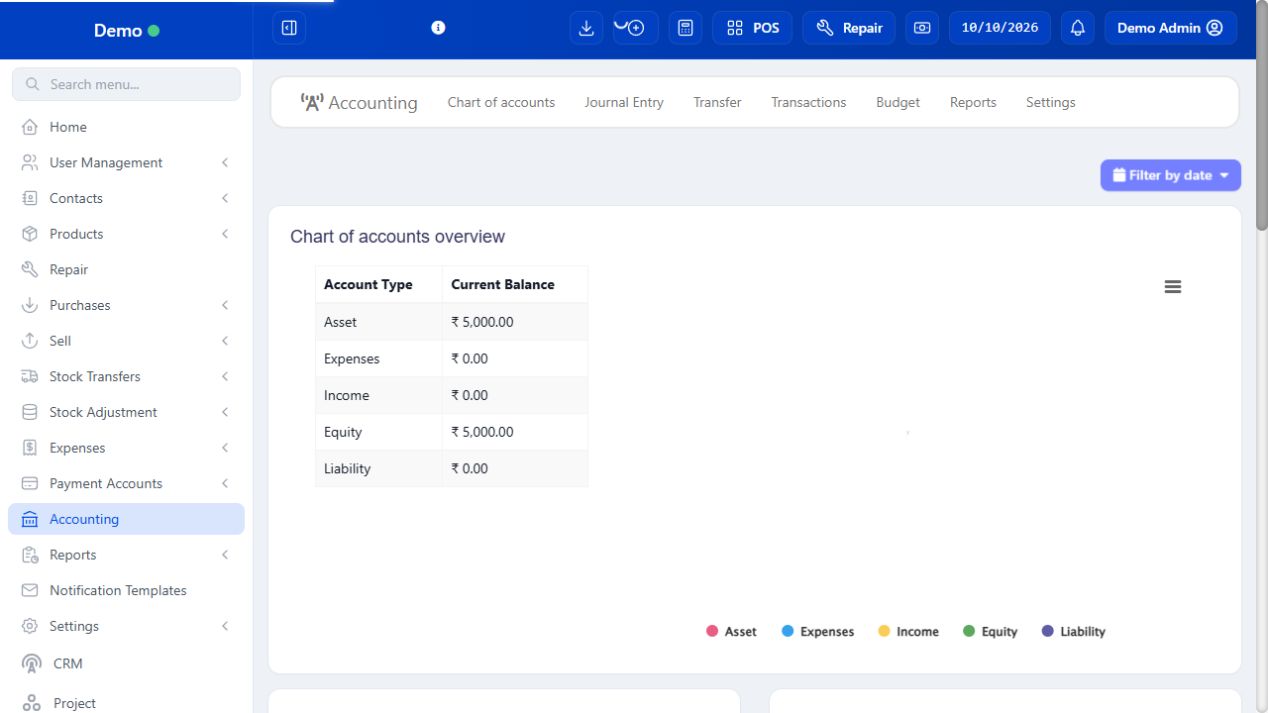
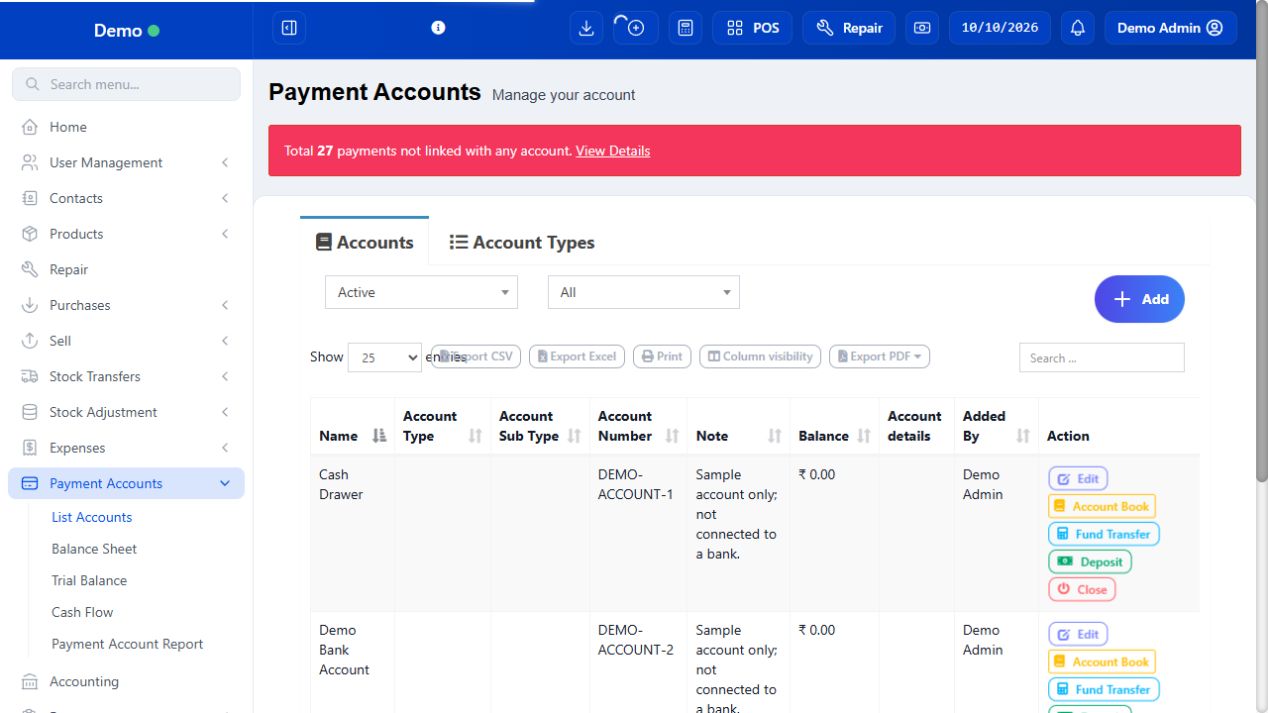
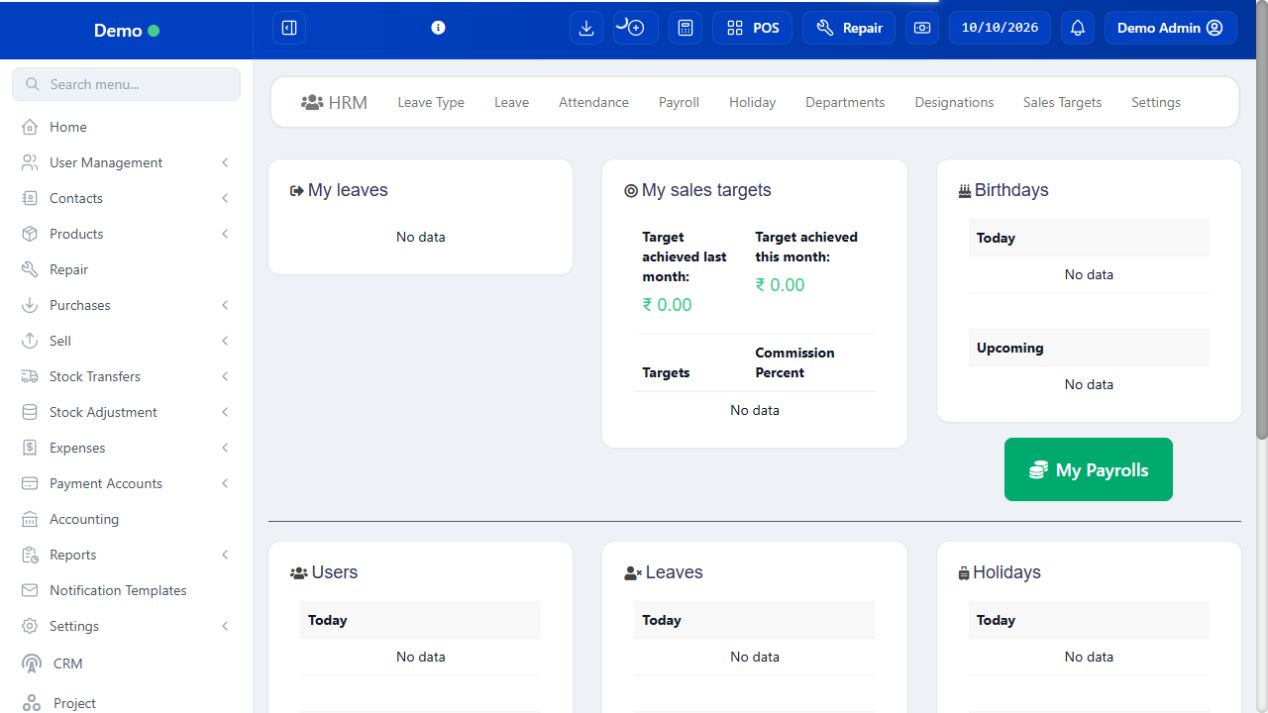
SCREEN GUIDE Getting started — module overview. Select the screenshot to enlarge; optional fields may differ in your business.
Field reference
Use this while completing the form. A required field is marked with *; conditional fields appear only when enabled.
Field / control
What to enter or understand
Business / Location
Check the business and outlet before recording anything. A warehouse and a counter can show different stock.
Date filters
Lists and dashboard panels may show only a period. Empty results are not proof records were deleted.
Actions
Commands for the selected row: view/edit/print/payment depend on access and record state.
Draft / final
Draft is saved work; final is a transaction. Do not use finalization simply to test an unfamiliar form.
Notifications
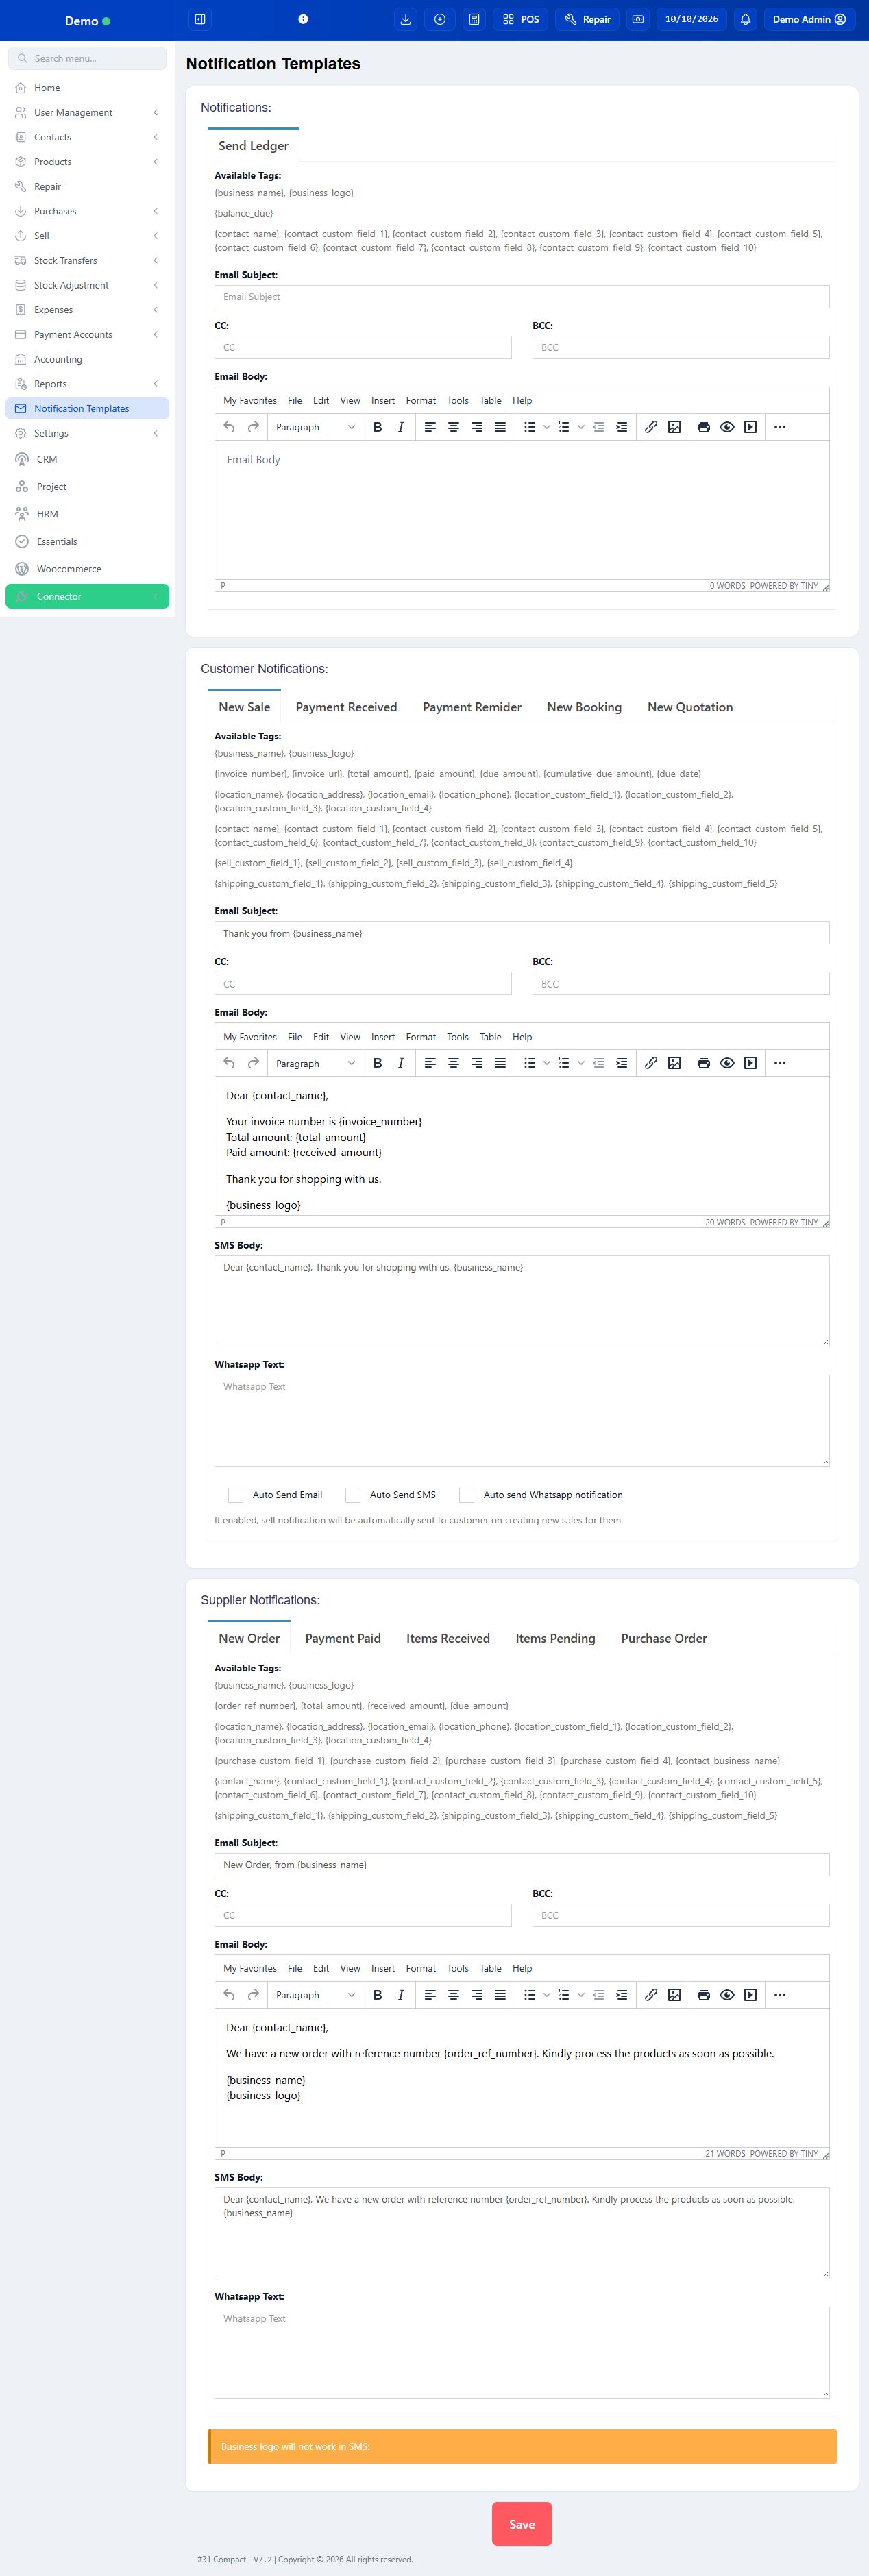
In-app notices and external email/SMS are different. Sending a message requires a configured channel and intended recipient.
Before you start Ask your administrator for your own username, password and permitted location.
Steps
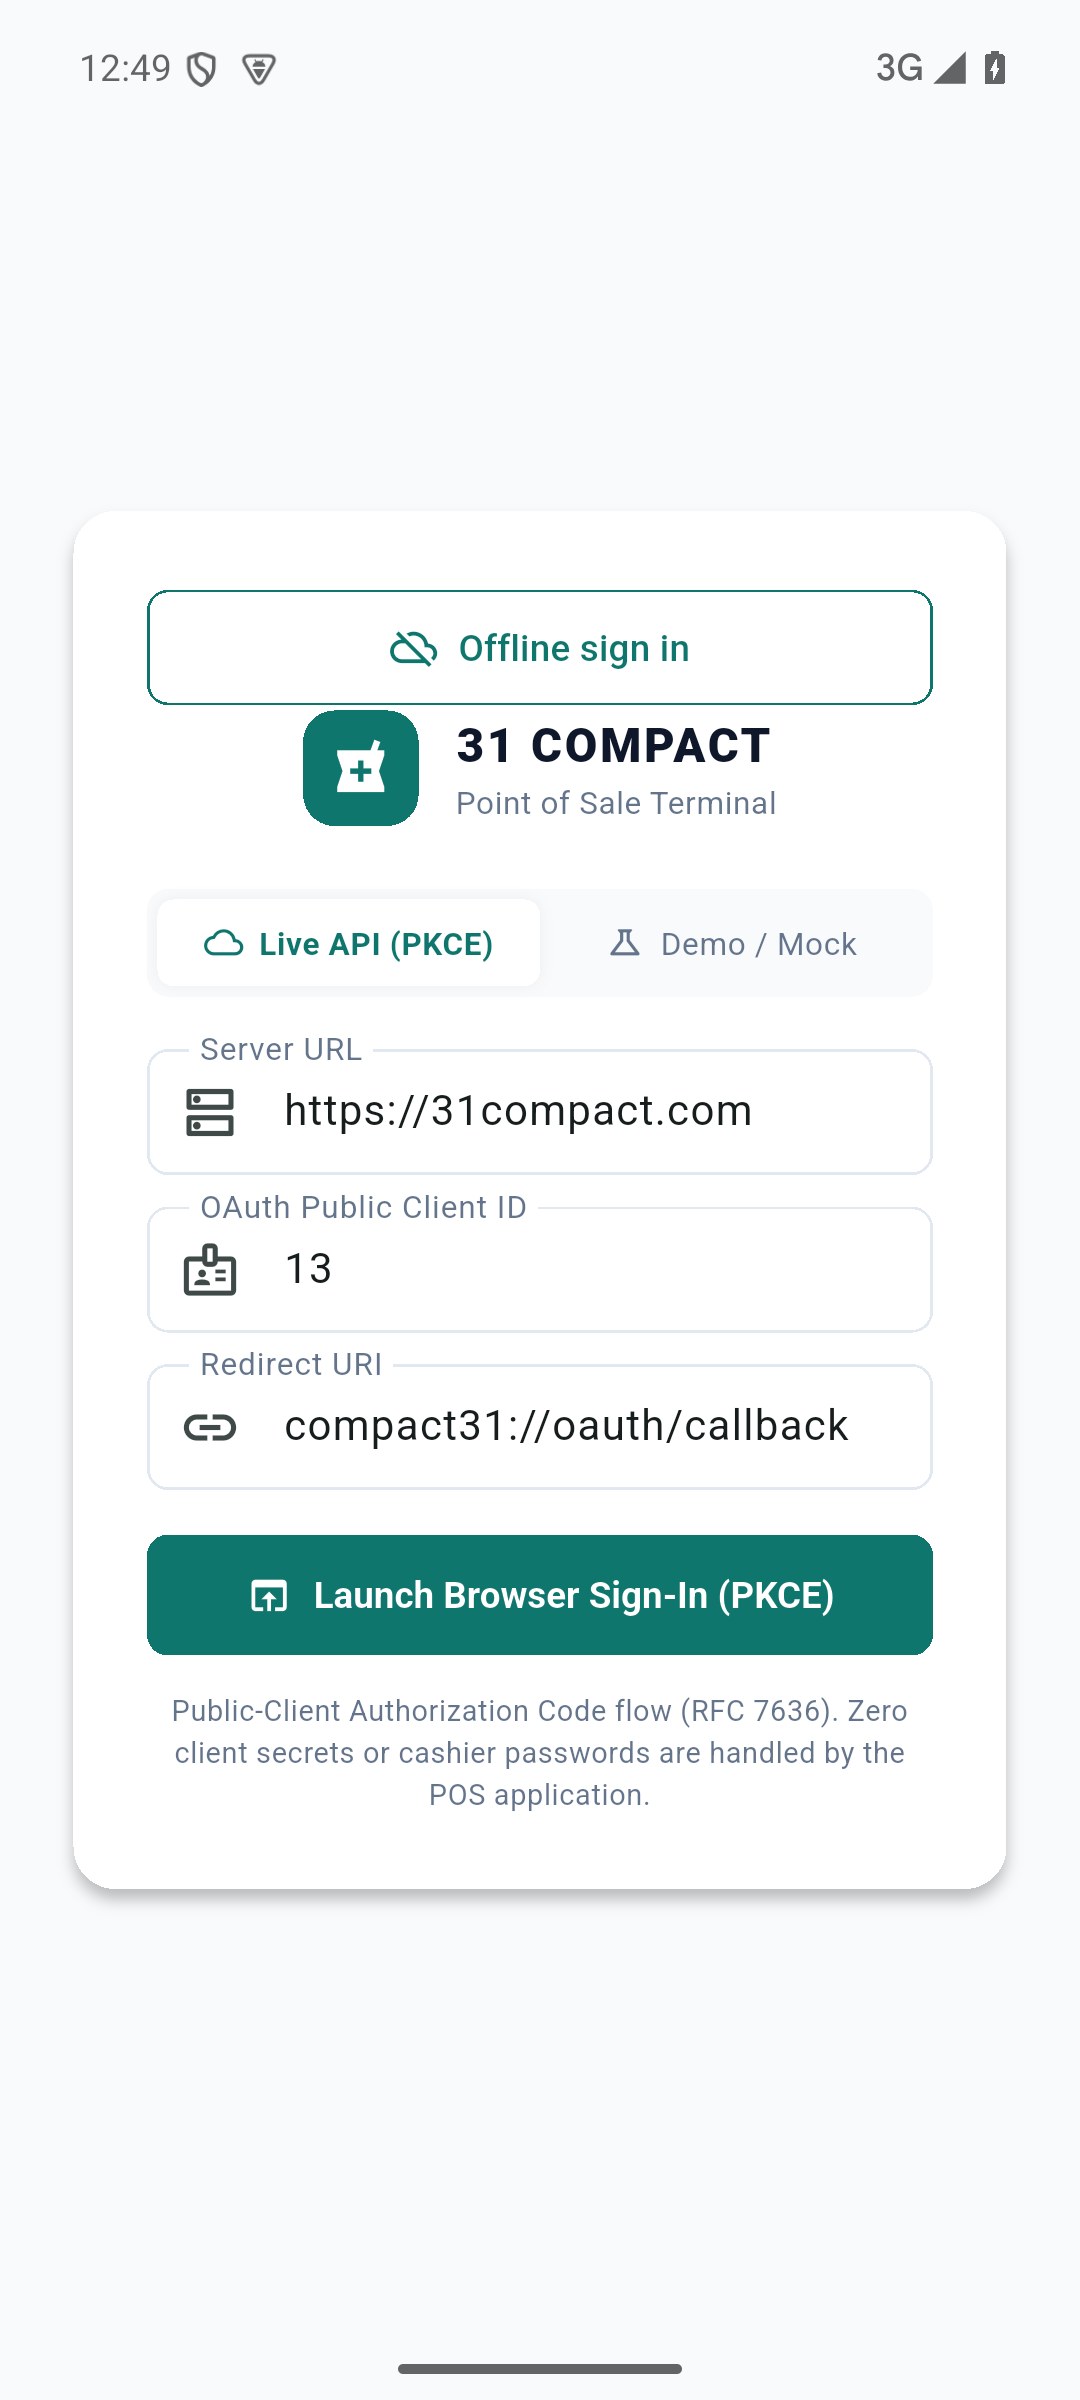
Sign in at https://31compact.com/login. Complete the CAPTCHA when requested. Check the business name before entering records.
The owner sets up locations, users, taxes, invoice layouts and product units. Products and opening stock come next.
Record stock received from suppliers as purchases. Sell from the correct location in POS. Record expenses separately from sales.
At the end of the shift, synchronize any offline bills, check register details, count cash and close the register. Managers use reports to review sales, stock and dues.
Check the result The same business records support the web and the connected POS apps. A draft, quotation or suspended bill is not the same as a completed sale.
Before you start Menus depend on your role, subscription and enabled features.
Steps
Use Search menu to find a page. Expand a sidebar group such as Products or Sell to reveal its pages.
On lists, set location and date filters first. Use the table search box to narrow records. Use Actions on the correct row to view or edit it.
Use page numbers or Next for more records. Column visibility changes what is shown; it does not change the saved record.
Export CSV, Excel or PDF when offered. Check the active filters before exporting. Use Go Back, a page Back control or the main navigation to leave a detail view.
Check the result You can locate a record without recreating it. Empty lists often mean the location, date or permissions exclude the record.
Before you start Use sample data and an account with the intended role, not another person’s credentials.
Steps
Check the business and outlet, then open a sample product. Read its unit, price, tax and stock before adding it to a basket.
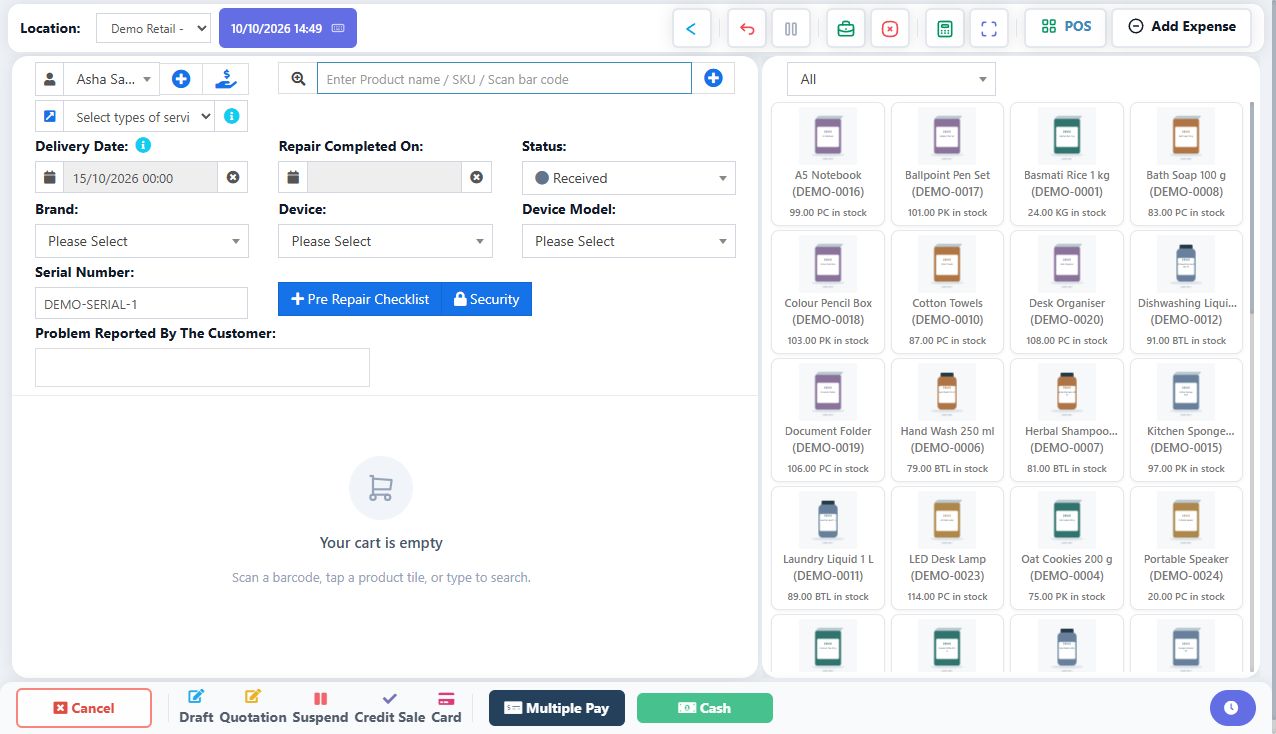
Open POS and a permitted register. Select a sample customer by name/mobile, add one product and review quantity/price/batch.
Save a draft or quotation to practise without treating it as a completed purchase by a real customer. Reopen it and confirm the contents.
With approval for demo trading, complete one sample payment and find the same invoice in Previous bills. Compare total, payment and stock changes.
Read Register Details and compare cash collected with non-cash payments. Follow the closing checklist only when the demonstration shift is ready to close.
Check the result You understand how one action becomes a record in the next module.
IN PRACTICE
A practical example
Receiving ten mugs is a Purchase; moving four to another store is a Transfer; selling one is a Sale; collecting money for yesterday’s unpaid mug is a Due payment; paying for cleaning is an Expense. They are different records even when the same amount of money is involved.
Common questions
Which device should I use for setup?
Use the web portal for the full product/settings/ERP workflows. Windows and Android focus on the native POS tasks described in their module.
Can I share one login with every cashier?
Use individual authorised accounts so permissions, shifts and actions remain attributable.
Web portal
Business setup & users
Set up the business once, then give each staff member the access needed for their work. Owner or administrator permissions are normally required.
6 procedures · Field reference · Practical example · Common questions
Business settings affect future data entry and screen visibility. Roles grant actions; user location access narrows where those actions apply. Invoice numbering, invoice appearance, product tax and payment methods have separate settings. Configure one subject at a time and verify its effect with an approved sample before changing the next.
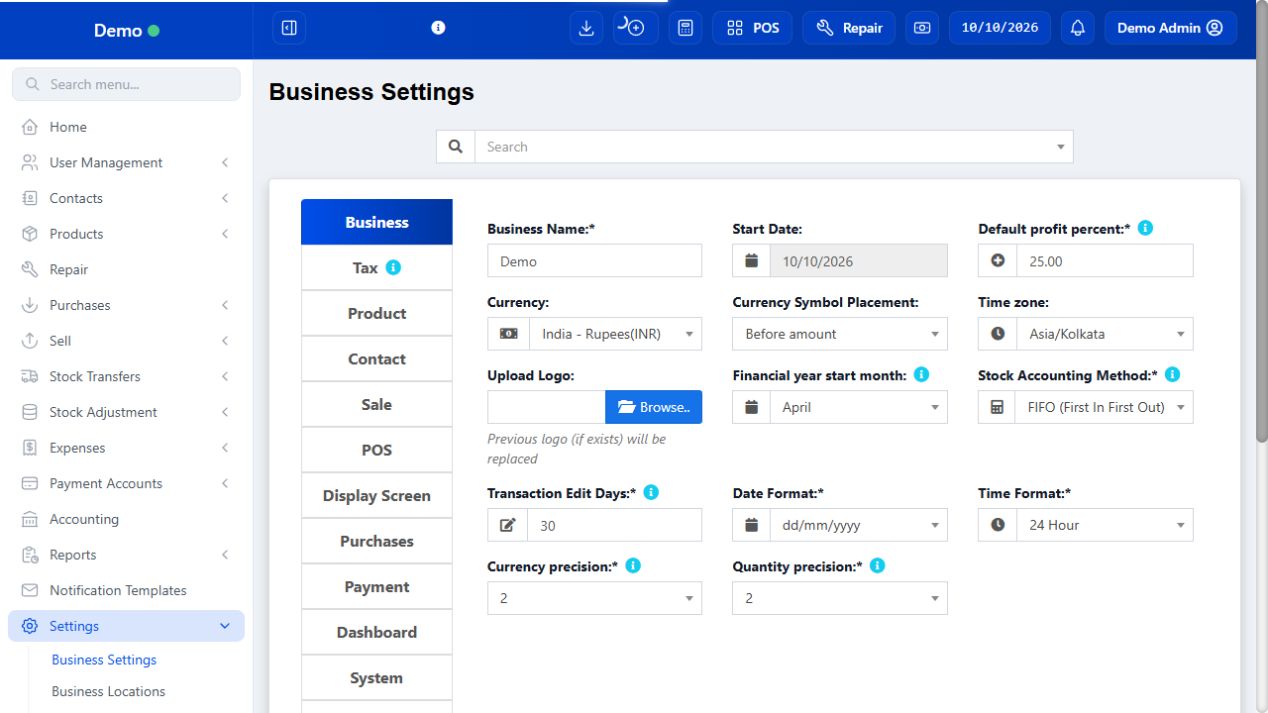
SCREEN GUIDE Business setup & users — module overview. Select the screenshot to enlarge; optional fields may differ in your business.
Field reference
Use this while completing the form. A required field is marked with *; conditional fields appear only when enabled.
Field / control
What to enter or understand
Business name / Currency / Timezone
Business identity and how money/time are displayed. Wrong timezone makes date-based searches confusing.
Currency / quantity precision
Display and rounding behavior. Quantity precision must suit the units used; money and quantity are different measurements.
Financial year start
Used for year-based reporting. It does not erase transactions at the new year.
Product settings
Visibility/features such as brands, categories, lots, expiry, racks and product taxes. Enabling a feature does not fill historical data.
POS settings
Selling behavior such as allowed edits, credit/discount/rounding and payment controls. Verify against the cashier’s permitted screen.
Location scheme/layout
Which numbering and receipt design an outlet uses. Define and assign both.
Role permissions
Allowed actions such as view/create/edit/pay/close. Role name alone is not a permission list.
User access
Login eligibility and assigned outlets/visibility. A role can be valid while an outlet remains inaccessible.
Reference prefixes / custom labels
Business-specific identifiers and fields. Train staff on their meaning before using them in imports.
Before you start Have the legal/shop name, address, currency, tax information and working timezone ready.
Steps
Open Business Settings and review the Business details. Use the shop’s real details rather than the demo values.
Set currency, date format, time format and timezone to match the shop. Review financial year and quantity/currency precision.
Review Product and POS settings for stock tracking, lot numbers, expiry, discounts, credit sales and rounding. Enable only the features your shop uses.
Review notification and integration settings with the owner. Save the changes, then sign out and back in if the current session still shows old settings.
Create a test bill in the demo environment and check tax, date, rounding and receipt before using the configuration in real trading.
Check the result New transactions use the selected business rules. Existing historical bills may retain their original details.
Before you start Use separate cashier, manager and administrator roles.
Steps
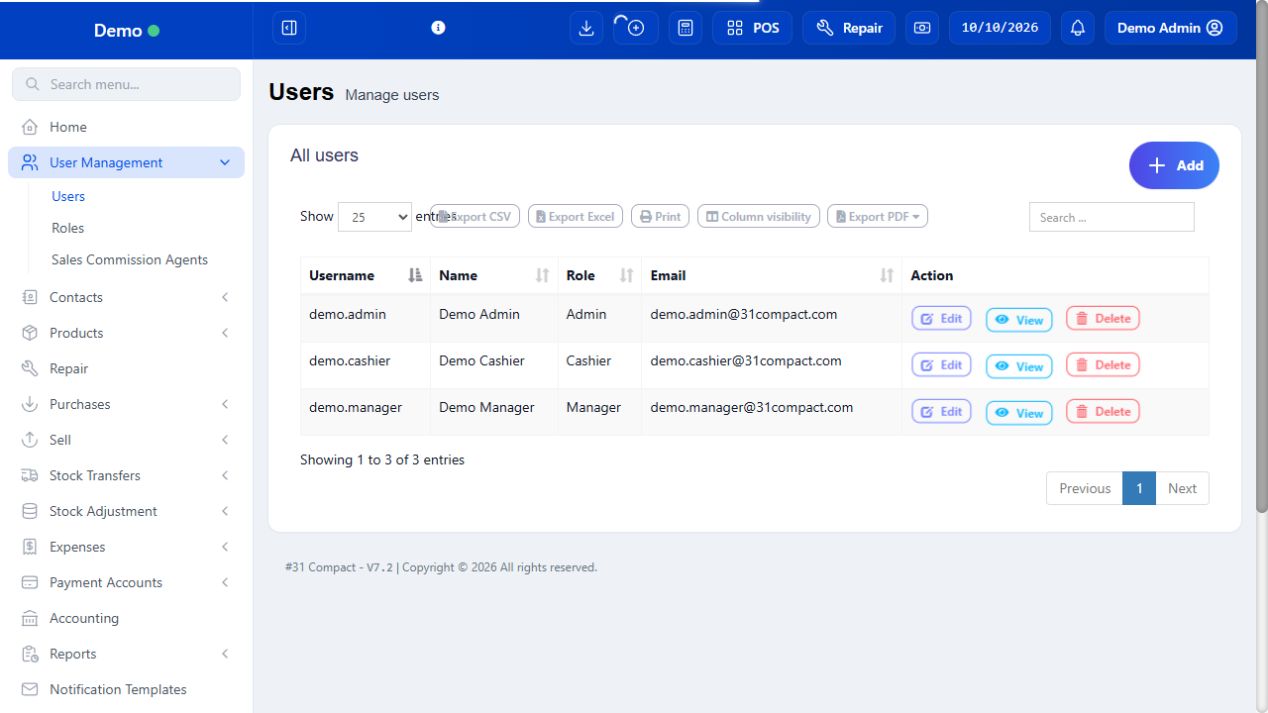
Open Roles, choose Add and enter the role name. Select the permissions for the role: selling, product/price changes, register closing, expenses and reports as needed.
Save the role. Open Users and choose Add. Enter the staff member’s name, unique username and contact details.
Assign the role and permitted locations. Review whether login is allowed and whether the user can see only their own contacts or transactions.
Have the staff member sign in with their own account and confirm they can reach the required pages. Check that restricted settings are unavailable.
SCREEN GUIDE Create roles and staff logins — look for the controls described in the steps. Select the screenshot to enlarge; optional fields may differ in your business.
Check the result Transactions and shifts are attributable to the correct person.
Where to go Settings → Tax Rates / Types of service; Products → Units
Before you start Prepare the unit names and rates you will actually use.
Steps
Add units such as Piece, Bottle, Pack or Kilogram. Allow decimals only where fractional quantities are meaningful.
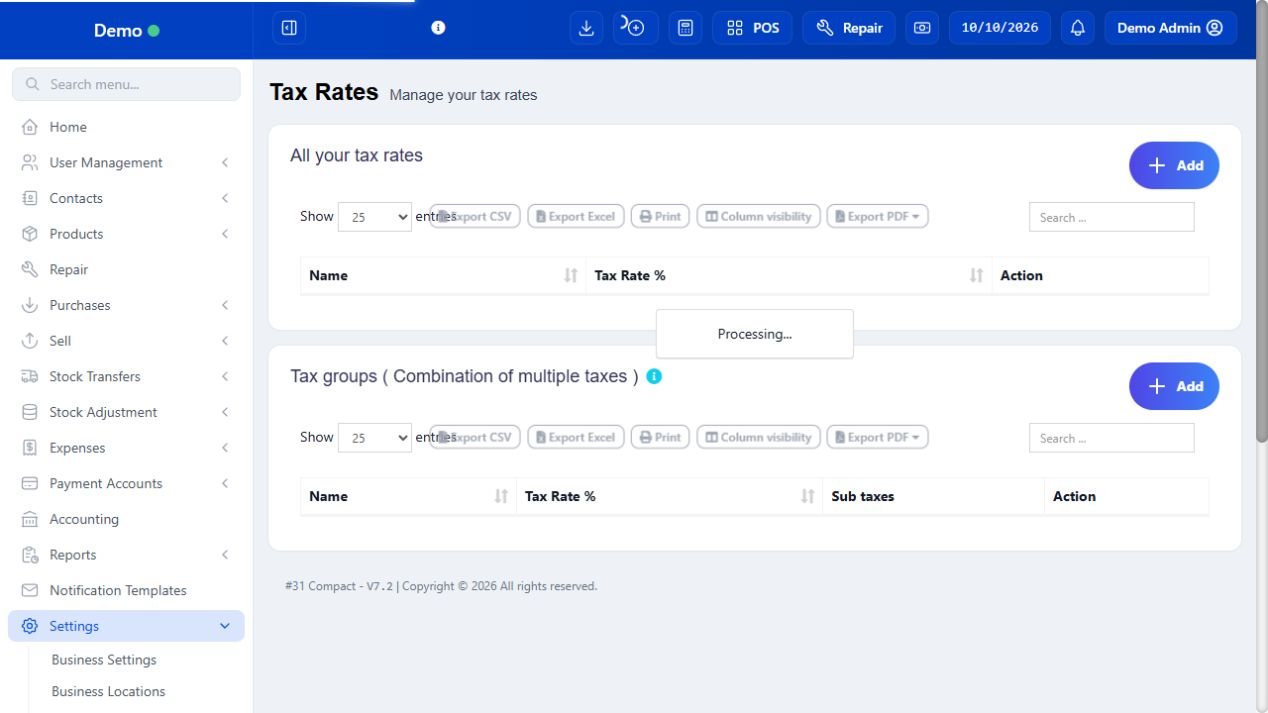
Add the required tax rate. A tax group combines configured rates; check the combined rate before assigning it to products.
Choose whether product prices are inclusive or exclusive of tax when creating the product.
If you use delivery or other services, add Types of service and review any service charges. Select the correct service on supported web POS screens.
SCREEN GUIDE Configure tax, units and service types — look for the controls described in the steps. Select the screenshot to enlarge; optional fields may differ in your business.
Check the result Quantities, rates and prices have consistent meanings across purchases and sales.
Where to go Settings → Business Settings / Roles / Locations
Before you start Know the desired change and the affected outlets/users.
Steps
Note the current setting and the reason for changing it. Make a small scoped change rather than toggling several unrelated features.
Save and reopen the setting to confirm the value persisted. Check a new sample form or invoice for the actual effect.
Verify the cashier’s account if the change involves access; the administrator view can show controls the cashier cannot use.
Tell the affected staff what changed and update any offline downloads before they rely on the new catalogue/settings.
If behavior differs from the expected configuration, return to the documented prior setting where safe and ask support with the exact screen and record reference.
Check the result Staff know which rule changed and how it appears in their workflow.
IN PRACTICE
A practical example
A manager can view all outlets while a cashier sees only Main Store. Giving the cashier a role called Manager does not by itself assign warehouse access or choose the warehouse’s invoice layout.
Common questions
Why is a feature missing after enabling it?
Check module installation, subscription, user permission, location and whether the feature is web-only. Reload the session if necessary.
Will enabling lots fill old purchases?
No. Lot identifiers must be entered on the relevant stock records; review existing stock before depending on lot selection.
Web portal
GST & taxes
Configure registration details, tax rates, tax groups, product tax and invoice presentation as separate steps. Entering a GSTIN does not create a tax rate or automatically choose the correct tax for a sale.
5 procedures · Field reference · Practical example · Common questions
A tax rate is one named percentage. A tax group adds several component percentages together. Product tax is the rate applied to an item; invoice/order tax is an additional transaction-level selection. Inclusive means the entered price already contains tax; exclusive means tax is added to the entered base price. Compact exposes manual configuration: do not assume it automatically determines Indian place-of-supply treatment from a customer address. Have your accountant confirm which rates, classifications and invoice details your business needs; the numbers below illustrate the software, not the current rate for any product.
SCREEN GUIDE GST & taxes — module overview. Select the screenshot to enlarge; optional fields may differ in your business.
Field reference
Use this while completing the form. A required field is marked with *; conditional fields appear only when enabled.
Field / control
What to enter or understand
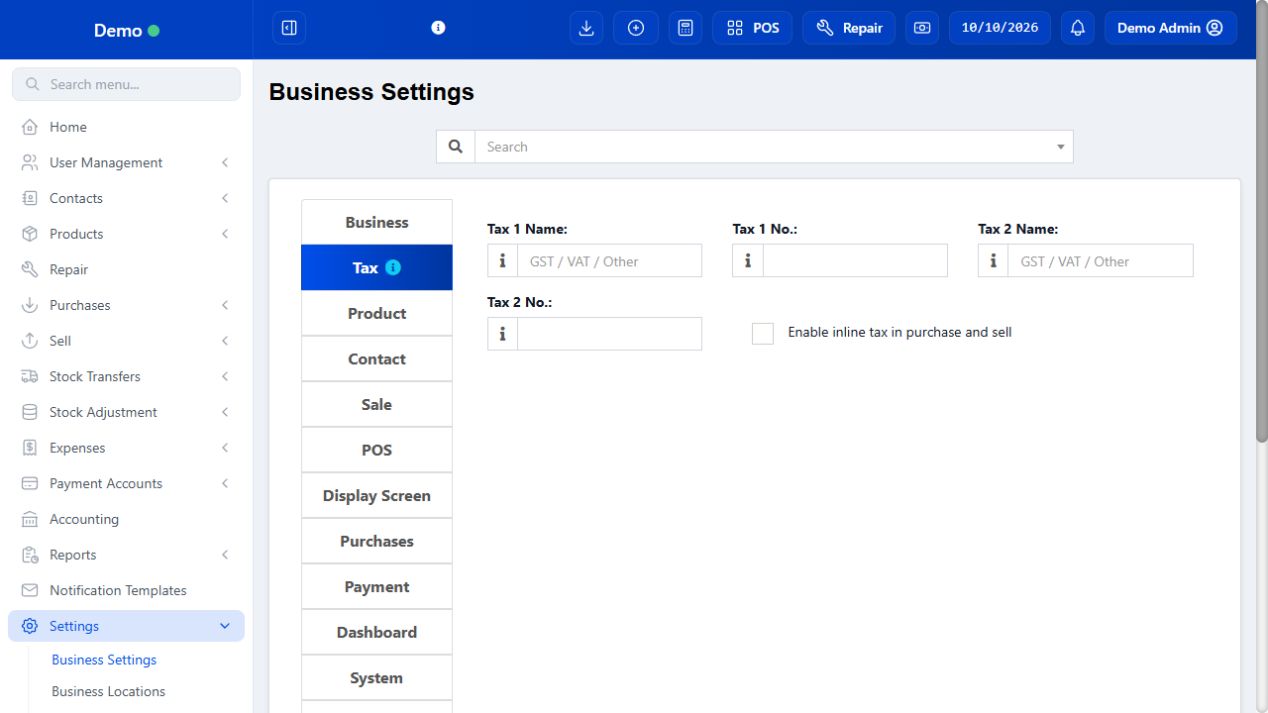
Tax 1 name / number
Business Settings → Tax: the printed registration label and your business registration number. For an Indian registered business, use GSTIN as the label and its actual GSTIN as the number. This is identification, not a percentage.
Tax 2 name / number
A second registration label/number if relevant. It is not where you enter the SGST percentage.
Enable inline tax
Allows item-level tax controls in supported transaction screens. Also check Business Settings → Product for the tax/price feature if product tax fields are hidden.
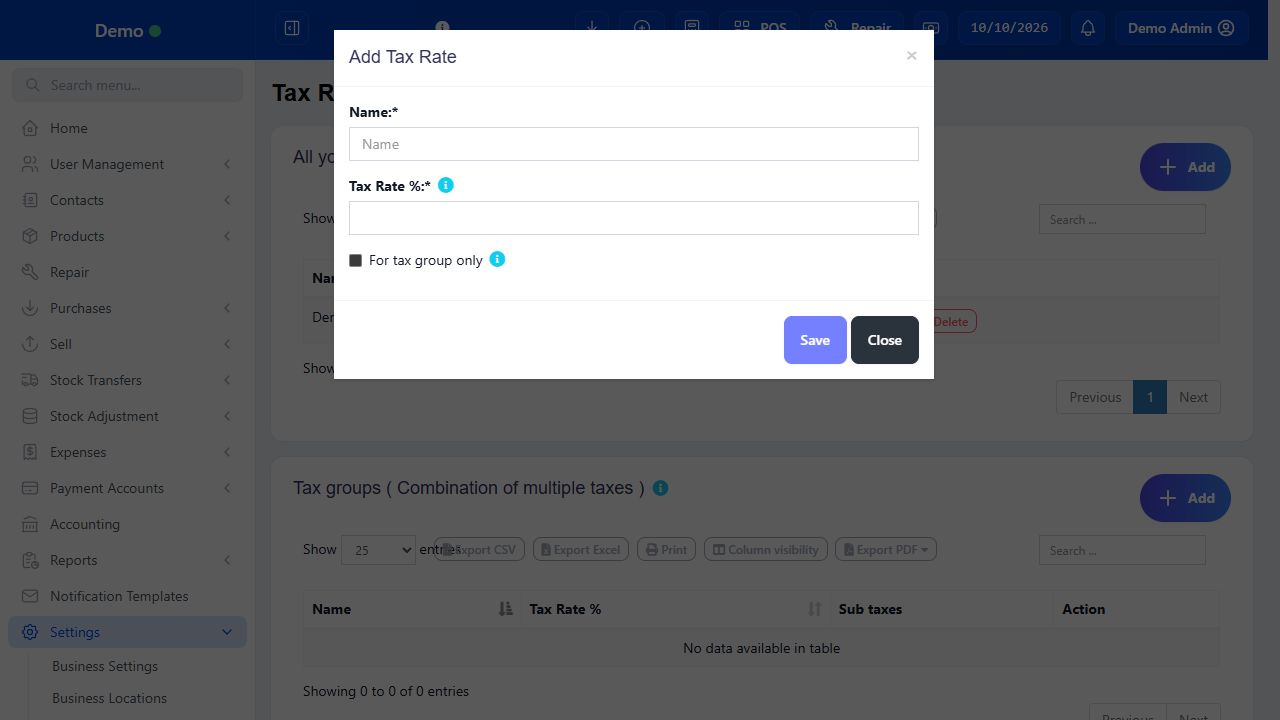
Tax rate Name
A meaningful name such as CGST example 9%, SGST example 9% or IGST example 18%. Include the rate so staff can distinguish entries.
Tax Rate %
Enter 9 for nine percent, not 0.09 or a currency amount. A zero rate and no selected tax have different meanings for reporting; choose intentionally.
For tax group only
Marks a component rate for combination in a tax group instead of standalone product selection. Useful for CGST and SGST component entries.
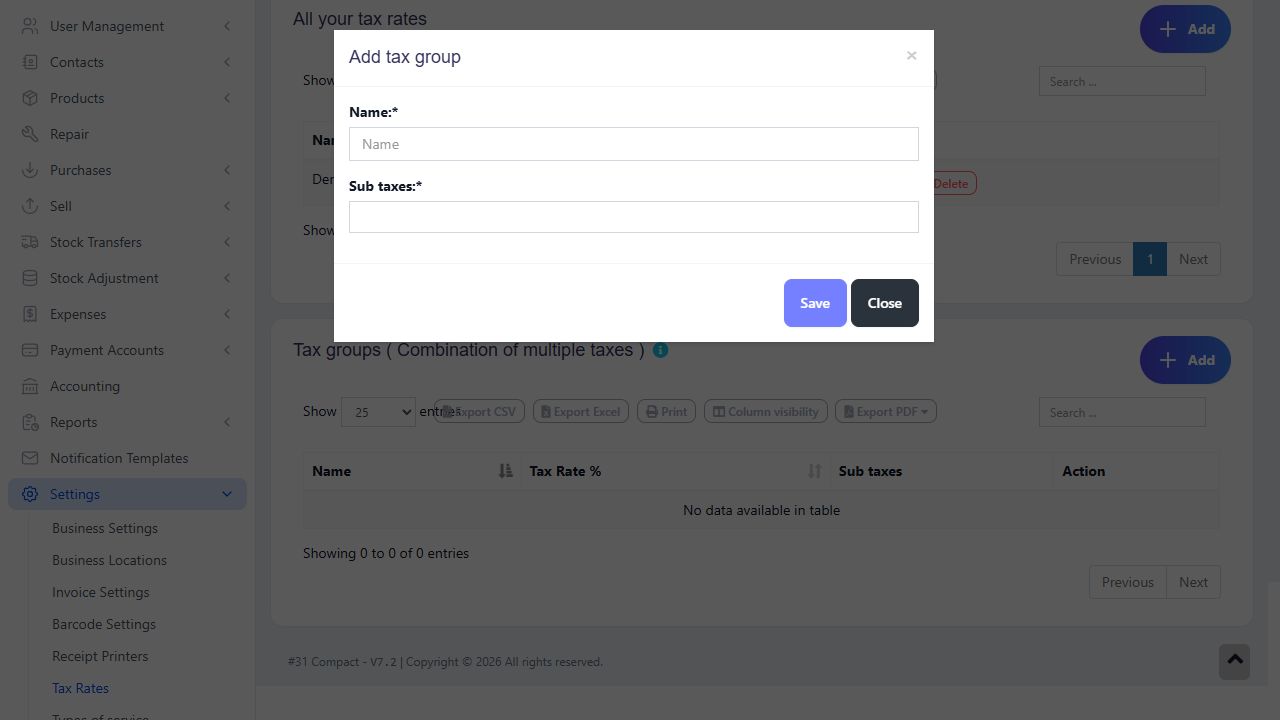
Tax group Name / Sub taxes
Name the combined treatment and select its component rates. Two example components of 9% produce a total of 18%; do not include another standalone 18% in the same group.
Applicable Tax
The product rate/group used when loading the item into a transaction. Review the actual sale row when an exception requires a different treatment.
Selling Price Tax Type
Inclusive or Exclusive describes what the selling-price entry means. Use the displayed Inc. tax / Exc. tax label rather than guessing.
Order / invoice tax
A separate tax choice on the entire transaction. Selecting the same GST here as well as on every line can add tax again. Review the invoice before saving.
Contact Tax number / state / address
Store customer or supplier registration and address details on the contact. An address alone is not proof that Compact automatically chooses CGST/SGST or IGST.
HSN / SAC and additional invoice fields
Use only the configured field/layout that is actually available in your business. A custom field is not automatically a validated GST classification or an e-invoice connection.
Before you start Have the correct registration details for this business, not a supplier’s GSTIN.
Steps
Open Business Settings and select the Tax tab. Enter GSTIN in Tax 1 name and the business GSTIN in Tax 1 number when applicable.
Use Tax 2 only for a genuinely separate registration detail. Keep unused fields blank instead of putting tax rates into them.
Review Enable inline tax. If Applicable Tax is hidden on Add Product, review the product tax/price feature in the Product tab as well.
Save the settings. Open the selected invoice layout and check its tax number display option; registration data and layout display are separate controls.
Preview a sample invoice. Confirm business name, address and GSTIN are shown in the correct positions. Correct the layout before issuing customer bills.
SCREEN GUIDE Enter business GST registration details — look for the controls described in the steps. Select the screenshot to enlarge; optional fields may differ in your business.
Check the result The business registration is stored and the chosen invoice layout displays it.
Where to go Settings → Tax Rates → All your tax rates → Add
Before you start Obtain the applicable rate list before configuration.
Steps
Choose Add in the upper All your tax rates panel. Enter a clear Name and the numeric Tax Rate %.
For a standalone tax such as an approved IGST rate, leave For tax group only unchecked. For component rates intended only for a group, select it.
Save. Search the list to verify the name and percentage. Repeat for each required component or standalone rate.
Do not rename an old rate into a different percentage just to change future billing. Create a clearly named new rate and review product assignments so historical meaning remains understandable.
If editing or deletion is offered, first check usage with the manager. Do not remove a rate needed by existing catalogue or records.
SCREEN GUIDE Create individual tax rates — look for the controls described in the steps. Select the screenshot to enlarge; optional fields may differ in your business.
Check the result The rate is listed and eligible for the intended product or group selection.
Where to go Settings → Tax Rates → Tax groups → Add
Before you start Use your accountant-approved components. The following 9% + 9% is a training example.
Steps
Create CGST example 9% and SGST example 9% in All your tax rates; mark them For tax group only if you do not want standalone use.
Choose Add in the lower Tax groups panel. Enter a distinct group name such as GST example 18% (CGST + SGST).
Select only the two component rates in Sub taxes, then save. Confirm the table shows 18% and both components.
Assign the combined group under the product’s Applicable Tax. Review the sale’s tax choice when a different supply treatment is needed.
Preview a sample invoice and the Tax Report. Check both components are presented as required by your chosen layout. Do not presume the default receipt is sufficient for every GST use case.
SCREEN GUIDE Configure a CGST and SGST tax group — look for the controls described in the steps. Select the screenshot to enlarge; optional fields may differ in your business.
Check the result A combined rate is available with a traceable component breakdown.
PROCEDURE 04
Set inclusive or exclusive product tax correctly #
Where to go Products → Add Product / List Products → Edit
Before you start Work with one training item first, then repeat on the appropriate catalogue records.
Steps
Select Applicable Tax. Choose Selling Price Tax Type to match how the shop quotes the price to the customer.
Exclusive example: base selling price 100 with an illustrative 18% tax gives tax 18 and gross price 118. Enter 100 only when the price field says Exc. tax.
Inclusive example: customer price 118 at 18% contains base 100 and tax 18. Enter 118 only when the active field says Inc. tax; do not add 18% again to 118.
Enter purchase cost in its correctly labelled tax field. Check the linked cost values and margin suggestion before saving.
Load one unit into POS, inspect price including tax, subtotal, invoice tax and total. Test a mixed-tax basket and a discounted line separately.
After changing rates or products, refresh the apps online and download fresh offline data before the next offline shift. Old snapshots retain downloaded values.
SCREEN GUIDE Set inclusive or exclusive product tax correctly — look for the controls described in the steps. Select the screenshot to enlarge; optional fields may differ in your business.
Check the result The configured product and the sample sale use the intended base, tax and final price.
Where to go Settings → Invoice Settings; Contacts; Reports → Tax Report
Before you start Know the details required for your actual invoice and reporting process.
Steps
Enter the customer’s name, address and GSTIN in its contact record when relevant. Verify these belong to the billed party.
Review invoice layout display for supplier registration, customer tax number, product description, units, quantities and tax breakdown. Configure any available HSN/SAC custom-field display deliberately.
Create an approved sample transaction, then preview the original web invoice. Check invoice date/number, taxable value, discounts, components and total.
Open Tax Report with the same location/date range and compare purchase/input and sales/output entries. Match the invoice, not only the dashboard total.
For interstate or other special treatments, review the actual transaction tax selection and invoice requirements with the accountant. Do not infer legal treatment solely from the rate name.
Use the accountant’s filing workflow. Saving a tax rate or printing a receipt does not register the business, file GST returns, create an IRN or send an e-way bill.
Check the result The sample invoice and recorded tax values agree; missing compliance fields are identified before live use.
IN PRACTICE
A practical example
Training basket: two items at a base price of 100 each with an example 18% group produce taxable value 200 and tax 36, split as 18 + 18, before other discounts/charges/rounding. A tax-inclusive total of 236 represents the same calculation. Selecting an additional 18% order tax would change the bill, so leave it unset unless the approved configuration specifically requires it.
Common questions
Why does GSTIN not change my total?
GSTIN identifies the business. Create rates/groups and assign product or transaction tax separately.
Why is tax charged twice?
Inspect both line tax and order tax, and check whether an inclusive amount was entered as a base price.
Is the demo rate a recommended GST rate?
No. Demo GST 5% is sample data. Use the currently applicable classification and approved rates for your products.
Will Compact choose IGST automatically?
The inspected generic rate/group forms provide manual configuration. Verify the actual transaction; this guide does not promise automatic place-of-supply or GST filing integration.
For official invoice requirements, refer to Official GST invoice particulars (CBIC). Illustrative rates in this manual are not a product tax-rate recommendation.
Web portal
Customers & suppliers
A customer buys from you; a supplier provides your stock. Keeping one correct contact record makes searching, invoices and ledgers easier.
5 procedures · Field reference · Practical example · Common questions
Keep one contact per real customer/supplier rather than making a new record for every visit. Customer/Supplier/Both selects the business relationship. A customer group, credit limit and payment terms serve different purposes: grouping affects classification/pricing rules; a limit restricts credit; terms describe when payment is due. A contact ledger combines transactions over time and must be read with opening balances and returns.
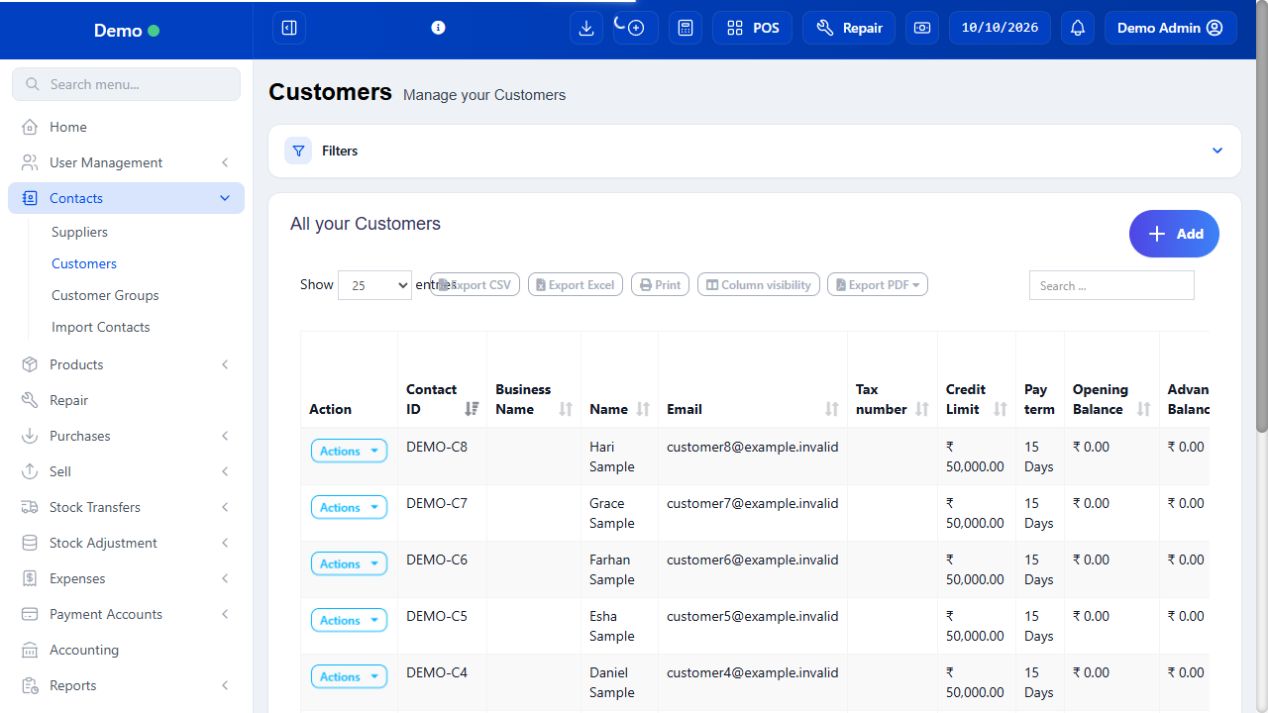
SCREEN GUIDE Customers & suppliers — module overview. Select the screenshot to enlarge; optional fields may differ in your business.
Field reference
Use this while completing the form. A required field is marked with *; conditional fields appear only when enabled.
Field / control
What to enter or understand
Contact type / Contact ID
Customer, Supplier or Both and its unique reference. Choose Both only when the same party buys and supplies.
Individual / Business details
Personal name fields or supplier/business name as offered. Use a clear display name for search.
Mobile / alternate / landline / email
Accurate contact/search values. Do not put multiple unrelated phone numbers into one field.
Tax number / address / state / country / postcode
Invoice and delivery identity. Check details before credit/GST bills; shipping address can differ.
Customer group
Classification such as retail/wholesale. Do not assume it creates a selling-price group automatically.
Opening balance
Verified amount owed at the agreed starting date. It is not a new sale or today’s payment.
Payment term number / days or months
Credit period for billing. Ten days differs from ten months.
Credit limit
Approved credit ceiling where enforced. Blank/unlimited behavior depends on the business configuration.
Assigned users / CRM source / life stage
Restricted contact ownership and sales tracking where enabled. Visibility depends on the user’s access.
Custom / shipping / export fields
Only business-defined extra details relevant to the transaction; not required for every contact.
Before you start Search first to avoid duplicate contacts.
Steps
Open Customers or Suppliers and search by name or mobile number. If a record exists, use its Actions menu to edit it.
For a new contact, choose Add and select Customer, Supplier or Both as appropriate. Enter a recognizable name and accurate mobile number.
Enter address, email, tax number, customer group and credit/payment terms only where relevant. Review opening balance carefully before saving.
Save and search again. In POS, select the existing customer by name or mobile; use Walk-In Customer for anonymous sales.
SCREEN GUIDE Add or update a contact — look for the controls described in the steps. Select the screenshot to enlarge; optional fields may differ in your business.
Check the result The contact is available for transactions, subject to the user’s access.
Where to go Contacts → Import Contacts / Customer Groups
Before you start Use the template downloaded from your own Compact page.
Steps
Download the import template and read its column instructions. Prepare a small sample first and check phone numbers, contact types and required fields.
Upload the file, review any validation errors and correct the source file before retrying. Search for imported contacts after success.
Create customer groups for a business reason such as wholesale or loyalty. Assign customers to the correct group.
Check the selling price and discount rules for a group with a sample bill before regular use.
Check the result Contacts are grouped and searchable without unnecessary duplicate records.
PROCEDURE 04
Search customers by name or mobile on the counter #
Where to go POS → Customer selector
Before you start The contact must exist and be accessible in this business.
Steps
Activate the customer search and type a distinctive part of the name or mobile number. Wait for matching results before selecting.
Compare name, phone and any identifying details to choose the correct customer when names are similar.
If there is no match, check phone formatting and try the last digits. Search the web Contacts list before creating another record.
Offline app users search the downloaded snapshot; a new online contact will not appear until downloaded.
Confirm the selected customer on the basket before payment, especially for credit sales or invoices requiring registration details.
Check the result The sale and any resulting balance belong to the intended customer.
Before you start Have an agreed migration-date balance from the owner/accountant.
Steps
Search for the existing contact. Check its ledger before entering an opening balance to avoid bringing the same old invoices in twice.
Enter the approved opening balance and the intended payment term number/unit. Assign an authorised credit limit if relevant.
Save and read the ledger with the full applicable date range. Verify the opening entry and total balance.
For new credit trading, select that contact on a sample bill and review the due amount/terms and server permission or limit checks.
If the starting balance is wrong, ask the manager to use the authorised correction flow; do not invent a sale/payment to hide it.
Check the result The opening balance and new transactions remain distinguishable.
IN PRACTICE
A practical example
A customer owing 500 before the starting date receives a recorded opening balance of 500. A later credit sale of 200 and payment of 300 leave a balance of 400, assuming no other entries. Entering the old 500 both as opening balance and another invoice duplicates the debt.
Common questions
Why can another staff member see more contacts?
Check assigned-user visibility and role permissions. Offline snapshots can also be older.
Can I collect a balance using Cash on an empty POS basket?
Use the contact/invoice due-payment action, not a new empty or duplicate sale.
Web portal
Products
Create the catalogue before purchasing or selling. A product’s stock is held by location and, when enabled, by lot/batch.
11 procedures · Field reference · Practical example · Common questions
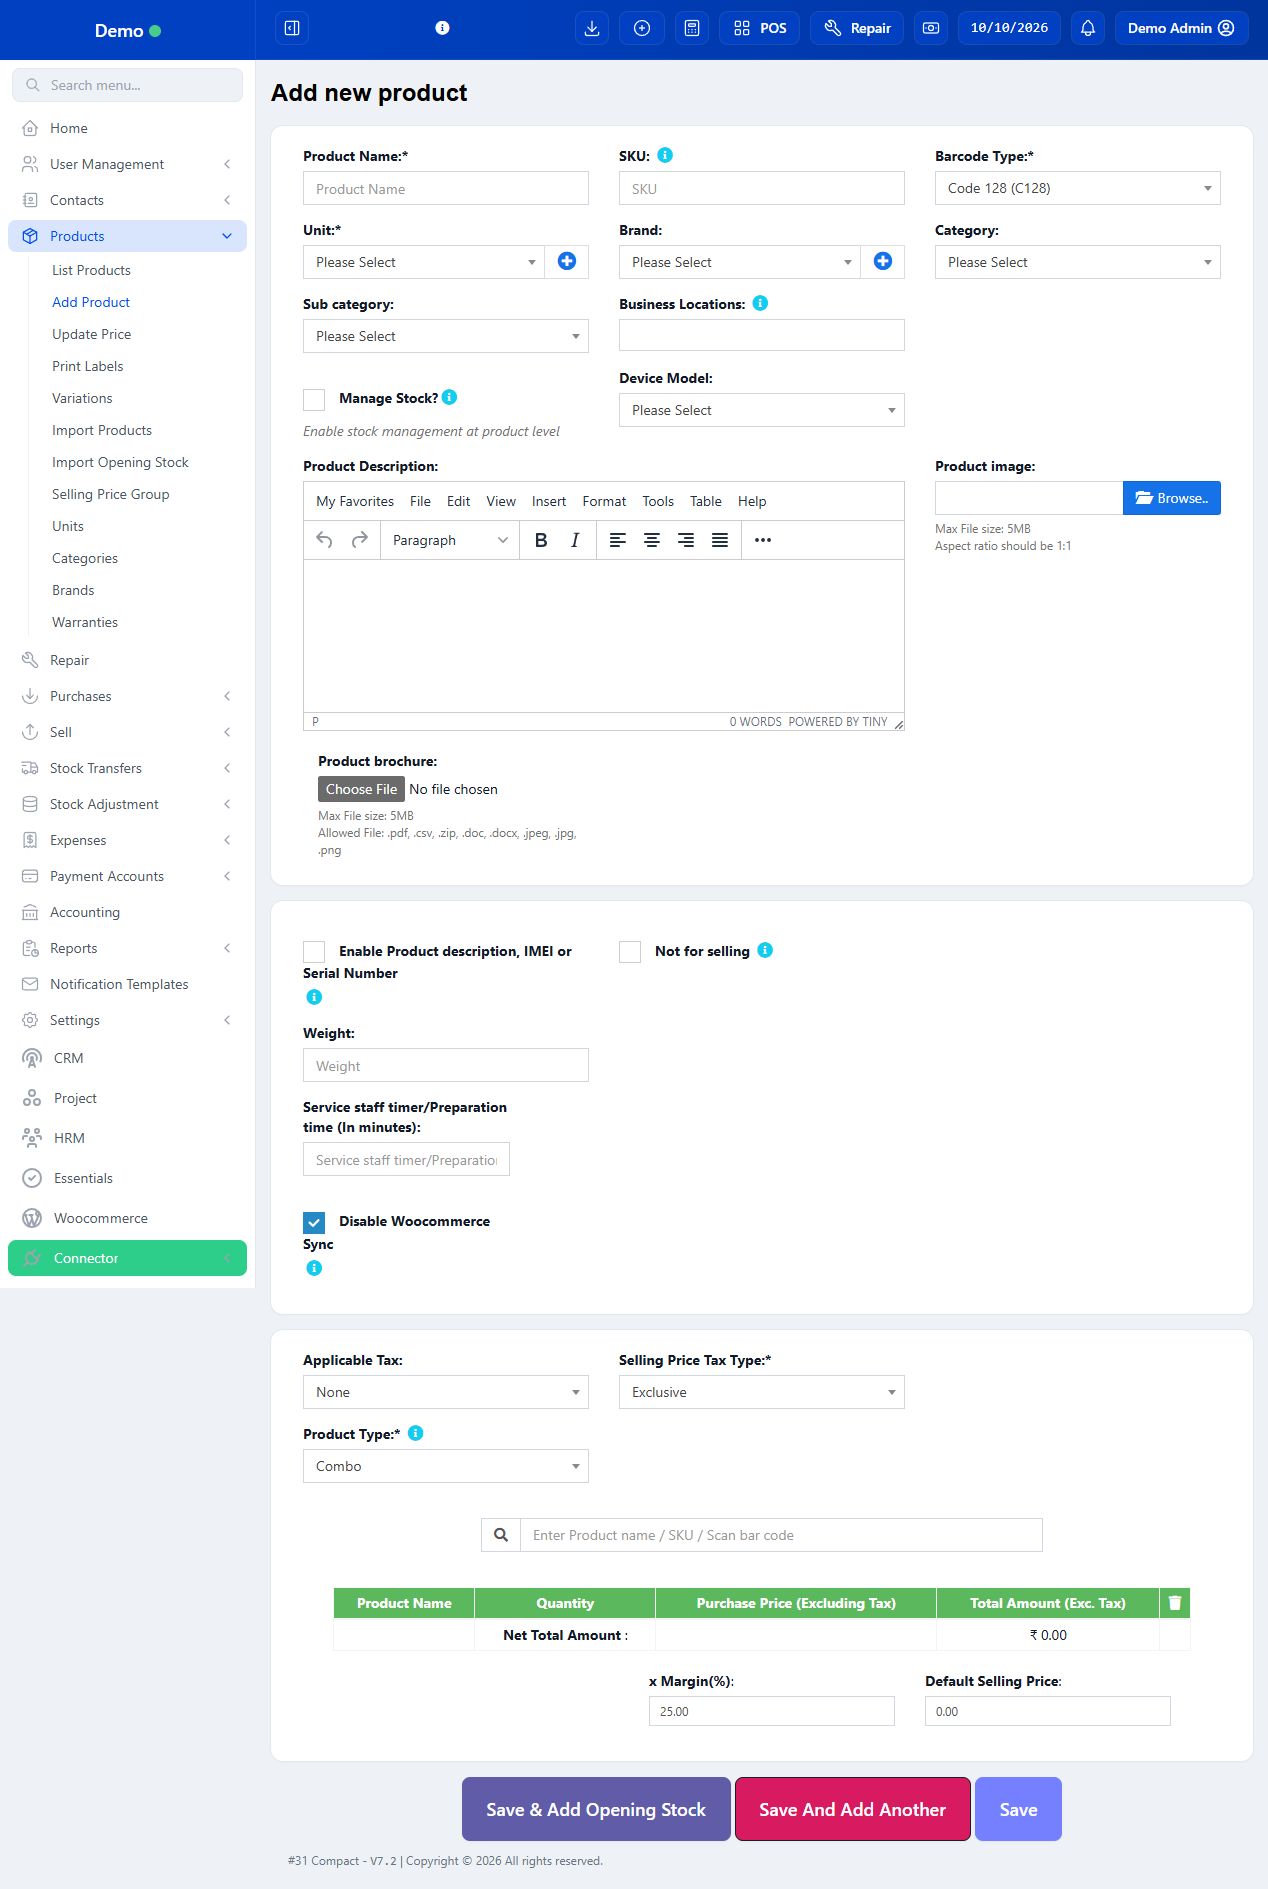
Start with the product structure, then its pricing and stock. Single is one sellable item. Variable is one family with separately priced and stocked variations, such as a T-shirt in Small and Large. Combo is a bundle made from existing product variations and component quantities. A service is not a fourth Product Type in the inspected form: a non-stock service can be entered as a Single product with Manage Stock disabled. Lots and serial numbers are tracking details, not new product types. Create products on the web; the current native apps sell and display downloaded products rather than provide the full catalogue-maintenance form.
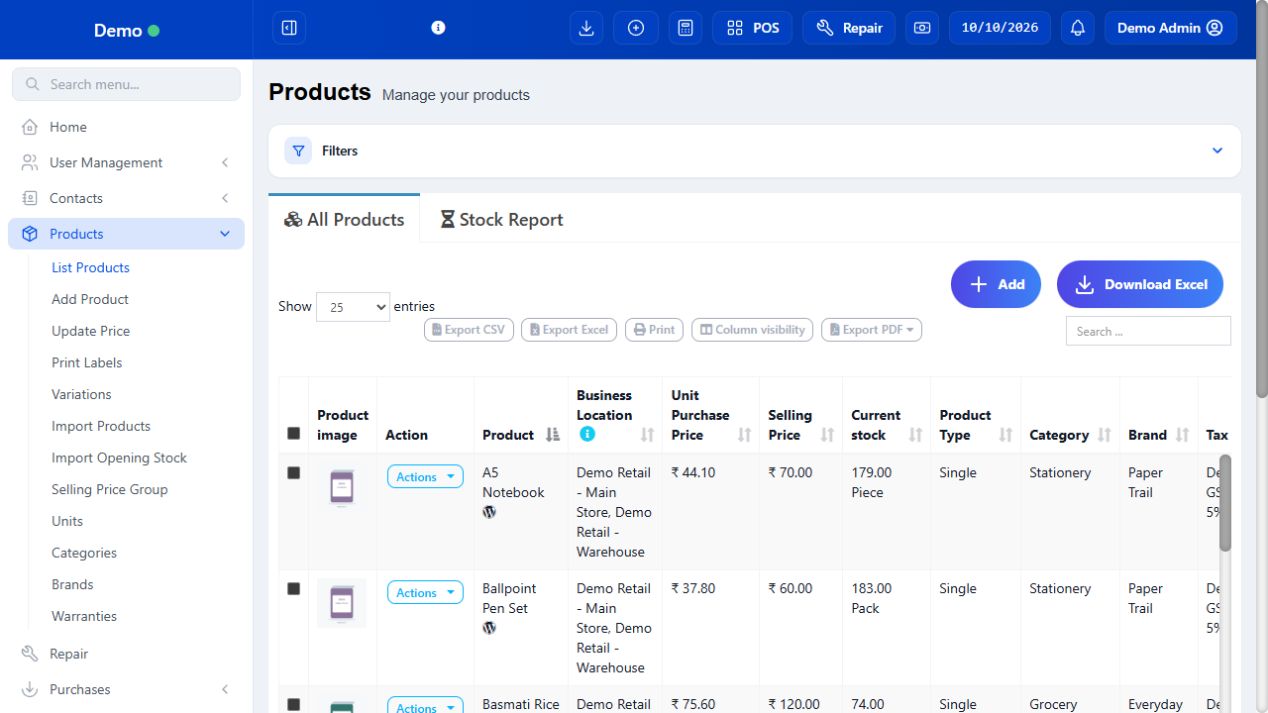
SCREEN GUIDE Products — module overview. Select the screenshot to enlarge; optional fields may differ in your business.
Field reference
Use this while completing the form. A required field is marked with *; conditional fields appear only when enabled.
Field / control
What to enter or understand
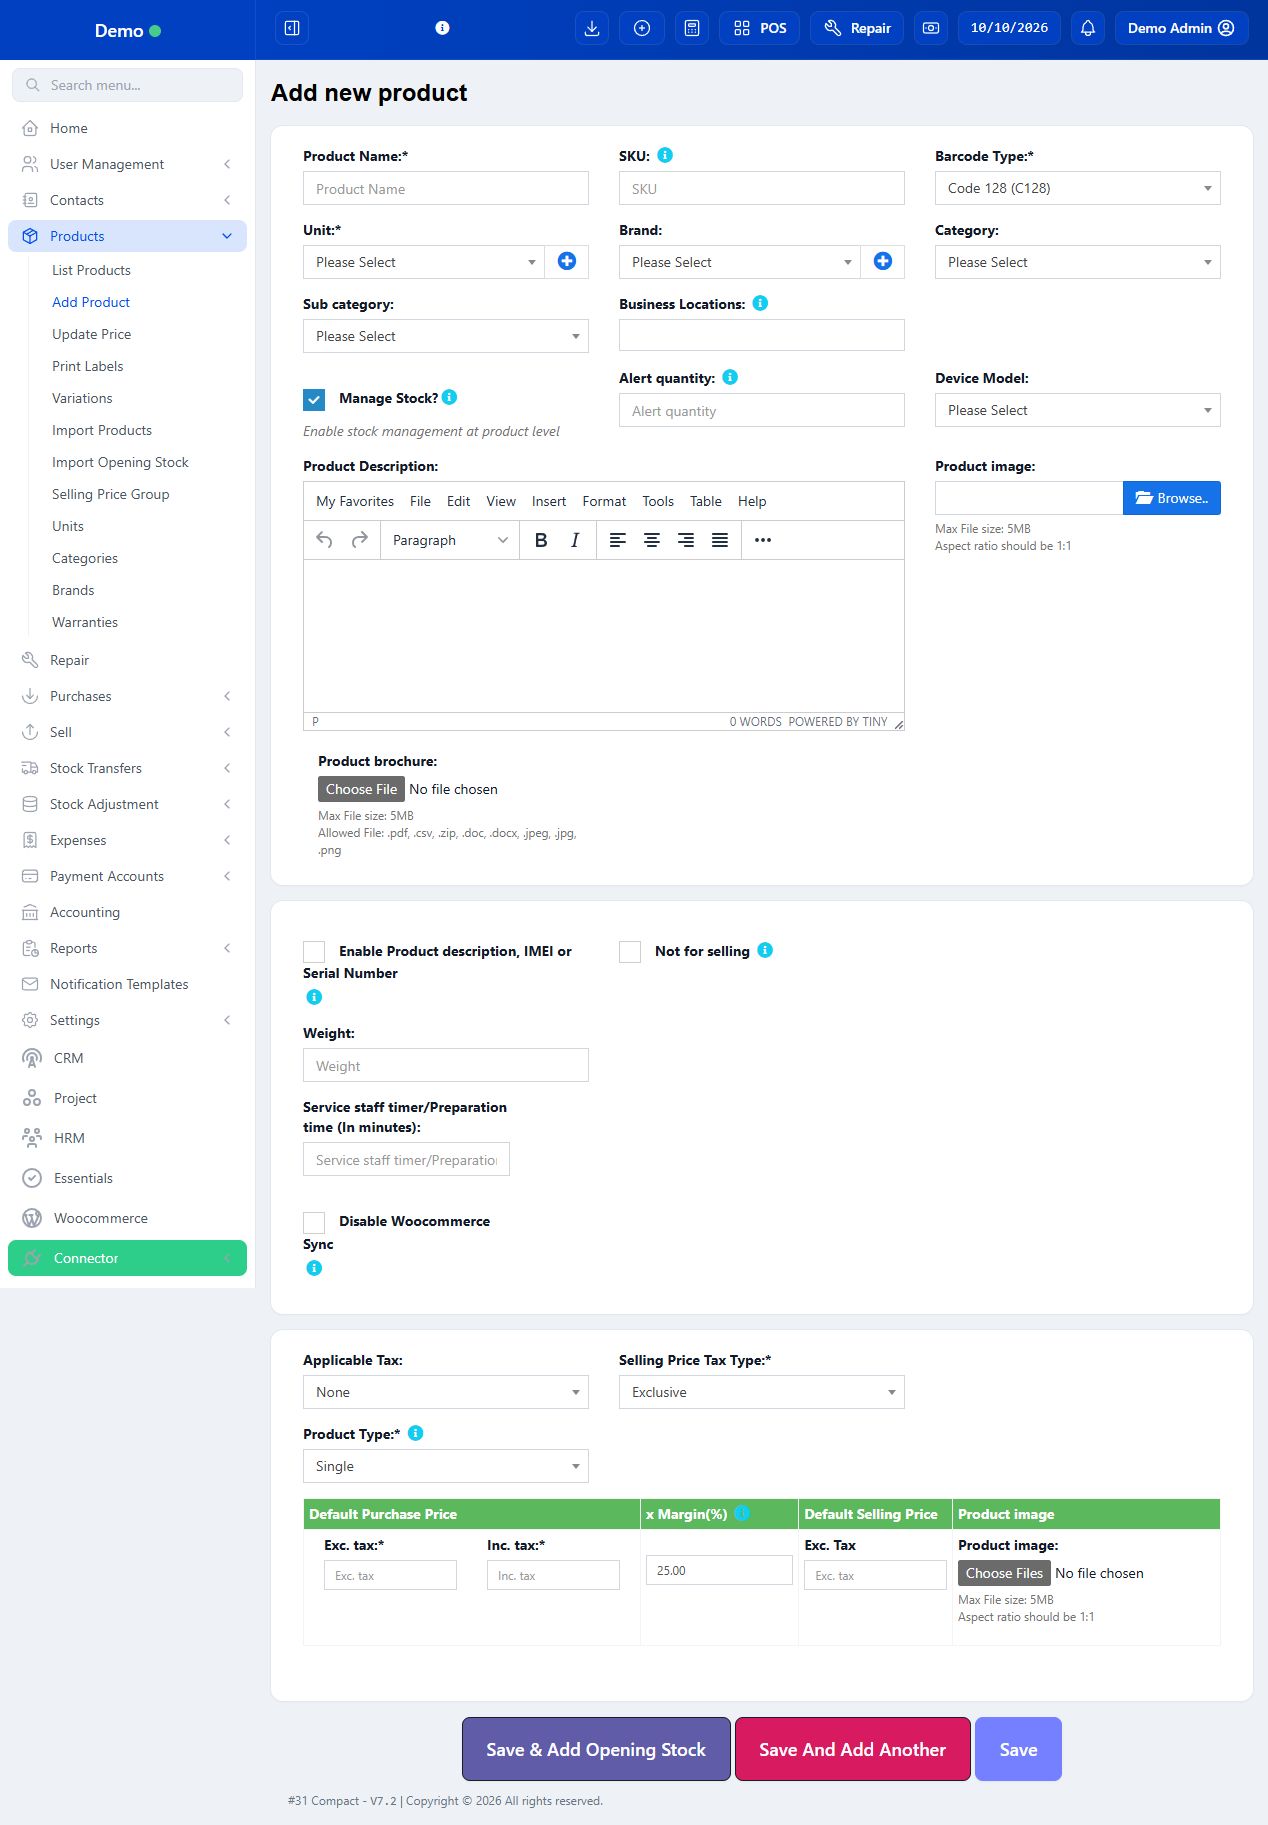
Product Name *
Customer-facing name. Include pack size or model where necessary: Drinking Water 500 ml is clearer than Water. A star marks a required field.
SKU
Internal product code/barcode value. Enter a unique existing code or let the configured SKU generation apply when blank. Avoid reusing one code for different items; preserve leading zeros in imports.
Barcode Type *
Barcode encoding used for labels, such as Code 128. Choose one compatible with your code and scanner. Barcode Type does not supply the code itself.
Unit *
Base measurement used for quantity and stock, such as Piece, Bottle or Kg. Configure decimal support under Units. Changing units after stock exists can make quantities misleading.
Related sub units (conditional)
Alternate selling/purchase units with configured conversion to the base unit. A box containing 12 pieces must have the right conversion; it is not just a renamed unit.
Secondary unit (conditional)
An additional measurement where enabled. Treat it as separate from converted sub units and review how your transaction screen records it.
Brand / Category / Sub category
Brand identifies the maker; category/subcategory organise catalogue filters and reports. Create taxonomy entries first or use the permitted quick-add control.
Business Locations
Locations where the product is available for use. Selecting a location does not give it stock: enter opening stock, purchase or transfer.
Manage Stock?
Enabled for counted goods. Disabled for non-stock services. A stock setting affects inventory behavior and should not be changed merely to bypass a shortage.
Alert quantity
Low-stock threshold for alerts. It does not order stock automatically. Review alerts by outlet and base unit.
Product Description
Detailed specification in the rich-text editor. Its visibility on customer documents depends on invoice/settings; it is not the Product Name.
Product image
Main catalogue image. The inspected form requests square 1:1 images and allows up to 5 MB. Resize a clear image before upload; inspect the current limit if it differs.
Variation images
Images for an individual single/variable row where offered. Use the correct variant image, especially for colours or models.
Product brochure
Optional supporting document in an allowed format. It is not automatically a receipt attachment. Use only files appropriate for staff/customer access.
Enable Product description, IMEI or Serial Number
Enables extra transaction-line detail for serial/IMEI or description. This does not itself preload every device serial into stock.
Not for selling
For internal-only items that should not be offered as normal sale products. It does not mean the item has zero stock.
Weight
Additional product attribute. Do not assume entering it automatically changes the selected unit, shipping cost or weigh-scale integration.
Service staff timer / Preparation time
Expected preparation time in minutes for configured service workflows. Optional for ordinary retail goods.
Warranty (conditional)
Select a configured warranty when the feature is enabled; check invoice display. It is separate from expiry or repair status.
Expires in (conditional)
Shelf-life duration in days/months for the configured manufacturing-date/expiry approach. Actual stock expiry is entered on purchase/opening-stock lots.
Rack / Row / Position (conditional)
Per-location shelf coordinates for picking stock. They describe storage position, not warehouse quantity.
Device Model (Repair module)
Links applicable items/parts to a repair device model. Use it when the Repair catalogue workflow requires the association.
Custom fields (conditional)
Administrator-labelled text/date/dropdown attributes. Follow your business’s meaning; a field labelled HSN needs a deliberate invoice/report mapping.
Disable WooCommerce Sync (conditional)
Excludes the item from the configured WooCommerce product sync. This does not disconnect the whole shop.
Applicable Tax / Selling Price Tax Type
Rate or group and inclusive/exclusive meaning. Read the GST chapter before pricing; a tax registration number is not a rate.
Product Type *
Single, Variable or Combo. Decide before entering stock and transactions; switching structure later is not a safe substitute for correcting an item.
Default Purchase Price Exc. tax / Inc. tax
Default per-unit buying cost before/after tax. Actual purchase rows can use the supplier’s actual cost; product default is not proof of a paid purchase.
x Margin (%)
Price suggestion based on cost. Despite the displayed label, the client formula uses cost × (1 + percentage / 100), which is markup on cost, not gross margin on selling price. Review final price manually.
Default Selling Price
Active price entry with the displayed Inc. tax or Exc. tax label. The label changes with tax type. Price-group values may override this default in sales.
Variable: variation / value / SKU
Choose a variation template, enter each distinct value and individual SKU/cost/selling price. Size S and Size L are separately identified inventory variations.
Combo: component / quantity / unit
Existing product variations and the quantities needed for one bundle. Review each component’s stock behavior; this is not a manufacturing recipe workflow.
Save actions
Save stores the catalogue record; Save And Add Another opens a new form; Save & Add Opening Stock continues to quantity entry; Save & Add Selling Price Group Prices appears when price groups exist.
Before you start Have the product name, unit, SKU/barcode, buying price, selling price and tax ready.
Steps
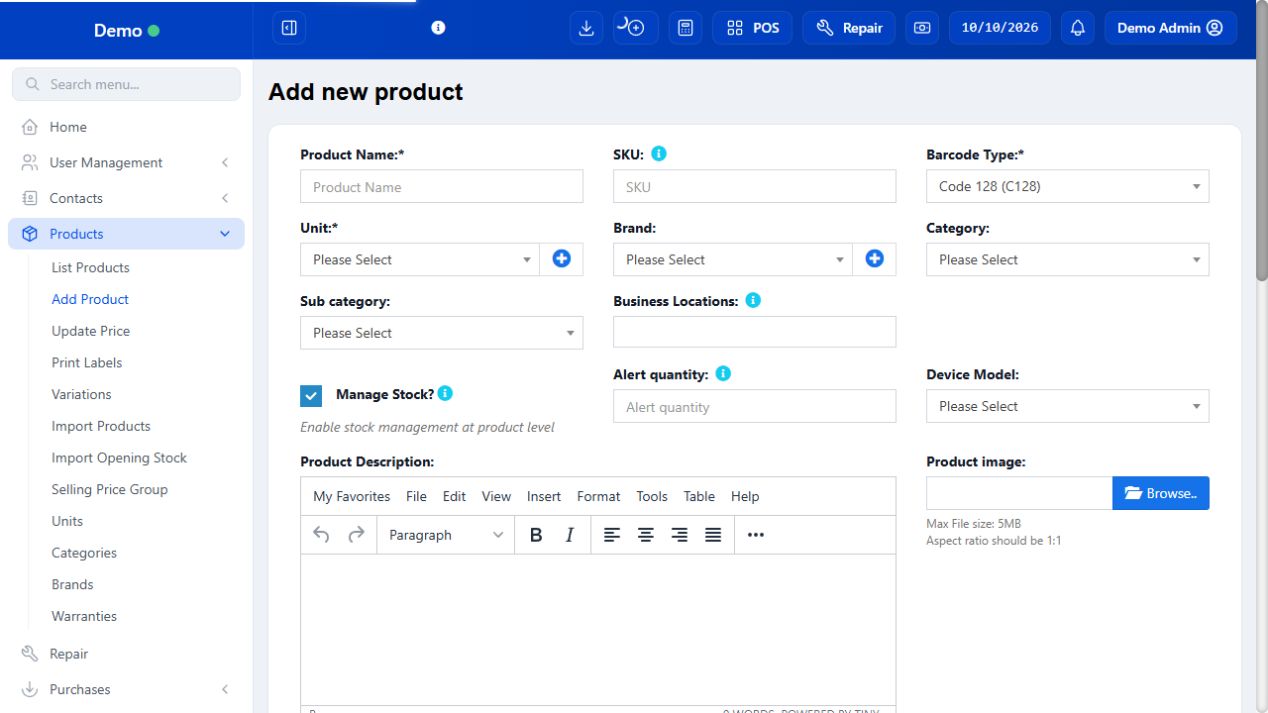
Enter Product Name and a unique SKU. Select barcode type, unit, brand and category. Choose the locations that will use this product.
Leave Manage Stock enabled for physical stock. Set an alert quantity if you want low-stock warnings. Use Not for selling only for items that must not appear for sale.
Add a product image. Choose Single for one item or Variable for sizes/colours with separate variations. Add the required variation values and prices.
Choose Applicable Tax and inclusive/exclusive tax type. Enter purchase and selling prices in the correctly labelled fields and inspect the resulting tax-inclusive values.
Choose Save, Save And Add Another or Save & Add Opening Stock. Check the product in List Products and in the intended location.
SCREEN GUIDE Create a stock item — look for the controls described in the steps. Select the screenshot to enlarge; optional fields may differ in your business.
Check the result The product can be found by name, SKU or barcode and its stock is tracked where enabled.
Before you start Decide how the shop counts and sells the item.
Steps
Use Single for a bottle of water, one specific device or a non-stock service. Give each separate packaged item its own identifiable code.
Use Variable for options sold from one family, such as Shirt → Size → S/M/L. Each variation can have different cost, price, barcode and stock.
Use Combo for a configured bundle of existing components, such as a gift set containing one mug and two tea packs. Add the actual component variations and quantities.
For a service, keep Single and disable Manage Stock only when no inventory quantity needs tracking. Set the unit and tax deliberately.
If an item is lot-tracked, still select its appropriate Single/Variable structure. Enable business lot/expiry tracking and enter lot data when receiving stock.
Check the product in List Products before adding opening stock. Avoid restructuring a product that already has transaction history without the manager’s plan.
Check the result The product structure matches how staff buy, count, search and sell it.
Where to go Products → Variations; Add Product → Variable
Before you start Create the variation template and values before using it in products.
Steps
Open Variations and add a template such as Size with values S, M and L. Use consistent values to avoid duplicate Large/L entries.
Add the parent product name, unit, category, locations, stock setting and tax, then select Variable.
Choose SKU-Number or SKUVariation format where offered. Review generated variation codes; enter separate existing barcodes if the packs already have them.
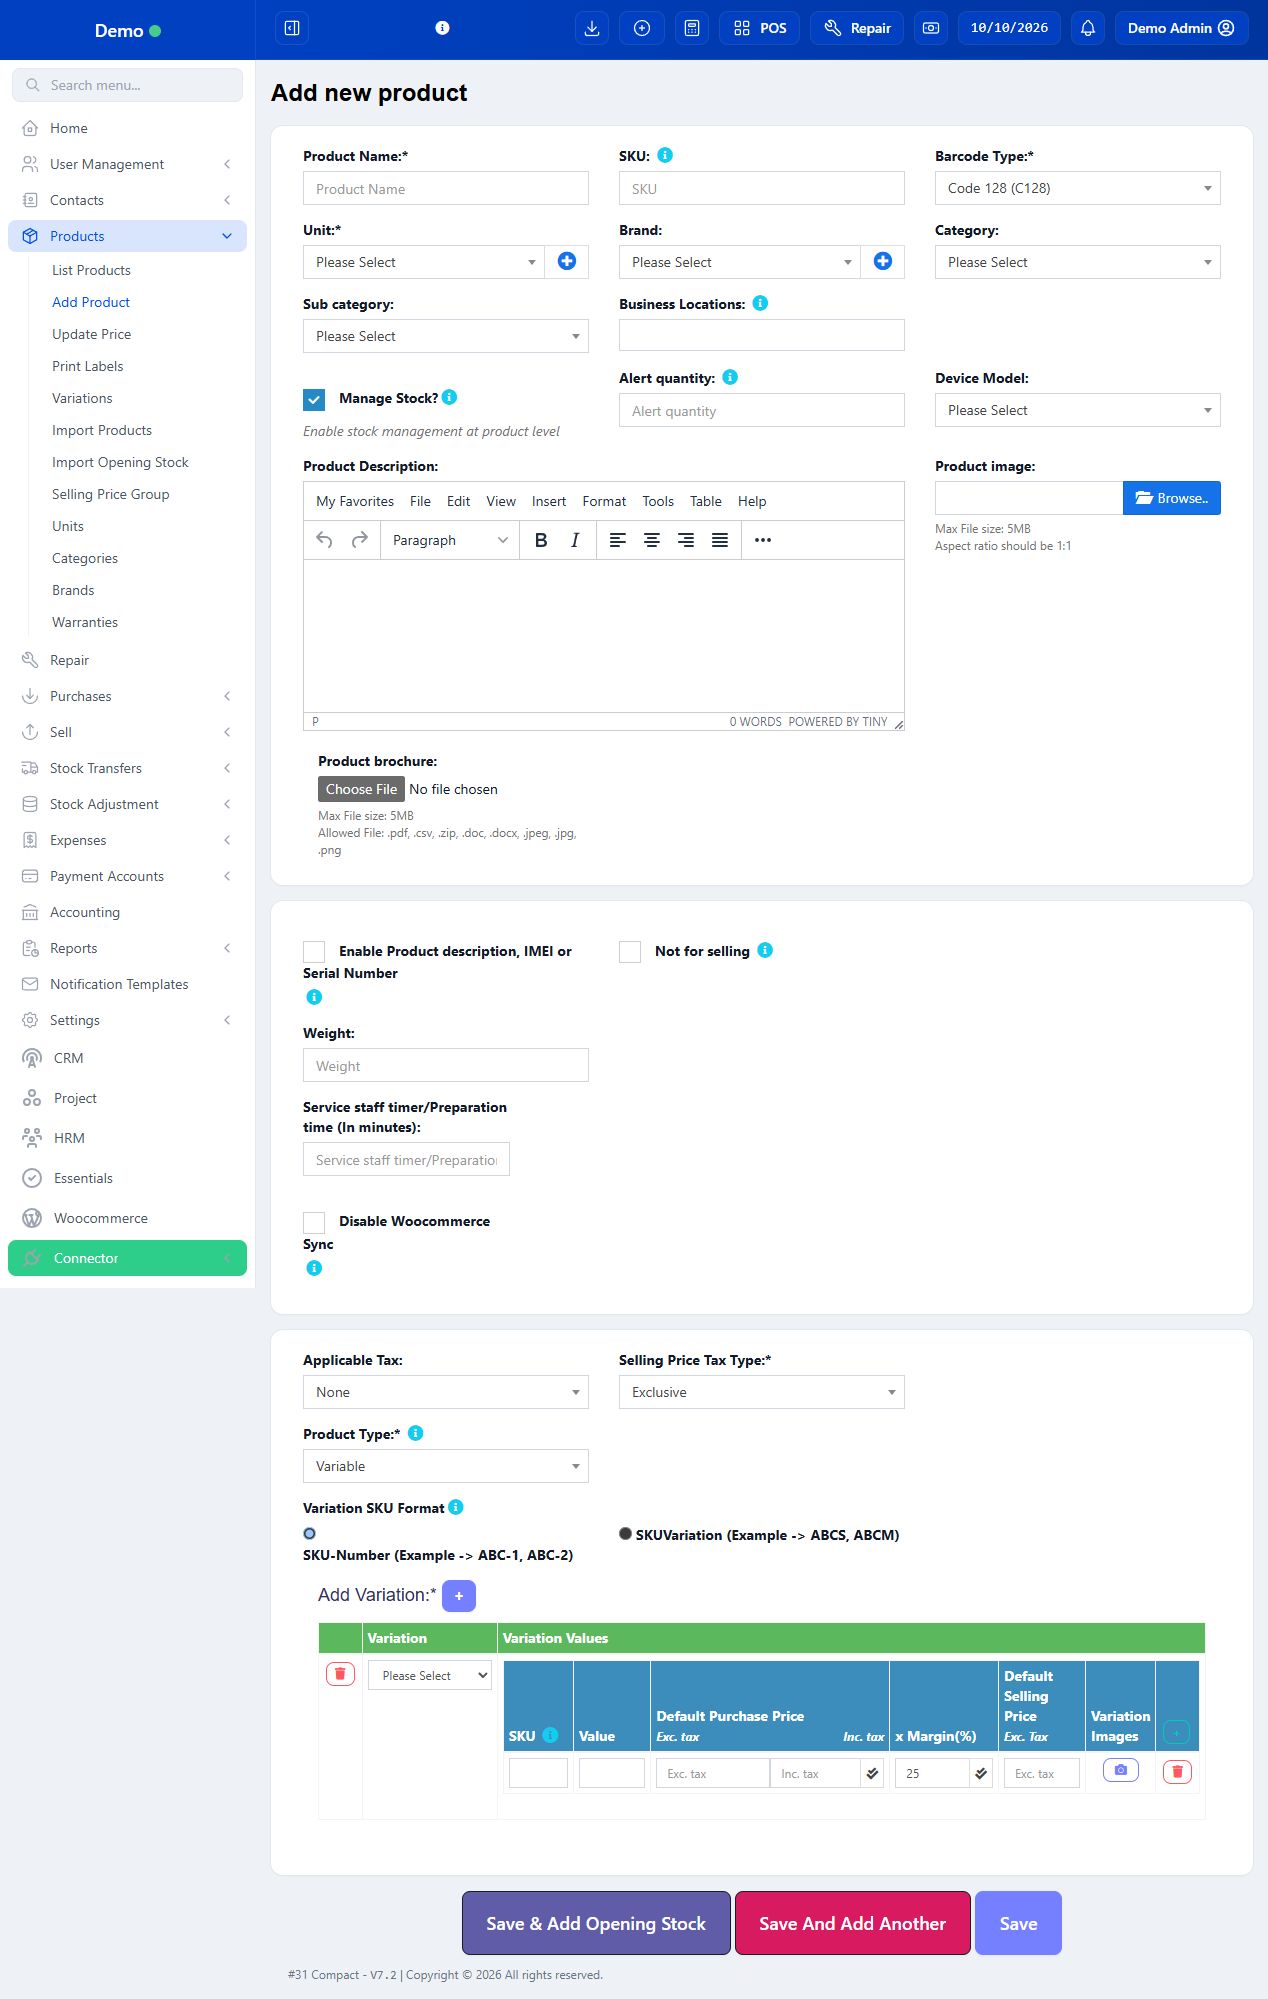
Select the variation template and enter the intended values. Use the row controls to add/remove only the unsaved rows you need.
Enter each value’s purchase cost, markup and selling price. Use copy controls only when the rows genuinely share those values. Add variation images if useful.
Save & Add Opening Stock, then count each size separately at each outlet. Search and scan a sample SKU on POS and verify the selected value and price.
SCREEN GUIDE Add a variable product with separate SKUs — look for the controls described in the steps. Select the screenshot to enlarge; optional fields may differ in your business.
Check the result Each variation can be located and sold without mixing its stock with another value.
Before you start Create the component products and ensure they have the correct variation/unit first.
Steps
Enter the bundle name, unique SKU, catalogue details, locations and tax. Select Combo in Product Type.
Search for each component and select its correct variation. Enter the component quantity used in one bundle, using the unit shown.
Review component totals and the bundle selling price. Two units of a tea pack is different from two boxes of packs; confirm conversion before saving.
Save the bundle and run an approved demo sale. Compare before/after component stock and the selling total.
If components are out of stock, investigate component availability rather than adding fictitious stock for the bundle. Do not record the same components as a second sale.
SCREEN GUIDE Create a combo or bundle — look for the controls described in the steps. Select the screenshot to enlarge; optional fields may differ in your business.
Check the result The bundle is identified and its component quantities are deliberate.
Where to go Products → Units / Categories / Brands
Before you start Decide base measurement and conversion rules before importing stock.
Steps
Create a Unit with its full name, short name and decimal-quantity choice. Piece usually uses whole quantities; Kg can permit decimals.
Where sub units are enabled, select the base unit and enter the conversion. A Box of 12 uses twelve base Pieces; verify the purchase and sale entry screens.
Create broad Categories, then Sub categories under the appropriate parent. Enter Brands separately; a brand is not a category.
Return to Add/Edit Product and assign these values. Choose only relevant business locations.
Check a sample fractional sale or box receipt. Compare stock in the base unit and the invoice unit so staff understand what the numbers mean.
Check the result Catalogue classification and stock quantities are consistent.
Where to go Products → Selling Price Group; List Products → group-price action
Before you start Prepare the approved prices for each customer segment.
Steps
Add a Selling Price Group such as Wholesale. A price group defines a price list; a customer group classifies contacts and is a different record.
Open the product’s group-price action, or Save & Add Selling Price Group Prices after creation when offered.
Enter the intended group price for each relevant variation. Read its tax label and save; do not presume the default price was copied to all variations.
Select the intended selling price group on the supported sale/location configuration and load a sample product.
Check the price actually used and customer assignment. A manual line-price override can differ from the stored group price; review permission and policy.
Check the result The appropriate price is offered on transactions using that group.
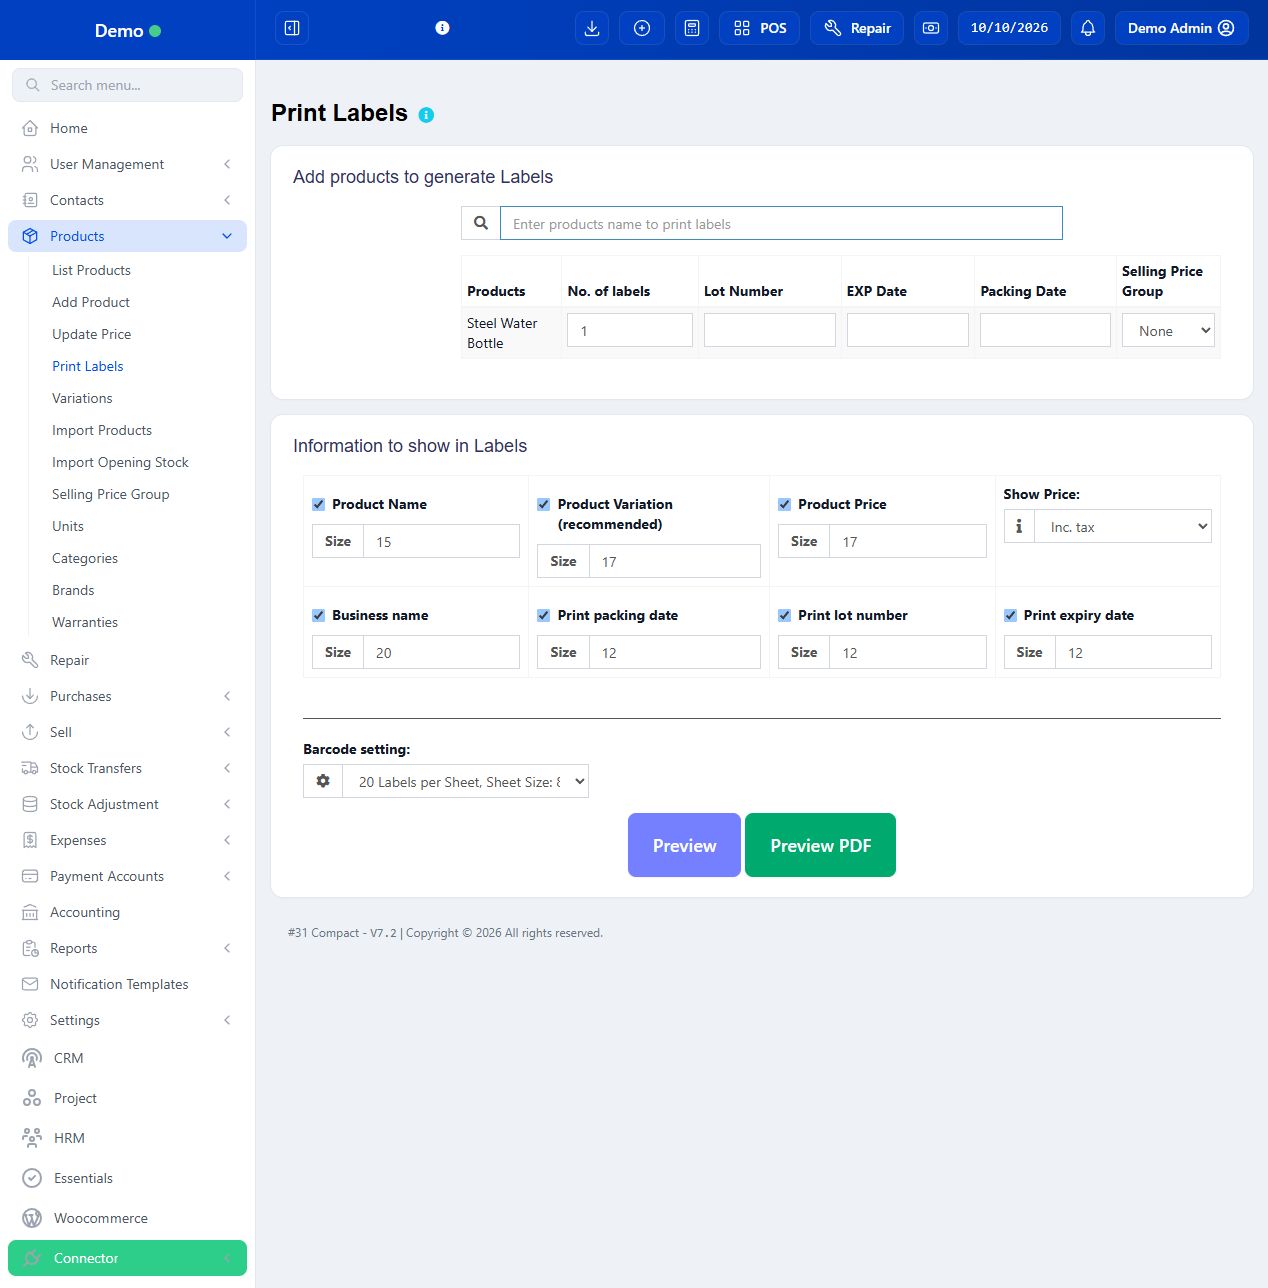
Before you start Use saved products and the actual label stock/paper size. Printing labels does not add stock.
Steps
Open Print Labels and search by product name or code. Select the exact product/variation, then add any other items to the label table.
Enter No. of labels for each row. This is the number to print, not an inventory correction. Choose the relevant lot, expiry and packing date when those controls are enabled.
Select the Selling Price Group if the labels need its price. Choose which information to print: name, variation, price, business name and permitted batch/date details.
Choose inclusive or exclusive price display deliberately. Set text sizes so important information remains readable on the physical label.
Select the Barcode Setting matching your sheet or roll. Review Preview before printing and check barcode, variation, price and total label count.
Print one test label at the correct physical size with the printer driver. Avoid browser fit-to-page scaling that shrinks the barcode.
Scan the test in POS to confirm the intended product/variation. Only then print the full batch.
SCREEN GUIDE Print product barcode labels — look for the controls described in the steps. Select the screenshot to enlarge; optional fields may differ in your business.
Check the result The label is readable and scans to the correct item.
Where to go Products → List Products → Actions → Edit / Update Price
Before you start Identify whether the problem is name, price, assignment or quantity.
Steps
Search the SKU and view the correct variation. Edit name/category/image for catalogue corrections; use the intended price action for approved future price changes.
If stock quantity is wrong, use Stock History and the relevant purchase/opening stock/adjustment workflow. A product price edit does not fix quantity.
Check product-location assignments if the item is absent at one counter. Check Not for selling and stock restrictions if it is not selectable.
Save and reload the product in a new transaction. Do not assume editing the product rewrites old invoices.
Refresh the native app’s data online. Download a new offline snapshot when catalogue/price changes must be used offline.
SCREEN GUIDE Correct a product and verify the effect — look for the controls described in the steps. Select the screenshot to enlarge; optional fields may differ in your business.
Check the result The next sale sees the intended catalogue values while old transaction records remain traceable.
IN PRACTICE
A practical example
For a shop starting with 20 bottles of water and 6 mugs: create two Single stock products, assign Main Store, and enter opening quantities 20 and 6 there. A stock alert of 5 is a reminder threshold. A Service charge item is Single with stock disabled. A Mug + Tea gift set is Combo, with its component quantities, not another opening-stock copy of the same mugs.
Common questions
Why can I see the product but not sell it?
Check outlet assignment, Not for selling, variation stock, lot restrictions and cashier permissions.
Is default purchase price the last supplier bill?
No. It is a catalogue default; actual supplier receipts and costs are entered on purchases.
Why do labels show the wrong price?
Check the chosen selling price group and inclusive/exclusive label setting, then generate a new preview.
Can I fix stock by changing Manage Stock?
Do not use the stock toggle as a correction. Investigate Stock History and enter the appropriate stock transaction.
Web + native POS
Stock & inventory
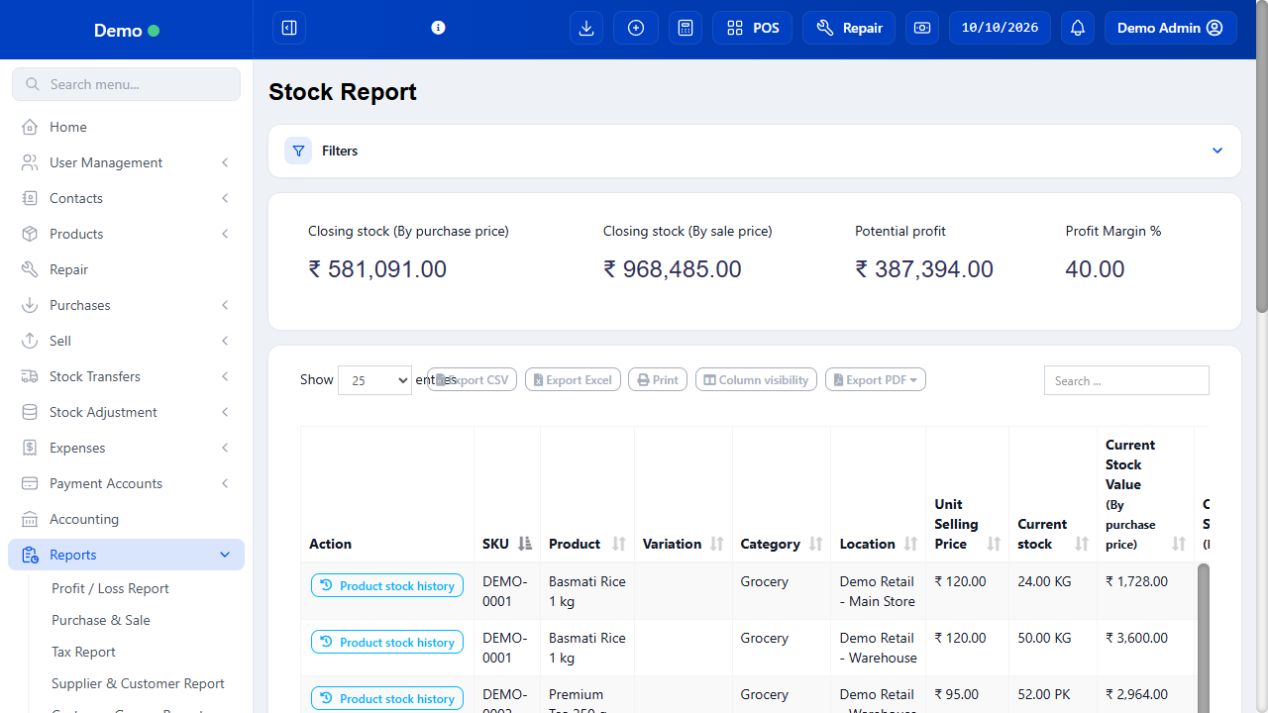
Use stock reports to understand where items are held. Transfers move stock; adjustments record losses or corrections with a reason.
3 procedures · Field reference · Practical example · Common questions
Stock is a quantity at a particular outlet for a particular product variation. A batch further identifies its receipt/expiry. The number on a product card is not a company-wide promise that stock is available at every outlet. Transfers move goods; adjustments explain discrepancies; purchases receive goods; returns reverse the appropriate transaction. Use stock history to diagnose a difference before correcting it.
SCREEN GUIDE Stock & inventory — module overview. Select the screenshot to enlarge; optional fields may differ in your business.
Field reference
Use this while completing the form. A required field is marked with *; conditional fields appear only when enabled.
Field / control
What to enter or understand
Location / variation
Which stock record is being viewed or moved. One parent product can have several separately stocked variations.
Current stock / unit
Recorded available quantity in the displayed unit. Check conversion for box/pack measurements.
Lot number / expiry
Receipt-specific identity/date; select the actual physical lot when selling or transferring.
Transfer From / To
Different source and destination outlets. Do not reverse them.
Transfer status
Stage offered by the transfer workflow. Verify both locations’ stock after the intended completed/received stage.
Adjustment type / quantity / reason
Nature and size of the discrepancy. Enter the amount to adjust according to the form, not automatically the final desired stock.
Stock history
Chronological purchases, sales, transfers, returns and adjustments used to explain the balance.
Where to go Products → List Products → Stock Report; Reports → Stock Report / Lot Report
Before you start Choose the location whose stock you want to inspect.
Steps
Open Stock Report and select the location, category, brand or product filters. Search the SKU/name if needed.
Read Current stock in its displayed unit. All-locations totals can differ from the quantity available at the selling location.
Use Lot Report for lot numbers and Stock Expiry Report for expiring quantities. Open product stock history from its Actions menu to trace movements.
In native POS, open the Stock page and search the product. While offline, the figures are the downloaded snapshot minus local reservations, not live stock from other devices.
Check the result You can explain stock quantities from receipts, sales, returns, transfers and adjustments.
Where to go Products → Stock History; Reports → Stock Report
Before you start Count the exact variation/outlet and check pending physical receipts or transfers.
Steps
Filter stock to the intended outlet and compare the physical count in the same base unit.
Open the product’s stock history. Check purchases received, sales, returns, transfers and previous adjustments around the discrepancy.
Check whether goods are physically in transit or were received under another variation/lot before changing the balance.
For a verified difference, use the authorised adjustment flow with the actual discrepancy and a clear reason. Do not change every outlet to the same count.
Reopen history/report and confirm the correction’s reference and new quantity. Retain the count explanation for the manager.
Check the result The corrected balance has a traceable cause rather than an unexplained override.
Where to go Home → stock alerts; Reports → Stock / Expiry report
Before you start Lot/expiry data and alert quantities must be configured first.
Steps
Select the outlet/date or expiry filters and read remaining stock and expiry dates.
Separate low quantity from expired or damaged stock. A low-stock alert does not automatically raise a supplier order.
Arrange replenishment through purchases/transfers for shortages. Follow the shop’s handling policy for expired goods.
Use the appropriate adjustment/return flow for physically removed goods after approval.
Refresh the report to ensure the movement is reflected, and download fresh app data if counters will sell offline.
Check the result Staff act on the correct shortage or expiry issue.
IN PRACTICE
A practical example
Main Store has 10 mugs and Warehouse has 30. A completed transfer of 5 from Warehouse to Main should reconcile to 15 and 25, before other transactions. An adjustment for 2 broken mugs concerns the outlet where they were broken, not both outlets.
Common questions
Why do two outlets show different quantities?
Stock is location-specific. Products can be assigned to both without moving goods.
Why is a batch unavailable at the counter?
Check outlet, variation, remaining quantity, lot/expiry entry and the business’s expiry/stock restrictions.
Web portal
Stock Adjustments
Record verified loss or stock discrepancy with its reason and product quantities.
2 procedures · Field reference · Practical example · Common questions
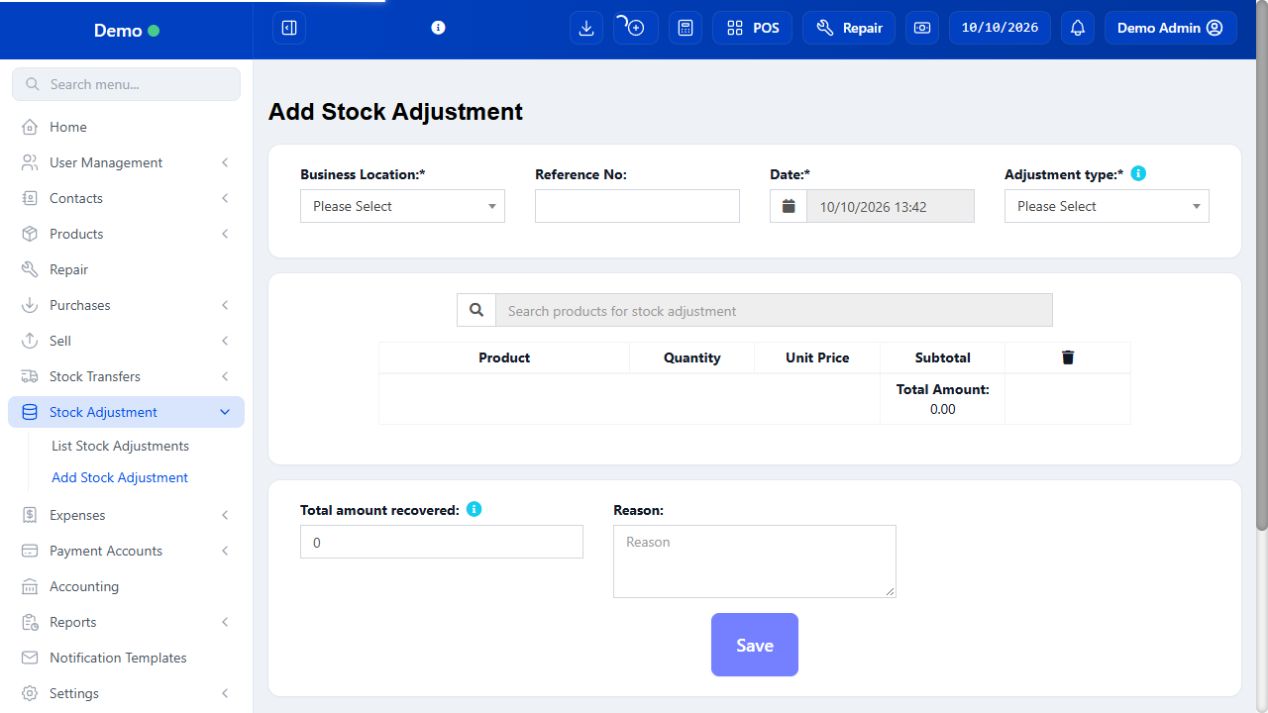
Use adjustments after reviewing the physical count and Stock History. An adjustment explains a discrepancy or removal, not a routine purchase, transfer or customer return. The form’s type and quantity determine what changes, so read them before saving. Recovered amount is not automatically the number of items removed or a customer sale.
SCREEN GUIDE Stock Adjustments — module overview. Select the screenshot to enlarge; optional fields may differ in your business.
Field reference
Use this while completing the form. A required field is marked with *; conditional fields appear only when enabled.
Field / control
What to enter or understand
Location / Date / Reference
Where and when the counted discrepancy occurred.
Adjustment type
Normal/abnormal or other offered classification; follow the shop’s approved policy.
Product / variation / quantity / unit
Affected item and adjustment quantity, not automatically its desired ending balance.
Amount / recovered amount
Value/cost or recovered money as the form describes, distinct from quantity.
Reason / note
Traceable count/damage explanation for manager review.
Where to go Stock Adjustment → Add Stock Adjustment
Before you start Recount the item and confirm the discrepancy with the manager.
Steps
Select the business location, date, reference and adjustment type.
Search the product and enter the quantity to adjust using the correct unit and variation.
Enter a clear Reason, such as damaged package or count discrepancy. Record recovered amount only if applicable.
Review and Save. Check the Stock Adjustment list and stock history to confirm the expected movement.
SCREEN GUIDE Record damaged, missing or corrected stock — look for the controls described in the steps. Select the screenshot to enlarge; optional fields may differ in your business.
Check the result The quantity change has a traceable reason and record.
Where to go Stock Adjustment → list; product → Stock History
Before you start Keep its reference and the original count explanation.
Steps
Open the saved adjustment and verify outlet, variation, quantity, type and reason.
Open the same product’s Stock History and match the adjustment reference.
Compare the new report balance to the checked physical count, accounting for later sales/receipts.
For a mistake, use the permitted correction with manager approval; first establish the effect of the original entry.
Keep the evidence for day-end stock review rather than repeatedly adjusting until a number looks right.
Check the result The adjustment and resulting balance agree with the intended correction.
IN PRACTICE
A practical example
Recorded stock is 10 mugs but only 8 are present because two broke. Review history and approve the loss, then record the two affected mugs at that outlet with a breakage reason. Do not enter 8 as the adjustment quantity if the form expects the amount removed.
Common questions
Why did my stock fall by too much?
Check whether you entered desired ending balance instead of adjustment quantity, and inspect the saved reference before correcting.
Should expired goods be a new sale?
Use the approved adjustment/return/removal process for the actual event; do not invent a customer sale.
Web portal
Stock Transfers
Move goods between outlets with a traceable source, destination and receiving stage.
2 procedures · Field reference · Practical example · Common questions
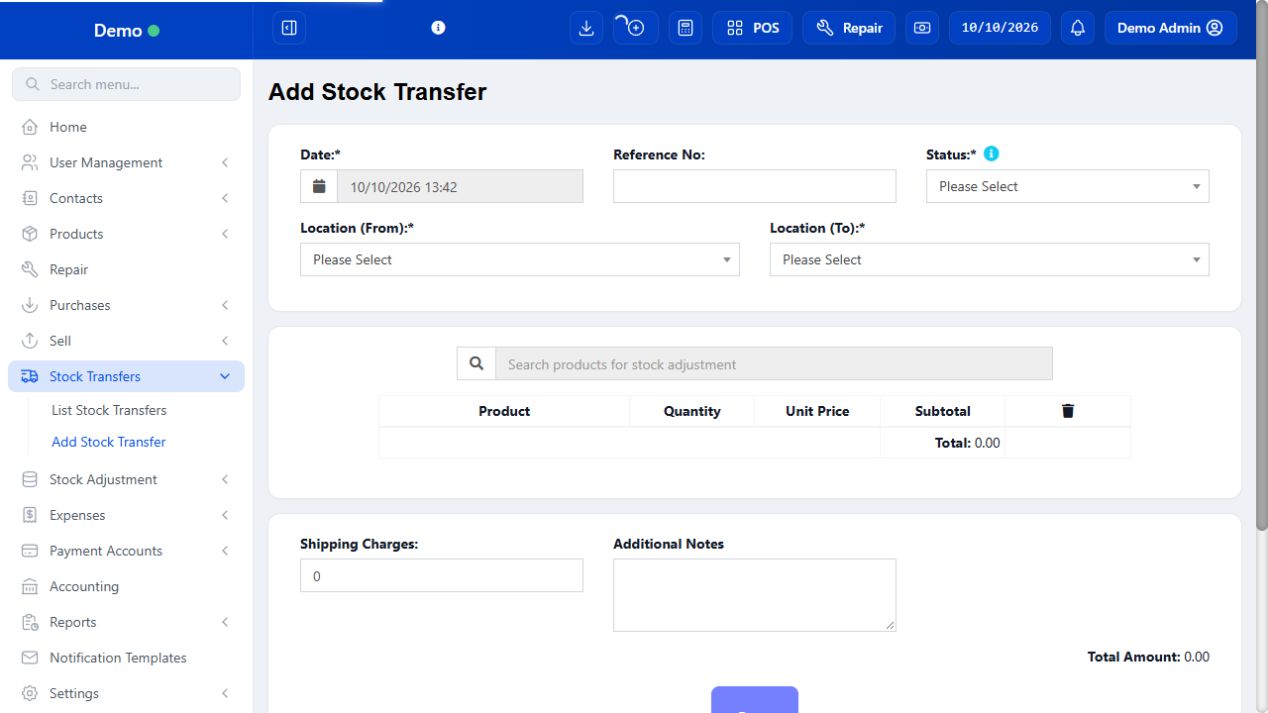
A stock transfer is a physical movement within the business, not a supplier purchase, sale or stock-loss adjustment. Choose the actual source and destination and review the stage used by your installation. Goods still in transit should not be confused with goods received at the destination. Verify stock history at both ends after completion.
SCREEN GUIDE Stock Transfers — module overview. Select the screenshot to enlarge; optional fields may differ in your business.
Field reference
Use this while completing the form. A required field is marked with *; conditional fields appear only when enabled.
Field / control
What to enter or understand
Date / Reference
Actual transfer date and unique movement reference.
From / To locations
Outlet sending and outlet receiving; verify they are different and correct.
Status
Actual offered stage such as pending/in-transit/completed. Check resulting stock behavior.
Product / variation / unit / quantity
Goods moved in the displayed unit; review box/base-unit conversion.
Shipping charges / notes
Transfer-associated charge and explanation, distinct from product quantity.
Before you start Have stock available in the source and confirm the destination.
Steps
Enter date and reference. Select From location and To location; they must represent the actual movement.
Add products, variations and quantities. Review units, lot details where available and shipping charges.
Choose the transfer status offered by the form. Use the completion/receipt step only when goods have arrived.
Save. Open List Stock Transfers and check the record. Compare source and destination stock after the completed movement.
SCREEN GUIDE Move stock between locations — look for the controls described in the steps. Select the screenshot to enlarge; optional fields may differ in your business.
Check the result The recorded transfer moves the intended quantities between the two locations.
Where to go Stock Transfers → list → View / permitted status/edit action
Before you start Match the shipment reference and physical goods.
Steps
Open the existing transfer, confirm From/To, product variations and dispatched quantities.
Count the goods received in the same unit; record/report any shortage before treating the whole transfer as received.
Use the offered status/receipt workflow to record the actual completion when permitted.
Inspect the stock report/history for both locations and match the transfer reference.
Resolve discrepancies through the manager’s correction flow; do not duplicate the transfer to make the receiving stock appear.
Check the result The completed movement is reflected at both outlets.
IN PRACTICE
A practical example
Warehouse sends five mugs to Main Store. Record the movement with Warehouse as From and Main Store as To. Confirm the physical receipt and each outlet balance; do not also enter a new supplier purchase for the same mugs.
Common questions
Why is destination stock unchanged?
Check receiving/completion stage, selected outlet and variation.
Can I use an adjustment instead?
A loss/correction adjustment does not represent the paired source/destination movement of a transfer.
Web portal
Purchases
A received purchase brings goods into stock and records what you owe the supplier. A supplier payment records money separately.
5 procedures · Field reference · Practical example · Common questions
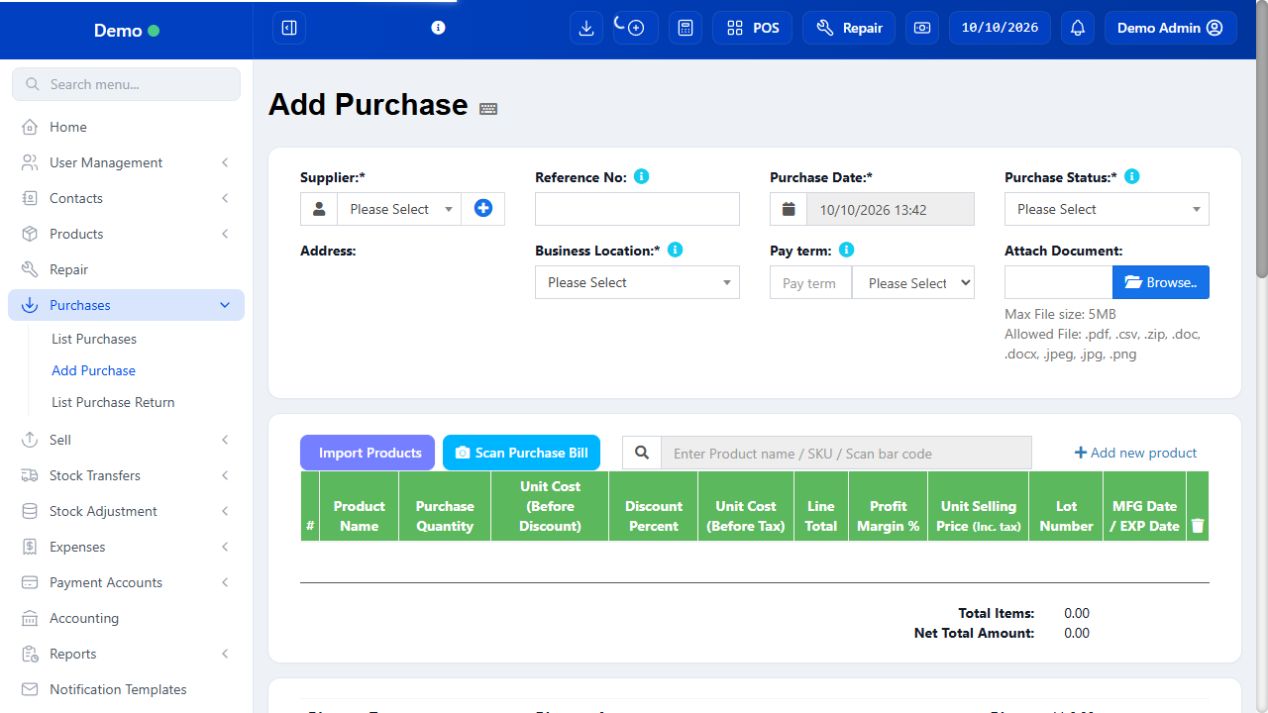
A purchase records goods from a supplier and its payable/payment. The status controls the receiving stage, while payment status controls money owed. Ordered goods are not necessarily received stock. Supplier invoice/reference is separate from Compact’s internal reference. Review supplier cost, tax, batch and expiry before saving, particularly when using scanned bill suggestions.
SCREEN GUIDE Purchases — module overview. Select the screenshot to enlarge; optional fields may differ in your business.
Field reference
Use this while completing the form. A required field is marked with *; conditional fields appear only when enabled.
Field / control
What to enter or understand
Supplier / Reference / Date
Existing supplier, its bill reference and the actual purchase date. Use the supplier reference to detect duplicate entry.
Status / Location
Receiving stage and receiving outlet. Check received stock after the appropriate status.
Payment terms / Exchange rate
Due period and currency conversion when offered. Do not confuse days/months or overwrite an unfamiliar exchange rate.
Product / quantity / unit / variation
Actual received item and its measuring unit; verify box conversions.
Unit cost / line discount / tax
Supplier cost and tax treatment. Catalogue default cost may need correction to the real bill.
Lot / manufacturing / expiry
The actual batch/date printed on the goods when enabled, not an arbitrary product-wide expiry.
Order IDs / shipping / charges
Links to purchasing orders and additional costs where offered; check they are not counted twice.
Payment / account / amount
Money paid now, not automatically the entire supplier invoice.
Document / notes / custom fields
Supporting supplier bill and business details. A scan result still requires human review.
Before you start Create the supplier and catalogue items first, and have the supplier invoice available.
Steps
Select Supplier, purchase date, reference number, purchase status and business location. Product search becomes available after the required selections.
Search product name/SKU or scan a barcode. Enter received quantity, unit cost, tax, discount, lot number and expiry where enabled.
Review invoice discount, tax, shipping and additional charges. Attach the supplier document when useful.
In Add payment, record only the amount actually paid, method, account and note. Leave an unpaid balance if payment is still due.
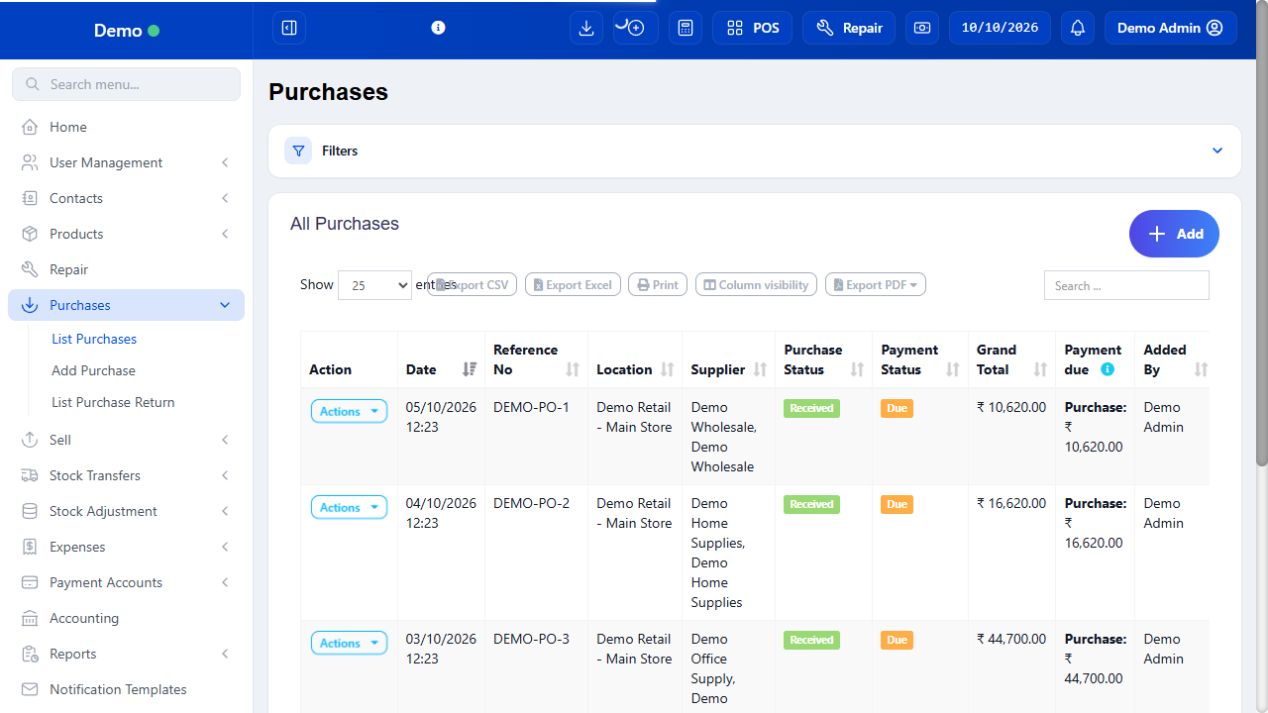
Compare totals with the supplier invoice, Save and open the purchase in List Purchases. Check stock at the receiving location and supplier due.
SCREEN GUIDE Receive a supplier purchase — look for the controls described in the steps. Select the screenshot to enlarge; optional fields may differ in your business.
Check the result A received purchase updates stock; the supplier balance reflects its payments.
Before you start Use the original purchase, supplier and location.
Steps
Search the reference/date and view the purchase. Use its payment action to record a later supplier payment.
For returned goods, select Purchase Return on the relevant purchase or use the purchase-return workflow provided by your list.
Enter the quantities being returned, review the credit/refund details and save only after confirming the goods movement.
Check List Purchase Return, stock history and supplier ledger. Record a refund payment if the supplier actually reimburses you.
SCREEN GUIDE Pay or return a purchase — look for the controls described in the steps. Select the screenshot to enlarge; optional fields may differ in your business.
Check the result Stock and supplier balances follow the return/payment records.
Before you start Compare the physical receipt and original supplier bill side by side.
Steps
Confirm supplier, bill reference, date, location and receiving status. Search the purchase list for an existing identical bill.
Check every product/variation and the unit. Convert pack quantities correctly, then review actual unit cost and line discounts.
Enter lot and dates from the goods. Check tax-inclusive/exclusive cost and the invoice-level tax choice so it is not repeated incorrectly.
Add shipping/charges once and compare final total to the supplier bill. Explain a legitimate difference rather than silently forcing quantities.
Record actual payment only. Save and check the purchase detail, outlet stock and supplier ledger separately.
Check the result Received quantities, cost and payable can all be reconciled to the supplier bill.
PROCEDURE 05
Use purchase orders and requisitions where enabled #
Where to go Purchases → Purchase Order / Purchase Requisition
Before you start These menus depend on business features and role access.
Steps
Use a requisition to record an internal need where that workflow is enabled; specify requested products, quantities, outlet and date.
Create the approved purchase order for the supplier. Review quantities, prices and expected terms before sending it.
When goods arrive, use the offered purchase-from-order/link action or select the order on Add Purchase.
Record the actual receipt, including a partial delivery. Check remaining ordered quantity instead of assuming the whole order arrived.
Inspect stock and payable after the receipt status is saved. The order alone is not proof of received goods or paid supplier money.
Check the result Ordered and received quantities remain distinguishable.
IN PRACTICE
A practical example
Order 10 cartons, receive 6 today, and pay only part of the supplier bill. Record the six received cartons in the correct unit; keep the remaining order quantity and supplier due visible. Do not enter 10 as received just because the supplier order says 10.
Common questions
Why did stock not increase?
Check location, receiving status, variation and unit. A pending/ordered record may not be received stock.
Can Scan Purchase Bill save without review?
No. Verify matched products, quantities, costs, tax and totals before saving its suggestions.
Web + native POS
Point of sale
The counter workflow is customer → products → quantities/lots/prices → total → payment → receipt. Always check the location first.
6 procedures · Field reference · Practical example · Common questions
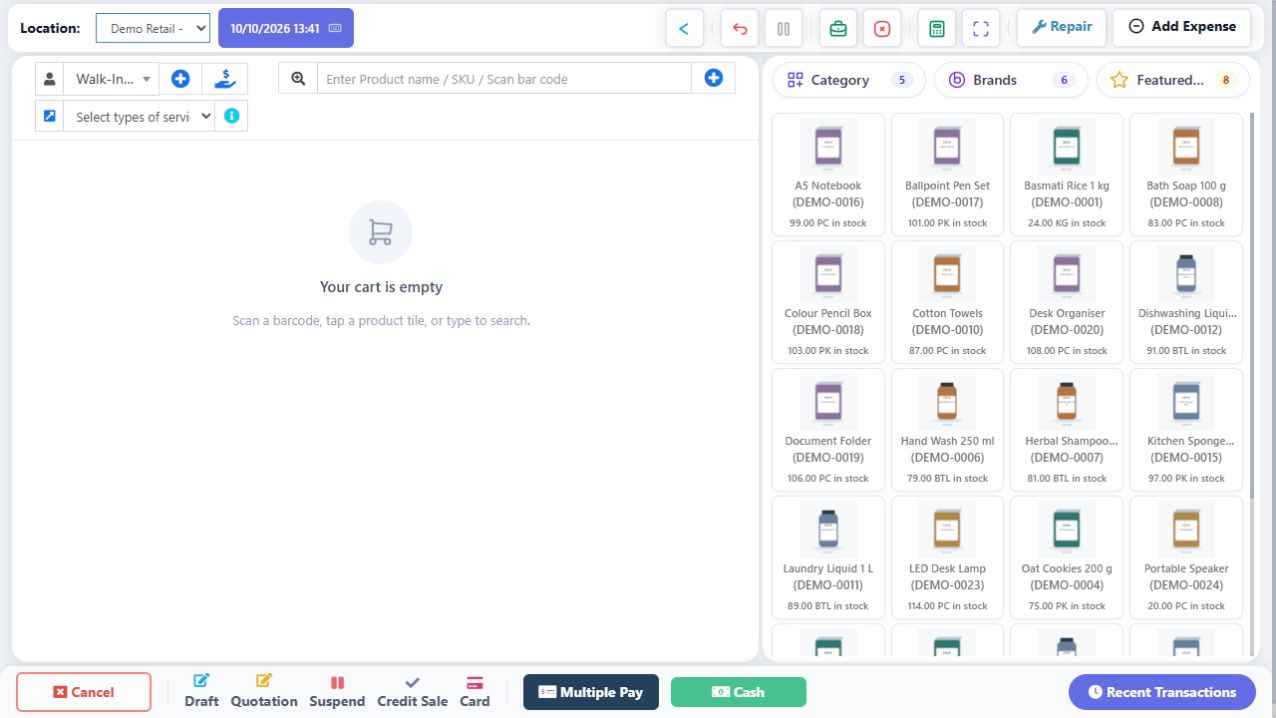
A basket is editable work until the server accepts a final sale. Keep the customer, outlet and physical lot correct before changing prices or taking money. Quantity and price are separate values; the displayed Price inc. tax is not necessarily the product’s base price before tax. A saved quotation/draft/suspended sale can be resumed but is not a completed paid bill.
SCREEN GUIDE Point of sale — module overview. Select the screenshot to enlarge; optional fields may differ in your business.
Field reference
Use this while completing the form. A required field is marked with *; conditional fields appear only when enabled.
Field / control
What to enter or understand
Location / Customer
Stock outlet and billed party. Search by name/mobile and verify before credit billing.
Product search / SKU / barcode
Match the exact product variation; similar names can have different sizes/prices.
Stock / lot & expiry
Current displayed availability and chosen batch. Use the physical stock’s lot.
Quantity / minus / plus / unit
Amount sold; type fractional quantities only when the unit allows them.
Price inc. tax / unit price before tax
Read the active label. Do not paste a gross amount into a before-tax editor.
Line discount / fixed or percentage
Reduction to a line. A percentage of 10 is not the same as a fixed amount of 10.
Bill discount / shipping / packing / rounding
Separate totals/charges where the platform exposes them. Check the final total after all changes.
Service / staff / date (web)
Conditional web controls. The native app does not expose every web ERP setting.
Cash / Card / Multiple Pay / Credit
Final payment workflow, distinct from saving unfinished work.
Before you start Use a selling account with access to the location.
Steps
Open POS and select the location. If asked to open the register, enter the cash float actually in the drawer and confirm.
Keep Walk-In Customer for an anonymous sale. For a known customer, open customer search and type their name or mobile number; select the matching record.
On web POS, use the customer Add button if you have permission and the customer is new. In the native app, use the existing-customer search; maintain contacts in the web portal where the app does not offer creation.
Review the sale date and service/staff controls if configured in web POS. Confirm the right customer before adding credit or loyalty details.
Check the result The sale belongs to the correct location, customer and cashier shift.
Before you start Use this check for web, Windows and Android with the controls offered there.
Steps
Check customer name/mobile and location. Review credit details when using a named customer.
Compare each item, variation, lot and quantity with the goods the customer is taking. Remove accidentally scanned duplicates.
Review unit price, authorised line discounts and bill-level charges/tax. Confirm the displayed payable amount.
Choose the actual payment method. If the customer changes their mind, edit the basket before finalizing rather than creating a refund immediately afterwards.
After saving, wait for confirmation and invoice reference. On timeout use confirmation recovery and history before trying a second sale.
Check the result The accepted invoice reflects the goods and agreed charge.
Where to go POS → saved bills / quotations / suspended records
Before you start Select the correct customer/reference and saved state.
Steps
Open the saved-bill list offered by your platform and choose the intended draft/quotation/suspended record.
Review restored customer, outlet, quantities, lots, prices and discounts. Stock/price conditions may have changed since the work was saved.
Make authorised corrections and obtain agreement on the current total.
Finalize through the resumed record’s normal payment workflow. Inspect its accepted invoice reference.
If finalization is uncertain, use retry confirmation for that operation. Do not create another fresh sale for the same saved basket.
Check the result Saved work becomes one confirmed bill when the customer completes it.
IN PRACTICE
A practical example
A customer buys 2 bottles from lot A and 1 bottle from lot B. Preserve the two physical lot selections as appropriate rows, inspect quantity and final total, then take payment. Changing the row price is a selling decision; it does not change the supplier purchase cost.
Common questions
Why does the app differ from the web screen?
The native screen adapts to device size and supports the documented counter features. Full settings and optional ERP workflows remain web pages.
Did tapping Cash save my sale twice after a timeout?
Do not tap a new checkout blindly. Inspect pending-operation recovery and the matching invoice in history first.
Web + native POS
Payments & credit
Record how the customer actually paid. Recording Card or Bank Transfer in Compact does not itself charge a customer or transfer money.
5 procedures · Field reference · Practical example · Common questions
A payment record describes money actually received or paid. Sale total, amount tendered, recorded payment, change and due are related but distinct. Non-cash money should not be counted as cash in the drawer. Card recording does not automatically process a bank transaction; confirm success on the actual payment terminal/channel before recording it.
SCREEN GUIDE Payments & credit — module overview. Select the screenshot to enlarge; optional fields may differ in your business.
Field reference
Use this while completing the form. A required field is marked with *; conditional fields appear only when enabled.
Field / control
What to enter or understand
Amount / Tendered
Amount for this payment and cash handed over where offered. Use the screen’s actual meaning.
Change / Due
Cash to return versus remaining unpaid balance. A paid total and excess tendered cash are not extra sales.
Method
Cash/card/UPI/custom method configured for the outlet. Use readable custom labels where available.
Payment account
Where recorded funds belong. A method and an accounting/payment account are different.
Reference / card details / note
Transaction reference needed for reconciliation. Do not store unnecessary sensitive card credentials.
Multiple-pay rows
Separate real payments whose sum must reconcile to the bill and remaining due.
Credit confirmation
Explicit unpaid sale with a selected customer and allowed credit conditions.
Where to go POS → pending confirmation / Previous bills
Before you start Keep the basket/reference and do not ask the customer to pay again without checking.
Steps
Read the failure carefully: server rejection is different from not knowing whether the server accepted the sale.
For uncertain confirmation, use the offered Retry confirmation on the same operation, then inspect Previous bills by date/customer/amount.
If the invoice exists, view its payments and print that existing invoice. Do not submit a fresh duplicate basket.
If the server rejected it, correct the stated stock/permission/credit/register problem before retrying the intended saved work.
If still uncertain, provide support with the local reference/time and preserve the app’s pending record.
Check the result The operation is resolved without duplicating the sale or payment.
IN PRACTICE
A practical example
A total of 300 paid as 100 cash and 200 UPI increases recorded cash by 100, not 300. For an all-cash total of 300 with 500 tendered, the customer should receive 200 change, and net sale cash is 300.
Common questions
Does selecting Card charge the card?
The recorded payment method is not proof of bank/terminal approval. Use the actual configured terminal/payment channel.
Can an anonymous Walk-In customer buy on credit?
Use a verified named customer and the business’s permitted credit workflow; server policy can reject it.
Web + native POS
Previous bills & returns
Search existing records before making corrections. Changing a finalized bill can change stock, taxes, payments and reports.
6 procedures · Field reference · Practical example · Common questions
Previous bills is the reference point after a sale. View confirms what was billed, payment history confirms money, and print produces another copy of that same invoice. Finalized editing changes an existing transaction and needs appropriate access; returns record goods coming back and may involve a separate refund. Do not confuse editing a bill with adding a payment or returning an item.
SCREEN GUIDE Previous bills & returns — module overview. Select the screenshot to enlarge; optional fields may differ in your business.
Field reference
Use this while completing the form. A required field is marked with *; conditional fields appear only when enabled.
Field / control
What to enter or understand
Invoice / date / customer / total
Identity of the sale. Compare more than total when two bills have the same amount.
Payment status / payments / due
Read the actual payment entries and remaining amount; a status badge alone may not explain a discrepancy.
Actions
View, print, edit or return depending on permission and record conditions.
Return quantity
Quantity physically returned against the original item, not the original sold quantity unless all goods came back.
Refund method / amount
Money actually returned; stock return and payment refund must both be checked.
Shipping status / address
Delivery progress is separate from payment status.
Where to go Web Sell → All sales / List POS → Actions → Edit; native bill detail → web edit when offered
Before you start You need update permission, a connection and a bill that the server permits you to edit.
Steps
Open the existing bill and use Edit. In the native app, the supported finalized-bill edit opens the original web flow; complete normal sign-in if needed.
Check customer, location, product quantities, lot selections, price, discounts and tax. Make only the intended correction.
Review the payment section: preserve correct collected payments and resolve any balance/change caused by the edit.
Save the existing bill. Reopen it and check stock and the invoice total/payment status. Reprint the corrected invoice if required.
Check the result The original bill is corrected through the server’s authorized workflow.
Before you start Start with the existing invoice, never a replacement sale chosen just to hide a mistake.
Steps
For money owed on correct goods, use Add payment and verify the balance. Do not change product quantity just to reduce a due.
For goods physically coming back, use the return workflow with the original invoice and actual returned quantity.
For an authorised factual bill correction, use Edit on the original finalized bill when available. Review linked payments/stock and tax implications before saving.
In native apps, finalized editing opens the supported online web flow; finish it there and refresh app history.
Reopen the invoice/return/payment history and compare the result to the intended action.
Check the result The correction has the right business meaning and remains traceable.
Where to go Native Previous sales; web Sell → All Sales
Before you start Use the approximate date, customer/mobile or invoice number.
Steps
Open Previous sales/Recent transactions and use the available payment/date/location/search controls. Move to the correct page when older bills are not listed.
Open the matching invoice and review item quantities, totals and payment entries before printing/editing.
Close the detail/preview and use Back to POS or the page navigation control to return to the counter.
Confirm the active basket has not been mistaken for the historical invoice. Resume selling only on the intended current basket.
Check the result You can inspect a bill and safely return to the counter.
IN PRACTICE
A practical example
A customer returns one of three mugs. Return quantity is 1 against the original invoice. Adding a payment would increase collections without returning stock; editing quantity silently is not the same traceable return workflow.
Common questions
Why is Edit unavailable?
Check role, allowed edit period, record state and online connection. Native finalized editing depends on the original web edit flow.
Will reprinting create another invoice?
No. Reprint the existing bill rather than creating a second sale.
Web + native POS
Cash registers
The cash drawer balance is not the same as total sales. Cash floats, cash receipts, due collections, refunds and expenses determine expected cash.
4 procedures · Field reference · Practical example · Common questions
The register is the cashier’s shift record. Opening cash is the float; cash sales and due collections add cash; cash refunds/expenses subtract it. Total sales include non-cash and unpaid trading, so they are not the expected drawer amount. Physical count is recorded at close and compared with expected cash. Use the detailed report sections to explain differences before closing.
SCREEN GUIDE Cash registers — module overview. Select the screenshot to enlarge; optional fields may differ in your business.
Field reference
Use this while completing the form. A required field is marked with *; conditional fields appear only when enabled.
Field / control
What to enter or understand
Opened / Closed / cashier / location
Which shift, person, outlet and period the figures refer to.
Opening balance
Actual float at shift start, not the day’s sales target.
Cash received: sales / due payments
New sale payments versus collections on existing debts.
Cash refunds / expenses
Money leaving the drawer through recorded refund/expense flows.
Expected cash in drawer
Calculated cash balance for the register scope.
Gross sales / refunds / net sales
Sales activity; does not equal cash collected when non-cash/credit exists.
Payments collected by method
Separate sale collections, dues and expenses where shown. Custom method codes need their configured display labels.
Outstanding receivables
Money still owed on the report’s invoices; separate from physical cash.
Products / brands / service summaries
Quantity/value breakdown of activity; rounding can explain differences from rounded invoice totals.
Denomination / count / counted total
Value of a note/coin, number counted, and their product. Count is a whole number, not a cash amount.
Closing note / discrepancy
Explanation for a verified difference between expected and actual cash.
Where to go POS → Close Register / native Cash register → Close shift
Before you start Synchronize pending offline sales first and finish all counter work.
Steps
Count notes and coins physically. Where denomination fields are enabled, enter the count for each value and compare the calculated total to counted cash.
Open Close Register/Close shift and review the expected amount, actual closing amount and other requested payment totals.
Explain any difference in the closing note. Ask the manager about discrepancies instead of changing invoices just to balance the drawer.
Confirm close, then check the closed-register report. Start a new register only for the next shift and its actual opening float.
Check the result The shift is closed with a traceable count and reconciliation.
Before you start Finish synchronization and review the same shift scope.
Steps
Read opening cash, cash sales, due collections, refunds and expenses. Calculate the expected drawer from those cash movements.
Compare payments by method to terminal/UPI records. Do not add non-cash collections to your drawer count.
Review customer dues separately. An unpaid invoice increases sales/receivables, not received cash.
Count notes/coins and enter counts in the denomination fields. Compare actual total to expected and recount if needed.
Investigate missing expense/refund/payment records and preserve their references. Enter a truthful closing note for any unresolved authorised discrepancy.
Close only when the shift is ready and then check its closed status/report.
Check the result The shift closes with an explainable count rather than a forced expected amount.
IN PRACTICE
A practical example
Opening float 500 + cash sales 1,200 + old dues collected 100 − cash refund 50 − cash expense 150 = expected drawer 1,600. A separate card sale of 800 increases sales/collections, but not this cash drawer calculation.
Common questions
Why are sales higher than cash in drawer?
Sales can be paid by card/UPI or remain unpaid; opening float and cash expenses also affect the drawer.
Can I close with queued offline sales?
Synchronize and resolve them first so confirmed server sales/register totals reflect the shift.
Web + native POS
Expenses
Expenses such as transport, packaging and utilities belong in expense records. The payment method controls whether they reduce the cash drawer.
4 procedures · Field reference · Practical example · Common questions
Expenses record a business cost and its payment, not purchased resale inventory. Enter supplier goods through Purchases so stock is tracked. A POS expense can affect the cashier’s cash reconciliation when supported, while a bank-paid expense belongs to its non-cash account. Expense total, tax and amount paid must be reviewed separately.
SCREEN GUIDE Expenses — module overview. Select the screenshot to enlarge; optional fields may differ in your business.
Field reference
Use this while completing the form. A required field is marked with *; conditional fields appear only when enabled.
Field / control
What to enter or understand
Location / title / category / subcategory
Where the cost belongs and what it is for. Categories support reporting; use a consistent policy.
Reference / date
Receipt or business reference and actual expense date. Check duplicates.
Expense for / contact / payment to
Staff or contact/payee involved, using the fields actually offered.
Applicable tax / total amount
Tax treatment and total cost. Do not add the same receipt tax twice.
Document / notes
Receipt and explanation needed for review.
Payment amount / method / account
Money actually paid and its source. Use Cash only when drawer cash really paid it.
Recurring / refund controls (web)
Conditional web actions distinct from one-off native expense entry.
Where to go Web POS → Add Expense; Expenses → Add Expense; native POS expense action
Before you start Know the location, purpose, amount and payment method.
Steps
Choose Add Expense. Select the location and expense category. On the full web form, enter Expense Title, Payment To and reference/date where appropriate.
Enter total amount, tax and note. Attach the supporting document on the web form when needed.
Record the actual payment amount, method and account. Choose cash only if the money came out of cash.
Save once and view List Expenses. For a POS cash expense, check that Cash Expenses in the current register reflects it once.
SCREEN GUIDE Add an expense from POS or the web — look for the controls described in the steps. Select the screenshot to enlarge; optional fields may differ in your business.
Check the result The expense is searchable and its payment is recorded in the appropriate place.
Where to go Expenses → Expense Categories / List Expenses
Before you start Use the full web workflow for advanced expense maintenance.
Steps
Create descriptive expense categories and subcategories as needed.
Find the expense by reference/date and use its permitted Actions to view or edit. Confirm the payment history before changing amounts.
On the web form, use Is refund only for a genuine expense refund. Use Is Recurring and its interval fields only for an intended repeated expense.
Review expense reports and payments after saving. Check any scheduled repetition with the manager.
SCREEN GUIDE Categories, refunds and recurring expenses — look for the controls described in the steps. Select the screenshot to enlarge; optional fields may differ in your business.
Check the result Expenses are classified consistently and refunds/recurrence are intentional.
Where to go Expenses → List Expenses / recurring controls
Before you start Use authorised web access for recurring/refund features.
Steps
Filter by date, outlet and category. Compare receipt/reference before adding another cost.
For recurring setup, review period, repeat rules and next date through the offered controls. A recurring schedule is not proof a bank payment occurred.
Use permitted edit/refund/payment actions according to whether the cost details or actual money movement need correction.
Inspect the expense report, payment history and relevant account/register after saving.
Do not represent a stock purchase as a recurring expense to avoid receiving goods.
Check the result Costs remain identifiable and payment records match reality.
IN PRACTICE
A practical example
Cleaning supplies consumed by the shop can be an expense. Bottles bought for resale are a purchase. Paying 150 for cleaning from drawer cash reduces expected drawer by 150; paying it from the bank does not.
Common questions
Why is an expense not reducing drawer cash?
Check whether it was actually recorded as cash and belongs to this register/outlet scope.
Can I add an expense offline?
The current native expense flow is online; offline sale storage is not an expense queue.
Web + native POS
Invoices & printing
Online native receipt printing uses the web receipt workflow so the business’s invoice layout is the reference. Offline receipts are provisional and use a separate local format.
4 procedures · Field reference · Practical example · Common questions
Invoice Scheme controls numbers; Invoice Layout controls appearance; Business Location selects which scheme/layout to use; printer/browser settings control physical output. For confirmed online native bills, the original web print flow provides the server’s receipt format. Local offline receipts are provisional and are not the final web invoice. Product barcode labels have their own Products procedure.
SCREEN GUIDE Invoices & printing — module overview. Select the screenshot to enlarge; optional fields may differ in your business.
Field reference
Use this while completing the form. A required field is marked with *; conditional fields appear only when enabled.
Field / control
What to enter or understand
Invoice scheme / prefix / starting number
Numbering identity. Avoid reusing numbers or changing sequences without checking existing invoices.
Invoice layout / design
Receipt presentation, displayed labels and business/customer/tax fields.
Location assignment
Which scheme/layout and print preference this outlet uses.
Paper width / driver / scale
Physical output settings: match receipt roll, label or A4 page and preview.
Print Mini / Print Detailed
Register report output variants; inspect intended sections before printing.
Offline receipt label
Provisional device receipt awaiting server confirmation, not a confirmed server invoice.
Where to go Settings → Invoice Settings; Settings → Business Locations
Before you start Administrator access is required.
Steps
In Invoice Settings, review invoice schemes for numbering/prefixes and invoice layouts for receipt appearance.
Edit the appropriate layout’s header, logo, address/tax labels, visible item columns, footer and paper style.
Assign the intended scheme/layout to the business location. Review browser-versus-receipt-printer settings there.
Preview a sample invoice and test on the actual printer. Check numbering, taxes, totals, margins and long product names.
SCREEN GUIDE Choose invoice numbering and layout — look for the controls described in the steps. Select the screenshot to enlarge; optional fields may differ in your business.
Check the result Receipts use the location’s configured format.
Where to go Settings → Invoice Settings / Business Locations / Receipt Printers
Before you start Know the connected printer and actual paper size.
Steps
Create or select the invoice layout and review business name/logo, address, tax number, customer fields and line information.
Assign its invoice scheme/layout to the correct Business Location. Check that this outlet is selected for the sample sale.
Open an existing approved sample invoice and preview the original web receipt. Confirm numbering, tax, discount, rounding and total.
Choose the correct printer/paper in the supported browser/system dialog or configured receipt-printer flow.
Print one test and compare it physically to preview. Correct scale/margins/driver before routine printing; a good on-screen preview does not prove the printer is configured.
Check the result The intended layout prints legibly on the intended paper.
Where to go Windows / Android → Previous bills → Preview / Print
Before you start Be online for the original server receipt format.
Steps
Open the existing confirmed invoice and choose Preview / Print.
Complete the offered web session/authentication if requested, and review the original server receipt.
Use the available system/browser print or PDF action with the configured printer. Supported devices/drivers determine the actual connection options.
Check the invoice reference matches the existing sale. Printing failures should be retried on this invoice, not by selling again.
After offline synchronization, print the confirmed server invoice if needed and distinguish it from the earlier provisional local receipt.
Check the result A copy of the correct confirmed invoice uses the web format.
IN PRACTICE
A practical example
An outlet can use a receipt roll while another uses A4. Both can bill the same product, but their location-specific layout and printer paper settings must be checked separately.
Common questions
Why does preview differ from paper?
Review printer driver, paper size, scale, margins and browser headers/footers.
Can an offline receipt be identical to a server invoice?
The current offline receipt is marked provisional. Exact original web output needs server confirmation and the online flow.
Web + native POS
Reports
Always filter by the same date range and locations before comparing reports. Sales, collections, dues, profit and cash represent different measurements.
4 procedures · Field reference · Practical example · Common questions
Choose a report by the question you want answered. Stock report answers quantity at an outlet; sales reports answer billed activity; payment reports answer collections; profit/loss considers costs; the register concerns a cashier’s drawer. Always align date, outlet and status filters before comparing numbers. Exports reflect the selected scope, not necessarily the entire business.
SCREEN GUIDE Reports — module overview. Select the screenshot to enlarge; optional fields may differ in your business.
Field reference
Use this while completing the form. A required field is marked with *; conditional fields appear only when enabled.
Field / control
What to enter or understand
Date range / outlet / staff / status
Scope of the figures. Different scope produces valid but different totals.
Sales / payment / due
Invoice value, money collected and unpaid balance are distinct.
Cost / profit
Depends on recorded purchases and valuation rules; incomplete starting costs can mislead.
Stock / lot / expiry
Quantity and ageing data, not money received.
Items report
Compact’s item-focused report/customisation; review product/variation, quantity/value and available filters.
Export / column visibility
Save/display selected information. Confirm scope and protect customer/staff data.
Before you start Manager/report permission may be required.
Steps
Use Purchase & Sale for trading totals, Profit / Loss for operational profitability, and Tax Report for configured tax figures.
Use Stock Report, Lot Report, Stock Expiry and Stock Adjustment Report for inventory. Use Product Purchase/Sell and Purchase & Sale Product for item movements.
Use Sell Payment, Purchase Payment, Payment by Age and Supplier & Customer reports for collections and balances.
Use Expense Report and Register Report for spending/shifts. Use Sales Representative and Customer Groups reports where applicable.
Use Items Report for the customized item-focused view. Set its offered date/location/product filters and check displayed quantities/totals before exporting.
Check the result You are comparing records that answer the same business question.
Before you start Products must have correct units, location and recorded stock movements.
Steps
Filter item sales to the intended outlet and period. Compare quantities by product/variation rather than only category totals.
Open Stock report for the same outlet and compare remaining quantity and low-stock thresholds.
Review batches/expiry when ordering perishable goods; high stock with short expiry may not justify replenishment.
Create the appropriate supplier order/purchase or transfer after the manager reviews demand.
Check later receipts/transfers in the stock report so duplicate replenishment is avoided.
Check the result Purchasing decisions use sales demand and actual outlet stock together.
IN PRACTICE
A practical example
A 1,000 credit invoice today can appear in sales with no cash collected. A 500 collection on last month’s invoice can appear in today’s payment report without adding 500 to today’s new sales.
Common questions
Why does dashboard total differ from a report?
Align period/location/status and determine whether the figure is invoiced, net of returns, or collected money.
Is report export a backup?
An export is a selected report, not the complete server database or unsynchronized device records.
Web portal
Payment Accounts
Payment Accounts tracks accounts used for transactions. Accounting adds chart-of-accounts, journals and financial statements. Use the workflow approved by your bookkeeper.
3 procedures · Field reference · Practical example · Common questions
Payment Accounts records the bank/cash balances used by payments and transfers. A payment method such as Card describes how money moved; a payment account identifies where it belongs. Use deposits/transfers for movements between accounts and the original sale/expense payment flow for settling transactions. The separate Accounting module explains the chart and journals.
SCREEN GUIDE Payment Accounts — module overview. Select the screenshot to enlarge; optional fields may differ in your business.
Field reference
Use this while completing the form. A required field is marked with *; conditional fields appear only when enabled.
Field / control
What to enter or understand
Payment account name / number / type
Identify the real cash/bank account without storing unnecessary sensitive credentials.
Opening balance / date
Verified starting funds at the agreed cut-over date.
Deposit / transfer / operation date
Actual movement and time. Source/destination must be correct.
Before you start Have the account name/type and accurate opening balance.
Steps
Add the payment account and its opening details. Use a recognizable name such as Shop Cash or Business Bank.
Select the relevant account when entering purchase, sale or expense payments where offered.
Use account transfer/deposit controls for actual movements; include a reference and date.
Review account transactions, Cash Flow and Payment Account Report with the intended date range.
SCREEN GUIDE Maintain a payment account — look for the controls described in the steps. Select the screenshot to enlarge; optional fields may differ in your business.
Check the result Payments and transfers appear in the accounts selected for them.
PROCEDURE 02
Transfer or deposit funds with a traceable reference #
Where to go Payment Accounts → account Actions; Accounting → Transfers where offered
Before you start Know which account physically paid and which received money.
Steps
Open the actual source account and review its balance/history before entering a transfer.
Choose the permitted transfer/deposit action, select source/destination as offered, and enter actual amount/date.
Add a reference/note identifying the movement. Check the destination is not the same account by mistake.
Save and read both account histories. Reconcile the movement with the bank/cash record.
Do not add a matching expense or sale for a simple transfer: it moves funds rather than creating income or a cost.
Check the result The money movement has a reference and correct account destinations.
Before you start Use a verified account and the relevant date range.
Steps
Open the account detail/history and check its starting balance.
Set the intended period, then inspect each collection, payment, deposit and transfer with its reference.
Compare recorded movements to the bank statement or cash count. A closing balance alone does not identify missing transactions.
Open the underlying transaction for a mismatch; correct through its proper payment/action flow when authorised.
Retain the reconciled period and explanation rather than entering an unexplained deposit to force a balance.
Check the result The account balance can be explained by its movements.
IN PRACTICE
A practical example
Moving 2,000 from bank to cash changes two account balances. It is not new sales revenue. Recording both a transfer and a fictitious expense for that move would misstate the books.
Common questions
Are UPI and my bank account the same field?
UPI is a payment method; the account records where those funds belong.
Should I journal every POS sale manually?
Review mapping first. Manual entries can duplicate transactions already posted by the configured integration.
Web portal
Accounting
Classify transactions and review financial statements through the chart, mappings and balanced journals.
5 procedures · Field reference · Practical example · Common questions
Payment Accounts tracks where money is held and its movements. Accounting adds a chart of accounts, journals, mapping and statements. A cash/card method is not itself a general-ledger account. Opening balances need an agreed cut-over date; posting manual journals on top of automatically mapped transactions can duplicate accounting entries. These full finance screens are web workflows for authorised staff.
SCREEN GUIDE Accounting — module overview. Select the screenshot to enlarge; optional fields may differ in your business.
Field reference
Use this while completing the form. A required field is marked with *; conditional fields appear only when enabled.
Field / control
What to enter or understand
Primary / sub / detail type
Classification in Chart of Accounts for the financial statement structure.
GL code / parent / balance as of
Unique ledger reference, hierarchy and opening-balance date.
Journal reference / date / note
Identity and explanation for a manual adjustment.
Journal debit / credit lines
Balanced accounting entry. Equal sums are necessary but do not prove the selected accounts are correct.
Transaction mapping
Configured accounts for business transactions. Review mapping before relying on statements.
Report period
Date scope for trial balance, ledger, income/balance reports.
Before you start Check mappings and posted entries first.
Steps
Select the statement and the reporting date/range: trial balance, balance sheet and receivable/payable ageing are available in the installed Accounting routes.
Use the same reporting scope when comparing statements. Open ledger/detail links to investigate an unexpected balance.
Compare aged dues against customer/supplier ledgers and confirm unapplied payments or opening balances.
Export the reviewed statement for your bookkeeper.
Check the result Statements have an explainable connection to the recorded transactions.
Where to go Payment Accounts; Accounting → Reports
Before you start Use matching periods and an approved opening-balance basis.
Steps
Compare recorded account movements with bank/terminal/cash evidence.
Review outstanding customer/supplier balances and unmapped transactions where the module offers them.
Open trial balance/ledger and income/balance reports with the same intended period.
Trace discrepancies to opening balances, missing or duplicate movements, dates and mappings.
Complete the review with the accountant before making closing adjustments. The POS drawer report alone is not a complete financial statement.
Check the result Reported balances have been checked against underlying movements.
IN PRACTICE
A practical example
Moving 2,000 from bank to cash changes two account balances. It is not new sales revenue. Recording both a transfer and a fictitious expense for that move would misstate the books.
Common questions
Are UPI and my bank account the same field?
UPI is a payment method; the account records where those funds belong.
Should I journal every POS sale manually?
Review mapping first. Manual entries can duplicate transactions already posted by the configured integration.
Web portal
CRM
CRM helps staff remember who to contact and what to do next. Availability and access depend on your role and subscription.
7 procedures · Field reference · Practical example · Common questions
CRM manages prospects and customer interactions before and around sales. A Lead is a prospect, Source describes where it came from, Life stage describes its relationship stage, and a Follow-up is a dated action assigned to staff. Completing a follow-up does not necessarily make a lead a paying customer. Campaigns send external communications; templates do not send by themselves.
SCREEN GUIDE CRM — module overview. Select the screenshot to enlarge; optional fields may differ in your business.
Field reference
Use this while completing the form. A required field is marked with *; conditional fields appear only when enabled.
Field / control
What to enter or understand
Lead name / mobile / email
Identify the prospect and intended contact channel. Search first to avoid duplicates.
Source / life stage / assigned staff
Acquisition channel, relationship state and person responsible.
Follow-up title / contact / type / category
What action is needed, with whom, and how it will occur.
Start / end / status / description
Appointment period, real progress and useful discussion notes.
Notify via / notify before
Reminder channel/timing where configured; separate from permission for external marketing.
Campaign name / type / recipients / subject / body
Outbound message content and audience. Review actual recipients before sending.
Proposal / template
Prepared offer; check customer-specific terms before sharing.
Contact login
Customer portal account scoped to its contact, not a staff/admin role.
Before you start Have a specific action and the intended contact.
Steps
Enter Title, Contact and follow-up Type/category. Describe the purpose, such as checking approval for a quotation.
Set Start/End date-time and assigned Users. Choose initial Status and relevant Description.
Review reminder channel and lead time where offered. Save and check the follow-up list/calendar for the intended date.
After the call/visit, enter the outcome through the log/edit action and update status.
Create the next action with a new date if needed. Do not mark a missed call as a completed agreement.
SCREEN GUIDE Schedule and complete a follow-up — look for the controls described in the steps. Select the screenshot to enlarge; optional fields may differ in your business.
Check the result The interaction and next commitment are traceable.
Where to go CRM → Contact login / enabled portal controls
Before you start Use an authorised administrator and the intended customer contact.
Steps
Select the correct contact and enter the customer user details required by the form.
Assign only the portal permissions needed; this is not a staff administrator account.
Use your business’s approved credential handover/reset procedure rather than printing passwords on customer documentation.
Have the customer check their own permitted bills/orders through their portal account.
If a customer can see unrelated records, stop using that access and ask the administrator to correct its contact/permission scope.
Check the result Customer access is restricted to the intended portal scope.
IN PRACTICE
A practical example
A prospect from a shop visit has Source = Visit and an assigned salesperson. The follow-up is a Tuesday call to discuss the quotation. Record its outcome, then either schedule another call or use the actual sale workflow when the customer orders.
Common questions
Does a campaign template send immediately?
Saving a template and sending a campaign are separate actions. Review the actual recipients and send controls.
Why does my colleague not see a follow-up?
Check assignment, period/status filters and CRM permissions.
Web portal
Project Management
Projects group a piece of work, its team and tasks. This module is in the web portal; it is not a native POS screen.
9 procedures · Field reference · Practical example · Common questions
A project is a container for work, people, dates and related records. Tasks describe individual deliverables. Time logs record time spent, not task completion. Project invoices bill the customer, not the employee’s payroll. Project Lead is the responsible staff user, distinct from a CRM sales lead. Use the project’s settings to enable the optional time, documents and invoice tabs and to control what members can change.
SCREEN GUIDE Project Management — module overview. Select the screenshot to enlarge; optional fields may differ in your business.
Field reference
Use this while completing the form. A required field is marked with *; conditional fields appear only when enabled.
Field / control
What to enter or understand
Name * / Description
Give the project a recognisable title and clear scope, acceptance criteria and exclusions. Avoid putting every small action only in the description.
Customer
Contact for customer work. Internal work may not require a customer until an invoice is needed.
Status *
The current overall project stage from configured choices. A project stage is separate from the status of each task.
Lead *
Responsible project user. This field does not select a CRM prospect.
Start date / End date
Planned dates for the project. Tasks have their own due dates; review both when a plan changes.
Members * / Categories
Staff who participate and one or more categories for organisation. Membership and edit permissions are separate checks.
Task Subject * / Description
Specific work item and what counts as done. Include the output needed, not merely a vague topic.
Task Start date / Due date / Priority *
Scheduling and urgency for that task. Priority does not automatically change its due date.
Task Status * / Members *
Actual progress and responsible project members. A task assigned to nobody useful will still remain on the project.
Task custom fields
Additional business-specific values. Follow the administrator’s meaning; these are not mandatory for every project.
Time log Task / User / Start / End / Note
The person, work item and actual period worked. End must be later than start; avoid overlapping or duplicated logs.
Project Settings
Time logs, notes/documents, invoices, list/Kanban view, task prefix and member add/edit controls where offered.
Invoice Title / Customer / Location / Date / Scheme
Billing identity and numbering. Required customer/location must match the intended business transaction.
Invoice Task / Rate / Quantity / Tax / Discount
Billable work lines and amounts. Recorded time is not automatically proof of an approved rate or billable quantity.
Where to go Project → Projects → Add / Create Project
Before you start Identify the lead, members and intended customer before entering the form.
Steps
Enter Name and Description. Describe the outcome, such as installing a shop’s shelving and training its staff, so the team understands the scope.
Select Customer when the project belongs to a client. Choose the overall Status and the staff user responsible as Lead.
Set Start date and End date realistically. Add the Members who will work on it and the intended project Categories.
Complete any configured custom fields using your business definitions. Save and reopen the project.
Check Overview for lead, dates and members. If a colleague cannot see it, review membership and role access before creating a duplicate project.
SCREEN GUIDE Create and plan a project — look for the controls described in the steps. Select the screenshot to enlarge; optional fields may differ in your business.
Check the result A project exists with a clear owner, scope and participating team.
Before you start The project lead or administrator normally controls these settings.
Steps
Open Settings for this project. Enable time logs, notes/documents and invoices only when the team will use those features.
Choose task List view or Kanban board where offered. Set a readable task ID prefix for references.
Review whether members can add/manage tasks, time logs and notes/documents. Give the access needed for the work without sharing the lead’s login.
Save settings, reopen the project and check which tabs actually appear. Tabs depend on both feature settings and user access.
Have a member review their own view. If an enabled feature still does not appear, ask the administrator to inspect access/configuration rather than promising an unavailable tab.
SCREEN GUIDE Set project tabs and member permissions — look for the controls described in the steps. Select the screenshot to enlarge; optional fields may differ in your business.
Check the result The project has the intended tools and staff access.
Before you start Break the project into work items that someone can finish and verify.
Steps
Choose Add Task and enter a specific Subject, such as Fit shelf in aisle 2. Explain the required output and checks in Description.
Set Start date and Due date. Select Priority and the actual starting Status.
Select Members from the project’s team. Assign the people accountable for this task; project membership alone is not a task assignment.
Complete applicable custom fields and Save. Open the task to confirm assignee, deadline and scope.
Create separate tasks for distinct deliverables rather than one unmanageable task called Complete project. Review the list with the team.
SCREEN GUIDE Create a task and assign its deliverable — look for the controls described in the steps. Select the screenshot to enlarge; optional fields may differ in your business.
Check the result The task has an accountable person and a clear completion condition.
Where to go Project → My Tasks; project → Task → View
Before you start Use your own staff account so updates are attributable.
Steps
Open My Tasks or the project task list. Set project/assignee/status/due-date filters to locate your current work.
Open the task and read its description and existing discussion. Add a comment with the actual progress, question or blocker.
Change status through the offered status action when the stage changes. If a Kanban move is available, check the saved status after moving the card.
Update the due date/assignment through the authorised edit action when the lead agrees to a plan change. Explain significant changes in the discussion.
Mark the task completed only after the required output is checked. Check project Overview separately; completing one task does not necessarily close the entire project.
SCREEN GUIDE Work through tasks, comments and status — look for the controls described in the steps. Select the screenshot to enlarge; optional fields may differ in your business.
Check the result The task reflects actual work and the next person can understand its history.
Where to go Project → project → Time logs / task → time-log action
Before you start The project must expose the time-log feature and your role must permit it.
Steps
Choose Add time log and select the correct task and User if the form offers them.
Enter actual Start date/time and End date/time. Add a short Note describing the work performed, then Save.
Review the duration and task/project association in the list. A log of 10:00 to 11:30 represents 1 hour 30 minutes, not a quantity of 1.30 decimal hours.
Use Edit on the mistaken log when authorised. Check for overlapping entries before adding another log for the same period.
Open Project Reports → Project/Employee time-log report with the intended date range to review time recorded across staff.
SCREEN GUIDE Before recording time, review Enable Time Log and member permissions in Project Settings; the detailed time-log fields are explained above. Select the screenshot to enlarge; optional fields may differ in your business.
Check the result Work time is attributed to the correct task/person and can be reviewed.
Before you start Enable invoicing and use lead/admin access; confirm the customer-approved scope and rates.
Steps
Enter invoice Title, Invoice Scheme, Customer, Business Location and Invoice date. Set payment terms and the intended draft/final status offered by the form.
Add billable Task lines with Rate and Quantity. Check units/time interpretation; a time log is not automatically a customer-approved bill.
Select applicable tax and any authorised discount. Review each line and the total, then enter Terms and Notes appropriately.
Save the intended invoice and open its detail. Check customer, number, dates, lines and payment status.
Use the offered payment/view/print actions for that invoice. Do not also create a retail POS invoice for the same work unless the manager has a deliberate accounting reason.
SCREEN GUIDE Create a project invoice — look for the controls described in the steps. Select the screenshot to enlarge; optional fields may differ in your business.
Check the result The customer is billed once for the agreed project work.
Where to go Project → Reports; project → Overview / Edit
Before you start Review work, time and invoices separately before final closure.
Steps
Filter reports by project/person and date. Compare task completion and actual time with the plan.
Review open tasks, blocked items and notes. Reassign or correct due dates through the lead rather than hiding incomplete work.
Check the project invoices and outstanding payments. Completion of work and collection of money are distinct events.
Record a completion note and update the overall project status through its authorised edit action when the deliverables are accepted.
Keep the project and its history for reference. Do not delete completed projects simply to clean up the active list; filter by status.
Check the result The project is closed based on checked deliverables and traceable billing.
IN PRACTICE
A practical example
Shop setup project: create a project for Sample Customer, assign a manager as Lead and two staff as Members. Add Survey, Fit shelving and Train cashier as separate tasks. Log actual fitting time against its task, store the accepted layout in Documents & Notes, and create one agreed installation invoice. Review all tasks and invoice balance before closing the project.
Common questions
Why can I not assign a staff member to a task?
Check that the person is a project member and that you can edit task assignments.
Where are Time logs or Invoices?
Their visibility depends on project settings and role/lead access. Enable and verify the actual tab before planning its use.
Is Project Lead a CRM lead?
No. It is the staff user responsible for the project.
Why does a completed task not make the project completed?
The project contains several tasks and separate overall status. Review all deliverables and close the project through its own flow.
Web portal
HRM
HRM manages staff attendance, leave and payroll workflows. Essentials supports daily tasks and workplace information. Access differs between staff and managers.
6 procedures · Field reference · Practical example · Common questions
HRM concerns employees, attendance, leave and payroll. Essentials includes to-dos, reminders, shared notes/knowledge and other enabled work tools. Attendance records time; leave approval records permission to be absent; payroll records calculated pay and its payment. Clocking in does not prove payroll was paid. Use restricted HR access for staff records and review generated payroll before finalizing it.
SCREEN GUIDE HRM — module overview. Select the screenshot to enlarge; optional fields may differ in your business.
Field reference
Use this while completing the form. A required field is marked with *; conditional fields appear only when enabled.
Field / control
What to enter or understand
Employee / department / designation
Staff identity and organisation. Separate cashier login access from payroll setup.
Shift / clock-in / clock-out
Scheduled work period and actual attendance timestamps. Review overnight/date/timezone effects.
Leave type / dates / reason / status
Requested absence and approval decision; days and entitlement depend on the configured policy.
Holiday location / dates
Which outlet and period the holiday applies to.
Payroll period / duration / rate
The pay calculation basis. Hours, days and months are different duration units.
Allowance / deduction / fixed or percent
Approved additions/subtractions and effective period; review percentage basis before saving.
Payroll group status / payment
Prepared/final state and actual payment are separate.
To-do task / assigned users / priority / due
Work item and responsible team. It is separate from a Project task.
Reminder repeat / date / time
When the reminder should appear under the configured channel.
Knowledge sharing / users
Which staff can view a shared knowledge item or document.
Before you start Configure leave types/limits and role-based approval first.
Steps
Choose Add leave, select the employee/type and enter start/end dates and a useful reason.
Save the request and inspect its status. A submitted request is not necessarily approved absence.
The authorised reviewer checks entitlement/schedule and uses the approval/rejection action offered.
Reopen the leave record to verify the decision and period. Check attendance/payroll impact under the actual configured policy.
For a corrected date/type, use the authorised edit/review flow so staff know which period is approved.
SCREEN GUIDE Request, approve and review leave — look for the controls described in the steps. Select the screenshot to enlarge; optional fields may differ in your business.
Check the result The absence request and decision remain distinguishable.
Where to go HRM → Payroll / allowance and deduction controls
Before you start Approve pay rates, attendance, leave and payroll period before calculation.
Steps
Choose the intended employee group and payroll period. Review the group name/status and each employee’s duration unit/rate.
Check calculated hours/days/months against approved attendance and leave. Add only approved allowances/deductions with the correct fixed/percentage meaning.
Review each employee total and notes. Save a draft/prepared payroll when the workflow permits review before finalization.
Finalise through authorised HR controls only after approval; then record the actual payment through its payment action.
Inspect payroll/payment reports and provide the appropriate payslip. A saved payroll is not evidence the employee received money.
Check the result Approved pay calculation and actual payment are both recorded.
IN PRACTICE
A practical example
A staff member requests leave Monday–Tuesday. The manager approves it. Payroll later uses the shop’s leave and attendance policy to determine payable time; a leave approval does not itself create a salary payment.
Common questions
Does Clock In open a POS cash register?
No. Staff attendance and cashier register opening are different actions.
Why does a saved payroll show unpaid?
Pay calculation/finalization and actual payment are separate steps.
Should I put project work in To Do or Project?
Use To Do for a standalone staff action; Project tasks belong to a project’s deliverables, time and billing workflow.
Web portal
Essentials
Organise everyday staff actions and shared instructions independently of payroll and project billing.
3 procedures · Field reference · Practical example · Common questions
A To Do is a standalone assigned work item with priority, deadline and status. A Reminder is a scheduled prompt; it does not prove a task was completed. A Knowledge Base item stores reusable instructions with an explicit sharing scope. These staff tools are distinct from Project tasks, which belong to a project with its own team, time and invoices.
SCREEN GUIDE Essentials — module overview. Select the screenshot to enlarge; optional fields may differ in your business.
Field reference
Use this while completing the form. A required field is marked with *; conditional fields appear only when enabled.
Field / control
What to enter or understand
Task / Description
State the actual action and expected result, such as Count aisle 2 before closing.
Assigned users / Priority / Status
Who is accountable, urgency and actual progress. Assignment alone does not complete work.
Start / End / estimated hours
Schedule and effort estimate, not a payroll calculation.
Reminder name / repeat / date / time
Which prompt and when it should repeat. Review the timezone and intended channel.
Knowledge title / content
Reusable instruction and its supporting details.
Share with / user IDs
Intended staff audience. Do not make confidential HR information broadly visible.
Where to go Essentials → To Do List / other available tabs
Before you start Assign each task a responsible person and due date.
Steps
Choose Add in To Do List and enter a clear task description, assigned users, priority and due date.
Save, then use the list/status filters to find your work. Update status as work progresses.
Use available document, memo, reminder, knowledge-base or messaging tools according to your business permissions.
Review completed and overdue tasks rather than creating duplicate tasks for the same work.
SCREEN GUIDE Use to-dos and Essentials tools — look for the controls described in the steps. Select the screenshot to enlarge; optional fields may differ in your business.
Check the result Day-to-day work remains visible to the assigned users.
Before you start Use the approved reminder channel and correct business time.
Steps
Choose Add reminder and enter a recognisable Name describing the action.
Choose the actual repeat schedule and date/time controls offered. A one-time date and a repeated weekday are different rules.
Save and review the reminder list for the next intended occurrence.
When the reminder appears, complete the real work and update its To Do or relevant module separately.
Edit/stop the schedule when no longer needed through the authorised control; dismissing one prompt is not necessarily cancellation of all repeats.
Check the result The intended staff prompt has the correct schedule.
IN PRACTICE
A practical example
Create a To Do for today’s stock count, a Reminder for the month-end review and a Knowledge Base instruction explaining how to count. They support one another but are three separate records.
Common questions
Is a To Do the same as a Project task?
No. Project tasks are tied to project membership, progress, time and billing.
Why can another staff member not read a note?
Check its sharing choices and the person’s Essentials permissions.
Web portal
Repair
Repair records connect intake, device details, diagnosis, service work and customer billing. Use the web module for the complete job workflow.
9 procedures · Field reference · Practical example · Common questions
Repair separates physical intake from billing. A job sheet records the customer device, reported issue, condition, technician and progress. A repair invoice charges for agreed parts/work and records payment. A status such as Ready for collection describes the job; Paid describes the invoice. One does not automatically prove the other. Use the web Repair menu for the full job-sheet workflow; the native retail POS is not a replacement for its technician screens.
SCREEN GUIDE Repair — module overview. Select the screenshot to enlarge; optional fields may differ in your business.
Field reference
Use this while completing the form. A required field is marked with *; conditional fields appear only when enabled.
Field / control
What to enter or understand
Business Location / Customer *
Outlet receiving the item and the existing customer responsible for it. Check mobile number so collection and permitted notifications reach the right person.
Service Type *
Select the actual carry-in/pick-up/on-site option offered by your configuration; enter the visit/pick-up address when applicable.
Brand / Device / Device Model
Maker, broad device type and specific model. Define these in Repair Settings so technicians can filter consistently.
Serial number *
Identifies the physical item. Copy it accurately; two identical phone models can belong to different customers.
Passcode
Sensitive device-access detail if required for the authorised work. Do not put customer credentials on public screenshots or ordinary invoice notes.
Product configuration
Relevant specifications such as storage/capacity or installed components. Record what affects diagnosis and part selection.
Problem reported by customer
The customer’s account of the fault. Keep it distinct from the technician’s confirmed diagnosis.
Condition of product
Intake condition, visible damage and accessories received. Record observations before taking custody.
Assign service staff / technician comment
Person responsible and their work notes. Assignment does not itself complete the repair.
Estimated cost / Due date
Expected charge and promised completion time. An estimate is not a finalized invoice or proof of payment.
Status *
Configured workflow stage. Completion flags/notification behavior depend on the status setup; choose the appropriate stage, not just a pleasing colour.
Document / custom fields
Intake photos and business-specific information. Upload only relevant permitted files; control who can access them.
Send notification: SMS / Email
Explicit outbound messaging selection. Confirm contact and configured gateway/template before sending; saving the job is separate from permission to message a customer.
Parts / repair invoice lines
Actual product variations, quantities, prices and service charges. Check physical use and stock; a proposed part list is not automatically a paid invoice.
Pre Repair Checklist
Model-specific intake checks where configured. Mark the actual condition and N/A only when the check does not apply.
Save / Save and add parts / Save and upload docs
Save the intake alone, or save and continue directly to parts/documents. Review the saved job reference in each case.
Before you start Owner/manager access is needed to maintain shared workflow choices.
Steps
Open Settings and review Status. Create understandable stages such as Received, Diagnosing, Waiting for parts and Ready, using the controls actually offered.
Review any completion/default/notification options before saving. A completed flag can affect how jobs appear; do not set every stage as completed.
Under Devices, add types such as Phone or Printer. Under Device Models, choose the corresponding brand/device and enter the model.
Review Repair settings and Job sheet PDF settings for job references, custom fields, terms and printed intake presentation.
Open an unsaved Add Job Sheet form and confirm the intended model/status choices appear. Train reception and technicians on the same stage definitions.
SCREEN GUIDE Configure repair statuses, devices and models — look for the controls described in the steps. Select the screenshot to enlarge; optional fields may differ in your business.
Check the result Staff can describe devices and progress consistently.
Before you start Have the customer and item present and record its condition before accepting it.
Steps
Select Business Location and the existing Customer. Search by saved name/mobile to avoid a duplicate contact; add a customer only when genuinely new.
Choose Service Type, Brand, Device and Device Model. Enter the physical Serial number and relevant configuration.
Record the Problem reported by customer and Condition of product separately. List accessories received and visible damage in the appropriate fields.
Assign service staff if known, choose the intake status and due date, and enter the estimated cost if agreed. Store necessary technician notes in the appropriate field.
Attach permitted intake photos/documents. Review any notification checkboxes and leave them unselected unless an approved message is intended.
Save the job sheet and note its reference. Reopen it from Job Sheets to check customer, serial, assigned person and due date before handing out the intake copy.
SCREEN GUIDE Create a job sheet at intake — look for the controls described in the steps. Select the screenshot to enlarge; optional fields may differ in your business.
Check the result One traceable job sheet identifies the customer’s device and promised work.
Where to go Repair → Job Sheets → row Actions / View
Before you start Use the saved job reference and check print settings first.
Steps
Find the job by reference/customer/serial and open its detail or row Actions.
Choose the offered job-sheet print/PDF action. Check the customer, serial, condition, estimate and terms in the preview.
Use the offered label action when the device needs an identifying workshop tag. Preview the job identifier and model before printing.
Print a readable intake copy/tag at the matching paper size. Keep confidential device-access information out of unnecessary customer copies.
Attach the tag to the correct device and accessories. Reprinting an existing job does not create another job or invoice.
SCREEN GUIDE Print the job sheet or item label — look for the controls described in the steps. Select the screenshot to enlarge; optional fields may differ in your business.
Check the result The customer and workshop can reference the same intake record.
Where to go Repair → Job Sheets → View / Edit / status action
Before you start The technician must have access to the job or assigned-job permission.
Steps
Filter Job Sheets by location, status and technician. Open the correct reference and review reported issue, intake condition and attachments.
Use the assignment/edit control to select the responsible service staff. Save and confirm it appears in the job details.
Record diagnostic findings in technician comments/notes. Distinguish confirmed work from the customer’s original fault description.
Change the job status as the work progresses, for example waiting for parts or ready for collection, using the configured choices.
Review notification recipients and message before any permitted send. Check the activity/history so another staff member understands what changed.
SCREEN GUIDE Assign a technician and update job progress — look for the controls described in the steps. Select the screenshot to enlarge; optional fields may differ in your business.
Check the result The job shows the current owner, work notes and real stage.
Before you start Confirm the appropriate product variation and physical stock at the repair outlet.
Steps
Open the saved job and choose its Add parts/parts control where offered.
Search and select the specific part variation. Enter the quantity and review the unit and any displayed price/stock.
Record only parts needed for this job and save the list. Correct a mistaken unsaved row before submission.
When creating the repair invoice, review which parts were brought into billing and compare quantities with the actual work.
Check stock history after the final billing workflow. Do not also make a separate retail sale for the same parts without a reason; that can duplicate charges/stock movement.
SCREEN GUIDE Add required parts to a job — look for the controls described in the steps. Select the screenshot to enlarge; optional fields may differ in your business.
Check the result The job’s part requirement and invoice quantities can be reconciled.
Where to go Repair → Job Sheets → invoice action; or Repair → Add Invoice
Before you start Confirm completed/approved work and obtain permission for any changed charge.
Steps
Prefer the saved job’s invoice action when offered so the invoice remains connected to the intake record. If using Add Invoice, select the correct customer and job/device details on the repair sale screen.
Review the linked job reference, serial and status. Add the actual parts and the configured service/labour item; do not treat an estimated cost as the final line automatically.
Check quantities, unit prices, discounts and applicable tax. Read the final total and customer notes/terms.
Record the actual payment method and amount. Leave a genuine unpaid balance when the customer has not paid; do not mark a quotation as a paid repair.
Save through the offered invoice workflow. Open List Invoices, confirm the bill and payment history, and preview/print the customer invoice.
Check the linked job stage and activity independently. Billing/payment completion does not prove the device was handed back.
SCREEN GUIDE Add a repair invoice from the job — look for the controls described in the steps. Select the screenshot to enlarge; optional fields may differ in your business.
Check the result The repair has a traceable bill for the agreed work and actual payment.
Before you start Match the collecting person/device to the saved job and invoice.
Steps
Open the repair invoice and inspect payment history and remaining due. Collect only the verified outstanding balance.
Use the offered Add payment action with the correct date, method and reference, then reopen the bill to confirm the balance.
Review the job’s work notes and condition, explain the repair and warranty terms shown on the approved document.
Return the correct device and listed accessories. Update the job to the configured delivered/completed stage only after the actual handover.
Provide the invoice and retain the job/invoice references for follow-up. If a customer reports a recurring fault, consult the original job instead of silently overwriting its history.
SCREEN GUIDE Collect a repair balance and return the item — look for the controls described in the steps. Select the screenshot to enlarge; optional fields may differ in your business.
Check the result Money and physical handover are recorded separately and both can be checked.
Where to go Repair → Dashboard / Job Sheets / List Invoices
Before you start Use the same outlet and date filters across the review.
Steps
Use the dashboard to identify workload, then open the underlying job list rather than relying only on a summary number.
Filter open jobs by status/technician and examine due dates. Contact the responsible staff for jobs waiting on approval or parts.
Compare ready/completed jobs with invoices and unpaid balances. A completed workshop job may still have a receivable.
Review activity/documents for disputed or delayed jobs. Correct factual details through the authorised edit flow and preserve traceability.
Give the next shift a list of pending job references, next actions and promised dates.
Check the result Reception and technicians agree on outstanding jobs and balances.
IN PRACTICE
A practical example
A customer brings a printer with paper jams. Reception records serial P-DEMO-01, two cables received and a scratched lid, then assigns a technician and an estimate. The technician records a worn roller and adds the correct part. The invoice bills the agreed roller and labour, records actual payment, and the job is marked handed over only after the printer and cables are returned.
Common questions
Why is my job not in a technician’s list?
Check assignment, location/date/status filters and assigned-job versus view-all permissions.
Is the estimated cost already a sale?
No. It is an estimate on intake; create and check the repair invoice separately.
Where is Add Job Sheet in Android POS?
The full Repair job-sheet and technician workflow is documented for the web portal. Use the browser for this module.
Does changing status send a message?
It depends on status/settings and the selected notification controls. Review recipient and configured template; do not assume every save is silent.
Web portal
WooCommerce
Synchronise the configured online shop’s products and orders, then verify the linked records.
2 procedures · Field reference · Practical example · Common questions
WooCommerce integration connects a configured external shop to Compact. Review product/variation/pricing mappings, sync direction and order references before routine use. A successful connection is not proof every product or order was imported correctly. Keep credentials administrator-managed and test a small approved scope first. Notification Templates and Connector are documented in their own modules.
SCREEN GUIDE WooCommerce — module overview. Select the screenshot to enlarge; optional fields may differ in your business.
Field reference
Use this while completing the form. A required field is marked with *; conditional fields appear only when enabled.
Field / control
What to enter or understand
WooCommerce URL / authorised connection
Intended shop and administrator-maintained credentials. Do not expose secrets in screenshots or guide examples.
Product sync fields / categories / exclusions
Which catalogue data goes to the connected shop; Disable WooCommerce Sync can exclude a product.
Order import / sync log
Which external orders were received and their mapped records; check before importing again.
Notification event / subject / body / placeholders
When and what a message says. Verify actual substitution and recipient on an approved test.
Connector client / redirect / authorisation
Approved app identity and login return path. Native sign-in uses public-client PKCE, not an embedded customer secret.
Before you start Use a connected test shop or an approved production sync scope.
Steps
Read the configured shop and selected sync type before triggering product/order synchronization.
Review its result/log and search the resulting product/order reference in Compact.
Check variation, prices, tax and location mapping with a small approved sample.
If an order already exists, investigate its linked reference/status rather than importing it again blindly.
For rejected mappings or connection failures, ask the integration administrator with the sanitized result and time. Do not paste connection keys into public support screenshots.
Check the result The external and Compact records can be matched without duplicate entry.
IN PRACTICE
A practical example
A synchronized WooCommerce order already linked to a Compact invoice must be investigated by its external reference before retrying import. Creating a second ordinary POS sale for it can duplicate billing and stock consumption.
Common questions
Is WooCommerce connected in the sample Demo?
The demonstration data does not prove an active external store connection. Use your administrator’s actual configured shop.
Should a cashier enter an API client secret?
The native public-client login does not embed a client secret. Use the supplied approved connection settings.
Web portal
Connector
Connect authorised desktop/mobile clients to the business API and understand user access.
2 procedures · Field reference · Practical example · Common questions
Connector is an administrator-managed API authorisation area. Ordinary staff use the supplied native app connection and their own portal account. An authorised API client does not bypass role, tenant or location access. Keep client configuration and access tokens private; the current native public-client PKCE flow does not require an embedded client secret.
SCREEN GUIDE Native sign-in uses the approved portal connection; API documentation and staff permissions remain administrator-managed. Select the screenshot to enlarge; optional fields may differ in your business.
Field reference
Use this while completing the form. A required field is marked with *; conditional fields appear only when enabled.
Field / control
What to enter or understand
Approved client
Application identity authorised for the portal.
Redirect / callback
Allowed destination where browser sign-in returns to the app.
User authorisation
Staff login and granted session; it remains scoped by role/business.
API access / limits
Configured subscription/access controls and endpoint availability.
Where to go Connector administrator; native sign-in
Before you start Separate authentication from business data/permission failures.
Steps
Check whether browser sign-in completed and returned to the app.
Confirm the approved client/callback with the administrator if the portal reports an authorisation error.
For a signed-in app with missing data, check subscription, staff role and permitted outlets separately.
Use sign-out/sign-in or the offered refresh as appropriate; preserve pending offline work.
Do not grant broad administrator permissions solely to make a cashier’s API request succeed.
Check the result The actual authentication or access cause is identified.
IN PRACTICE
A practical example
The same live cashier account signs into Windows and Android through the approved client. It still sees only its permitted locations; creating an API connection does not grant administrator rights.
Common questions
Should I change the client ID to fix stock?
No. Verify outlet/data/permissions first and use the administrator’s approved connection.
Where should I share tokens?
Do not include them in screenshots, messages or user documentation. Use the approved support procedure.
Web portal
Notification Templates
Prepare and verify the messages used by sales, customer reminders and enabled modules.
2 procedures · Field reference · Practical example · Common questions
A template defines event/channel wording and placeholder fields. Channel configuration supplies the email/SMS delivery path. A module’s Send action or notification checkbox decides when the message is issued. Verify all three and the intended recipient. Saving a template is not evidence of successful delivery. Auto Send Email, Auto Send SMS and Auto send WhatsApp controls can trigger messages on later transaction events. Review these separately from a manual Send action; saving a changed auto-send setting changes future behavior.
SCREEN GUIDE Notification Templates — module overview. Select the screenshot to enlarge; optional fields may differ in your business.
Field reference
Use this while completing the form. A required field is marked with *; conditional fields appear only when enabled.
Field / control
What to enter or understand
Event / channel
The transaction/reminder and its email/SMS delivery option.
Subject / body
Customer-facing wording; keep it clear and specific.
Placeholders
Supported values substituted at send time. An invented placeholder may remain unfilled.
Recipient / test
Intended contact and an approved test before wider use.
CC / BCC
Additional email recipients. Verify the intended audience, not just the main customer.
WhatsApp text / Auto Send options
Configured message body and automatic transaction-event sends where offered. Do not enable these without checking the channel and audience.
PROCEDURE 01
Review notification templates and a test message #
Where to go Notification Templates; business channel settings
Before you start Use an approved test recipient, not a real customer mailing list.
Steps
Open the template for the intended event/channel and read its subject/body and supported placeholders.
Check that names, invoice/job references and amounts will be substituted appropriately.
Have the administrator verify the channel configuration, then send only the approved test through the offered action.
Review the actual received message and any available delivery/history result.
Train staff on the explicit send or notification checkbox for each module; template editing alone is not proof of delivery.
Check the result Messages are understandable and their intended send behavior is known.
Where to go Notification Templates → event template
Before you start Have the approved wording and know the supported placeholders.
Steps
Open the event/channel template and read its existing subject/body.
Use only the listed placeholders for the customer, transaction, amount or reference you want shown.
Save the wording and review its recipient/send behavior in the relevant module.
Run the approved single-recipient test and inspect the actual message.
Correct wording/substitution before wider use and tell staff which action sends the message.
Check the result The event message is understandable and its substitutions are checked.
IN PRACTICE
A practical example
A repair Ready for Collection template should show the customer’s job reference. Preview/test the message before staff use the status notification control.
Common questions
Does editing a template send it?
Template editing and message sending are separate actions.
Why is the message not received?
Check recipient, channel configuration, result/log and spam/delivery evidence; do not send repeated messages blindly.
Windows + Android
Windows & Android apps
The current apps focus on counter sales, customers/catalogue search, stock, previous bills, register details, expenses, settings and offline sales. Full ERP modules remain in the web portal.
5 procedures · Field reference · Practical example · Common questions
Windows and Android share the same business API while adapting the counter to screen size. Set up users/products/settings on the web, then sign into the native POS with the approved live connection. The browser opens for secure authorisation and returns to the app. Native access remains limited by the same cashier/outlet rules. Updating the app and refreshing business data are separate operations.
SCREEN GUIDE Windows & Android apps — module overview. Select the screenshot to enlarge; optional fields may differ in your business.
Field reference
Use this while completing the form. A required field is marked with *; conditional fields appear only when enabled.
Field / control
What to enter or understand
Live API / Mock Demo
Live connects to the business; Mock/Demo preview is local sample data and is not your live tenant.
Server / client / callback
Approved connection details. The live server is https://31compact.com; do not replace it with 127.0.0.1 for normal live use.
Browser authorisation / callback
Sign in and approve the requested client through the normal flow, then return to the app. Keep authorization codes private.
Outlet / register / user
Verify all three before trading; app installation does not create stock or a staff role.
Settings / offline download / sync
Separate device configuration and local snapshot/queue controls.
Windows package / Android APK
Install the approved complete package; preserve device data with pending sales during updates.
Where to go Supplied Windows package → flutter_pos.exe
Before you start Use the official package supplied by your Compact administrator.
Steps
Download the complete Windows ZIP and extract the whole folder. Keep the executable, DLLs and data folder together.
Open flutter_pos.exe. Choose the Live API mode/tab. Confirm Server URL https://31compact.com and Client ID 13 for the currently deployed portal setup.
Keep the default Windows callback setting. Choose the browser sign-in action, sign in to your own account, complete CAPTCHA if shown and authorize the POS.
Return to the app after callback. Choose your permitted location and check that products/customers load.
Open a shift online before trading. Review Settings for printer/scanner and offline preparation.
Check the result The app uses your live tenant data rather than the separate Mock preview.
Before you start Check the current release’s available controls.
Steps
Use the app for its implemented sale, payment, catalogue/customer search, stock view, history, basic expense and register workflows.
For finalized-bill edits and exact online receipt formatting, follow the supported original web workflow from bill details.
Use the web for catalogue/contact creation, purchases/returns, advanced expense maintenance, detailed settings and ERP modules such as Accounting, CRM, HRM, Project and Repair.
Use a connected device for server actions. Native offline mode provides the limited cached POS workflow described next.
Check the result You do not mistake a web-only workflow for a missing app permission.
Before you start Check unsynchronized sales and retain the existing installation/data.
Steps
Reconnect as the original cashier and resolve queued/needs-review sales before the update where possible.
Obtain the approved newer Windows package or Android APK. Verify the release identification with the business administrator.
Use the normal update path. Keep all Windows runtime files together and avoid clearing Android app data/uninstalling while pending work exists.
Open the updated app, verify connection/business/outlet and review history/local queue.
Refresh/download business data when required; replacing the executable alone does not guarantee a fresh offline catalogue.
Check the result The updated app keeps a traceable connection and local work is preserved.
IN PRACTICE
A practical example
A cashier uses Android for sales and Previous bills while the owner uses the web browser to create products and configure tax. Both use the same live business; a Mock preview is a separate demonstration and will not populate those real records.
Common questions
Why do I land on localhost in browser sign-in?
The Windows callback can be local, but the authorisation server for live use must be the approved HTTPS portal. An authorisation URL at 127.0.0.1 points to a test server.
Does installing Android create another tenant?
No. The authorised account selects the existing business; installation only provides the client app.
Windows + Android
Offline mode
Each Windows/Android installation has its own local storage. It saves an outlet snapshot and queued sales on that device; it does not make the ordinary web portal work offline.
5 procedures · Field reference · Practical example · Common questions
Offline mode has dedicated device-local storage. A successful online download creates the snapshot for one business/user/outlet, and the PIN unlocks that prepared workspace without a network connection. Offline sales are durable local records until accepted by the server. Another device cannot see them or reserve their stock in real time. Synchronization is a business validation step, not just uploading a PDF.
SCREEN GUIDE Offline mode — module overview. Select the screenshot to enlarge; optional fields may differ in your business.
Field reference
Use this while completing the form. A required field is marked with *; conditional fields appear only when enabled.
Field / control
What to enter or understand
Prepared workspace / outlet / last download
Which cached business data is available and when it was captured.
Offline PIN
Device workspace unlock credential, separate from the portal password. Set and keep it private.
Local reference / queued
Device sale awaiting confirmation. Keep the reference through retries.
Confirmed / server invoice
Accepted server transaction with its original invoice identity.
Needs review / rejection reason
Server validation failed; inspect the cause before retrying.
Download vs synchronization
Download updates reference data; synchronization confirms locally saved sales. One does not replace the other.
Encrypted local database
SQLite-backed local records with encrypted payloads and platform-managed key material; server backups do not contain pending device sales.
Where to go Native Settings → Offline mode → Download offline data
Before you start Sign in online, select the outlet and open a shift online first.
Steps
Choose Download offline data. Set an Offline PIN containing 6 to 12 digits and choose Download.
Wait for Offline data downloaded. Check Last download and the selected location.
The saved data includes catalogue, customers, taxes/units, outlet, current register and downloaded finalized history. Prepare each device/outlet separately.
Choose Work offline or the offline sign-in option and enter the PIN. Confirm the app shows offline mode before relying on it.
Check the result This device can use the prepared cashier/outlet data without a connection.
Where to go Native offline POS → payment → Save offline sale
Before you start Use only the cached cashier/outlet and available downloaded stock.
Steps
Search downloaded products and customers. Select the correct batch and quantity; offline quantities are limited by cached stock and sales already saved locally.
Review the prices, discounts and total. Record the payment that actually occurred and choose Save offline sale.
Open Offline sales & synchronization to check the local sale/reference and queued status.
If you print locally, the receipt is provisional and marked OFFLINE RECEIPT — AWAITING SERVER CONFIRMATION. Retain the local reference until synchronization.
Check the result The sale is stored durably on this device awaiting server confirmation.
Where to go Native Offline sales & synchronization
Before you start Preserve the record and read the rejection reason.
Steps
Inspect the reason and original reference. Common causes include changed stock/credit/permissions or register conditions.
Compare server stock and the intended cashier/outlet/register with the offline sale. Ask the manager to resolve the actual business issue.
Use the existing record’s offered retry after correction; keep its original identity.
Check for server confirmation and the resulting invoice before making any new sale for those goods.
If the issue remains, retain the device data and give support the sanitized reference/reason. Do not delete the queue to make the warning disappear.
Check the result The sale either becomes confirmed or remains preserved for a deliberate resolution.
IN PRACTICE
A practical example
Two devices each download stock of 3 mugs. Each may sell 2 while disconnected because neither sees the other’s local sale. On reconnection the server validates actual remaining stock; a rejected sale needs review rather than an invented extra stock quantity.
Common questions
Can server backup recover my queued sale after uninstall?
No. It has not yet reached the server; preserve the device data and synchronize first.
Does offline cover all modules?
No. The current native offline scope covers prepared counter sales/data. Expenses, register open/close, finalized-bill editing and full ERP modules remain online workflows.
All users
Troubleshooting
Start by checking the account, location, connection and filters. Give support a clear description and a screenshot with private details concealed.
3 procedures · Field reference · Practical example · Common questions
Diagnose a problem by the record and action involved: identify the business/outlet/user, note the time and reference, check filters and connection, then inspect the relevant history. Repeating a save is unsafe when acceptance is uncertain. Support needs a clear reproducible description and sanitized screenshot, not passwords or unrestricted copies of customer data.
Field reference
Use this while completing the form. A required field is marked with *; conditional fields appear only when enabled.
Field / control
What to enter or understand
Record reference
Invoice/job/project/local sale reference used to locate the issue.
Expected / actual result
What you intended versus what the screen actually displayed.
Platform / version / connection
Web, Windows or Android, release and online/offline state.
Evidence screenshot
Show relevant controls and message, conceal private/credential data.
Retry / duplicate risk
Determine rejection versus uncertain confirmation before retrying.
Before you start Keep the invoice/reference and do not repeat a payment or sale blindly.
Steps
No products: confirm Live API mode, location, product-location assignment and connection. Offline users need a successful download for that outlet.
No customer match: check stored name/mobile formatting and permissions. Try last digits; reconnect/download to get newly added contacts.
No lot selection: check lot tracking, purchase/opening-stock batch data, available quantity and outlet.
Server not responding: verify the approved HTTPS server. If the address starts 127.0.0.1, you are pointing to a local test service. Sign in again for an expired session.
Unclear sale confirmation: use the pending operation’s Retry confirmation and inspect history before creating another bill.
Printer problem: check printer/driver, paper size, preview and connection. Reprint the existing bill; do not resell.
Missing menu/action: ask the manager to review the role, locations, subscription and enabled module. Some ERP actions are web-only.
Offline PIN locked: wait for the temporary lock period shown. Do not clear app storage to remove the lock while it contains sales.
Check the result You can narrow the cause and preserve your transaction records.
Before you start Use these meanings when discussing records with support.
Steps
SKU identifies a product/variation for search and scanning. Unit is the measurement such as piece or kilogram. Lot/batch identifies stock from a specific receipt.
Opening stock is inventory already owned when starting. Purchase receives supplier goods. Transfer moves goods between locations. Adjustment records a stock discrepancy.
Draft/quotation/suspended bill is saved work. Final sale is an invoice. Paid/partial/due describes payment coverage, not delivery status.
Register is a cashier shift. Opening cash is its float. Expected drawer is calculated cash. Actual closing cash is the physical count.
Queued offline sale is device-only pending work. Confirmed means accepted by the server. Needs review means the saved sale needs attention.
Check the result Staff use the same language for the same events.
Before you start Preserve any pending local records and do not clear storage.
Steps
Write the business/outlet, staff role, platform and approximate time of the problem.
Record the invoice/job/project/local reference and the exact steps that led to the issue.
Describe expected and actual result. Note whether the issue occurs online/offline or only with one item/contact.
Take a screenshot of the relevant message/controls with credentials and private details concealed.
Check history/confirmation status before repeating the action, and provide the result to authorised support.
Check the result Support can identify the affected workflow without guessing or exposing secrets.
IN PRACTICE
A practical example
Useful: Android, Main Store, invoice/local reference X, checkout at 14:10, timeout then queued status, history checked and no confirmed bill yet. Less useful: Cash not working, with no reference or explanation.
Common questions
Should I reinstall to fix a sync warning?
Preserve pending records first. Clearing/uninstalling can remove unsynchronized work.
Should I send my password in a screenshot?
No. Use sanitized evidence and the authorised support/credential procedure.
Web portal
Services & rewards
These web features appear only when enabled for your business. A general retail shop may not need tables, kitchen work or service staff.
5 procedures · Field reference · Practical example · Common questions
Service and restaurant features are conditional controls around a normal sale, not a reason to invent goods or stock. Tables identify seating, service staff identify responsibility, modifiers change the chosen item/order, and Types of service can define a service/packing charge. Rewards and commission are business rules with eligibility and permissions. Inspect the offered controls for your business before training staff on them.
Field reference
Use this while completing the form. A required field is marked with *; conditional fields appear only when enabled.
Field / control
What to enter or understand
Type of service / packing charge
Service selection and configured charge behavior. Check the payable after selection.
Table / service staff
Where the order is served and who handles it. Different from the cashier login.
Modifiers / quantity / charge
Configured additions/options on the item; review their total and kitchen instructions.
Reward points / redemption
Customer eligibility and permitted redemption, distinct from a generic manual discount.
Warranty / commission agent
Product terms and credited salesperson, distinct from technician or service staff.
Subscription validity / limits
Business package access, not user-role permissions.
Where to go Web POS; customer history; commission/reward report
Before you start Use approved rules and a named customer/agent.
Steps
Select the customer and inspect points/eligibility before promising redemption.
Use the explicit reward control where offered; review the final discount/points result.
Select the intended commission agent on the supported sale, following business rules.
Save an approved sample and inspect customer points/history and commission report.
If a native screen does not offer these controls, use the web workflow rather than pretending an arbitrary discount updates points/commission.
Check the result The agreed rewards and staff credit follow the configured feature.
IN PRACTICE
A practical example
A takeaway order can have a configured packing charge while a dine-in order is tied to a table. Check the service type and resulting charge before payment; the cashier’s login and serving staff can be different people.
Common questions
Why is Tables missing?
The business must enable the feature and the user needs access; general retail businesses may not use it.
Does any discount redeem points?
No. Use the configured reward redemption action and check the resulting points history.
All users
Features & availability
Your actual sidebar is the best starting point. A module name in configuration does not guarantee it is installed, enabled for your subscription, or included in the native app.
2 procedures · Field reference · Practical example · Common questions
This manual covers the customer workflows available in the inspected Compact installation and explains the platform boundary. It is not a claim that every upstream Ultimate POS extension is installed or included in every subscription. A feature name in code/configuration is not enough to train users on it: activation, permission, screen and workflow need confirmation.
Field reference
Use this while completing the form. A required field is marked with *; conditional fields appear only when enabled.
Field / control
What to enter or understand
Installed module
Module code present on the portal; it can still be disabled for a tenant.
Subscription entitlement
Features/limits purchased for the business.
Role / location
Which actions and outlets this individual can access.
Web / native / offline
Three different availability boundaries; a web module is not automatically a native or offline module.
Before you start Ask the business administrator if an expected module is missing.
Steps
This guide covers the core retail web modules and the live demo’s Accounting, CRM, Essentials/HRM, Project, Repair, WooCommerce and Connector menus.
Manufacturing source exists in the workspace but its workflow was not available in the inspected live demo menu. Ask for activation and training before using production recipes or production stock.
Asset Management, CMS, Ecommerce, Field Force, Product Catalogue, Spreadsheet, AI Assistance, Hotel/Gym, Custom Dashboard, Cheque and ZATCA names appear in configuration but are not verified as installed customer workflows in this portal review.
Superadmin is installation-wide tenant/package administration, not a customer cashier feature. Ordinary business users manage their own roles/settings and package subscription.
When a new module or app feature is released, its own verified steps and screenshots should be added to this guide before training users on it.
Check the result The guide avoids sending customers to features unavailable in their installation.
Where to go Administrator → your business feature review
Before you start Ask for the actual module and intended user role.
Steps
Confirm the module is installed and enabled for the business package.
Review the user’s permitted actions and locations, then open the actual customer screen.
Practise an approved demo lifecycle including create/view/correct/report rather than only a dashboard visit.
Add verified field explanations and screenshots to the module documentation before staff use it in real operations.
Record whether the workflow is web-only, native online or offline-supported.
Check the result Staff learn a real available workflow with the correct platform scope.
IN PRACTICE
A practical example
Repair may be available in the web sidebar while the native app provides retail sales. That does not mean the native app can intake a job sheet offline; use the documented web Repair workflow.
Common questions
Does this guide guarantee all extensions?
No. It describes verified workflows and identifies unavailable/unverified optional modules.
Why does the administrator see more than the cashier?
Installation/package management and broader permissions are separate from ordinary customer counter access.