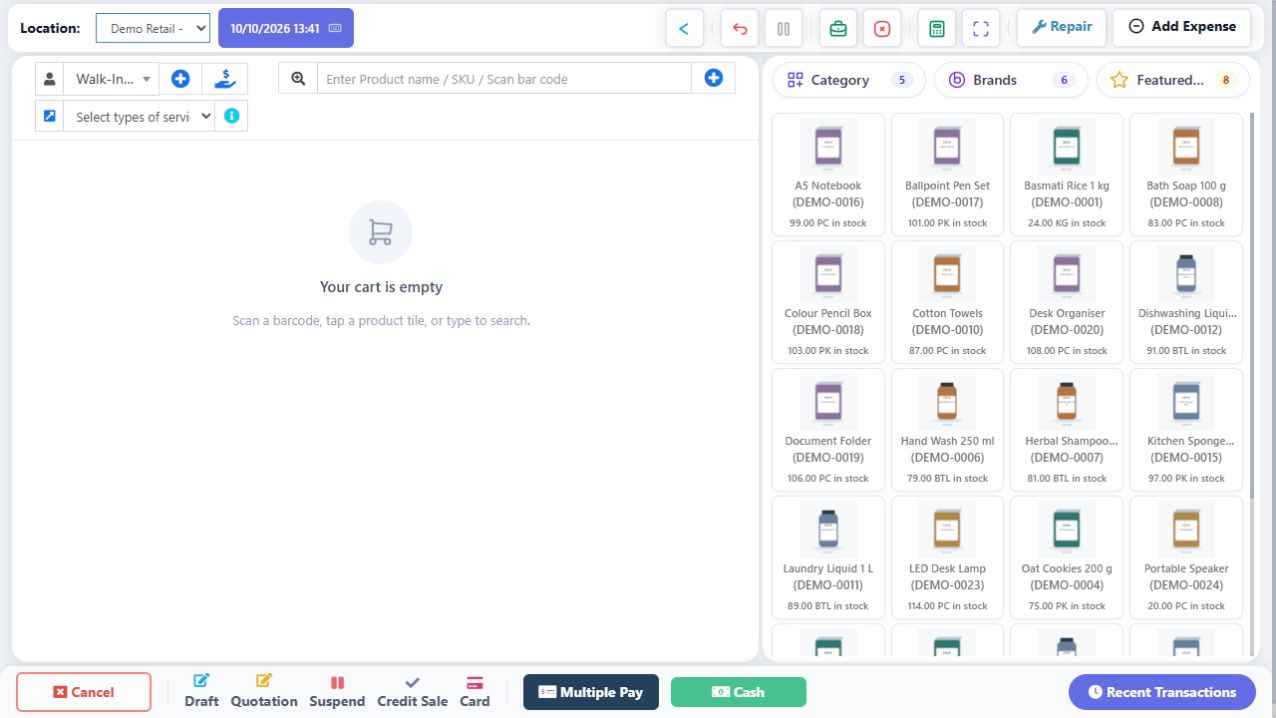
A basket is editable work until the server accepts a final sale. Keep the customer, outlet and physical lot correct before changing prices or taking money. Quantity and price are separate values; the displayed Price inc. tax is not necessarily the product’s base price before tax. A saved quotation/draft/suspended sale can be resumed but is not a completed paid bill.
SCREEN GUIDE Point of sale — module overview. Select the screenshot to enlarge; optional fields may differ in your business.
Field reference
Use this while completing the form. A required field is marked with *; conditional fields appear only when enabled.
Field / control
What to enter or understand
Location / Customer
Stock outlet and billed party. Search by name/mobile and verify before credit billing.
Product search / SKU / barcode
Match the exact product variation; similar names can have different sizes/prices.
Stock / lot & expiry
Current displayed availability and chosen batch. Use the physical stock’s lot.
Quantity / minus / plus / unit
Amount sold; type fractional quantities only when the unit allows them.
Price inc. tax / unit price before tax
Read the active label. Do not paste a gross amount into a before-tax editor.
Line discount / fixed or percentage
Reduction to a line. A percentage of 10 is not the same as a fixed amount of 10.
Bill discount / shipping / packing / rounding
Separate totals/charges where the platform exposes them. Check the final total after all changes.
Service / staff / date (web)
Conditional web controls. The native app does not expose every web ERP setting.
Cash / Card / Multiple Pay / Credit
Final payment workflow, distinct from saving unfinished work.
Before you start Use a selling account with access to the location.
Steps
Open POS and select the location. If asked to open the register, enter the cash float actually in the drawer and confirm.
Keep Walk-In Customer for an anonymous sale. For a known customer, open customer search and type their name or mobile number; select the matching record.
On web POS, use the customer Add button if you have permission and the customer is new. In the native app, use the existing-customer search; maintain contacts in the web portal where the app does not offer creation.
Review the sale date and service/staff controls if configured in web POS. Confirm the right customer before adding credit or loyalty details.
Check the result The sale belongs to the correct location, customer and cashier shift.
Before you start Use this check for web, Windows and Android with the controls offered there.
Steps
Check customer name/mobile and location. Review credit details when using a named customer.
Compare each item, variation, lot and quantity with the goods the customer is taking. Remove accidentally scanned duplicates.
Review unit price, authorised line discounts and bill-level charges/tax. Confirm the displayed payable amount.
Choose the actual payment method. If the customer changes their mind, edit the basket before finalizing rather than creating a refund immediately afterwards.
After saving, wait for confirmation and invoice reference. On timeout use confirmation recovery and history before trying a second sale.
Check the result The accepted invoice reflects the goods and agreed charge.
Where to go POS → saved bills / quotations / suspended records
Before you start Select the correct customer/reference and saved state.
Steps
Open the saved-bill list offered by your platform and choose the intended draft/quotation/suspended record.
Review restored customer, outlet, quantities, lots, prices and discounts. Stock/price conditions may have changed since the work was saved.
Make authorised corrections and obtain agreement on the current total.
Finalize through the resumed record’s normal payment workflow. Inspect its accepted invoice reference.
If finalization is uncertain, use retry confirmation for that operation. Do not create another fresh sale for the same saved basket.
Check the result Saved work becomes one confirmed bill when the customer completes it.
IN PRACTICE
A practical example
A customer buys 2 bottles from lot A and 1 bottle from lot B. Preserve the two physical lot selections as appropriate rows, inspect quantity and final total, then take payment. Changing the row price is a selling decision; it does not change the supplier purchase cost.
Common questions
Why does the app differ from the web screen?
The native screen adapts to device size and supports the documented counter features. Full settings and optional ERP workflows remain web pages.
Did tapping Cash save my sale twice after a timeout?
Do not tap a new checkout blindly. Inspect pending-operation recovery and the matching invoice in history first.