Online native receipt printing uses the web receipt workflow so the business’s invoice layout is the reference. Offline receipts are provisional and use a separate local format.
4 procedures · Field reference · Practical example · Common questions
Invoice Scheme controls numbers; Invoice Layout controls appearance; Business Location selects which scheme/layout to use; printer/browser settings control physical output. For confirmed online native bills, the original web print flow provides the server’s receipt format. Local offline receipts are provisional and are not the final web invoice. Product barcode labels have their own Products procedure.
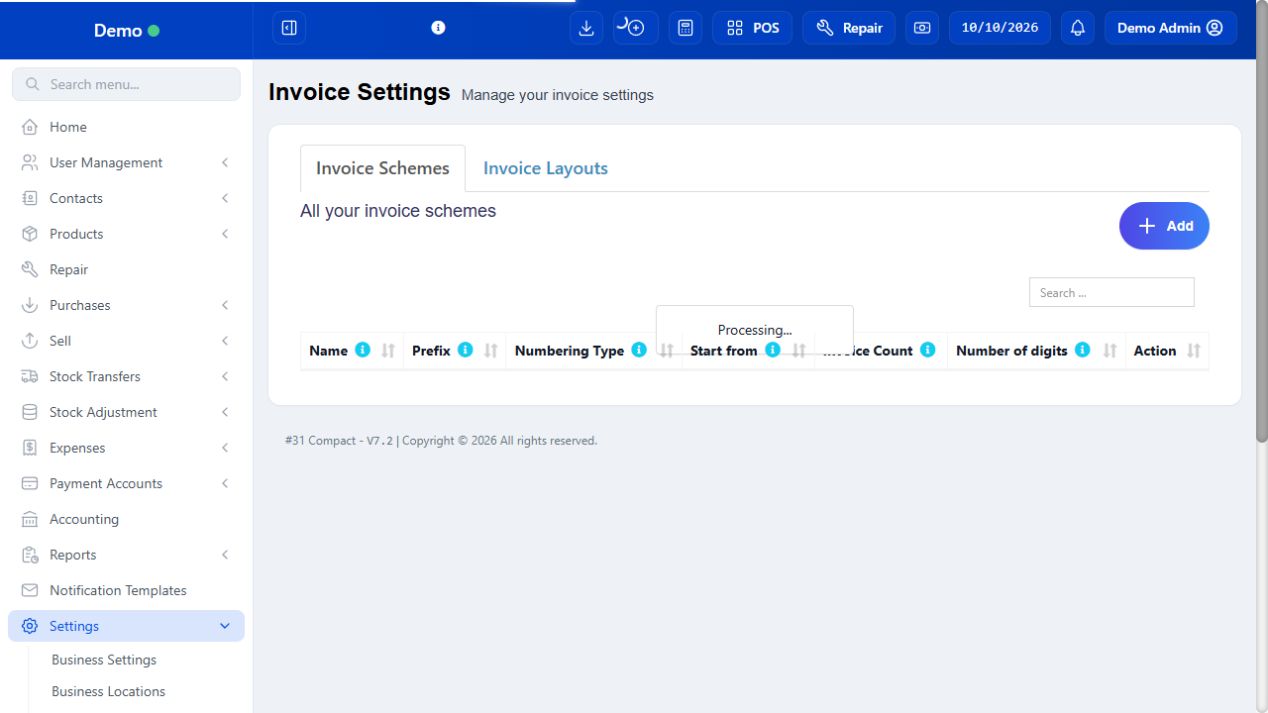
SCREEN GUIDE Invoices & printing — module overview. Select the screenshot to enlarge; optional fields may differ in your business.
Field reference
Use this while completing the form. A required field is marked with *; conditional fields appear only when enabled.
Field / control
What to enter or understand
Invoice scheme / prefix / starting number
Numbering identity. Avoid reusing numbers or changing sequences without checking existing invoices.
Invoice layout / design
Receipt presentation, displayed labels and business/customer/tax fields.
Location assignment
Which scheme/layout and print preference this outlet uses.
Paper width / driver / scale
Physical output settings: match receipt roll, label or A4 page and preview.
Print Mini / Print Detailed
Register report output variants; inspect intended sections before printing.
Offline receipt label
Provisional device receipt awaiting server confirmation, not a confirmed server invoice.
Where to go Settings → Invoice Settings; Settings → Business Locations
Before you start Administrator access is required.
Steps
In Invoice Settings, review invoice schemes for numbering/prefixes and invoice layouts for receipt appearance.
Edit the appropriate layout’s header, logo, address/tax labels, visible item columns, footer and paper style.
Assign the intended scheme/layout to the business location. Review browser-versus-receipt-printer settings there.
Preview a sample invoice and test on the actual printer. Check numbering, taxes, totals, margins and long product names.
SCREEN GUIDE Choose invoice numbering and layout — look for the controls described in the steps. Select the screenshot to enlarge; optional fields may differ in your business.
Check the result Receipts use the location’s configured format.
Where to go Settings → Invoice Settings / Business Locations / Receipt Printers
Before you start Know the connected printer and actual paper size.
Steps
Create or select the invoice layout and review business name/logo, address, tax number, customer fields and line information.
Assign its invoice scheme/layout to the correct Business Location. Check that this outlet is selected for the sample sale.
Open an existing approved sample invoice and preview the original web receipt. Confirm numbering, tax, discount, rounding and total.
Choose the correct printer/paper in the supported browser/system dialog or configured receipt-printer flow.
Print one test and compare it physically to preview. Correct scale/margins/driver before routine printing; a good on-screen preview does not prove the printer is configured.
Check the result The intended layout prints legibly on the intended paper.
Where to go Windows / Android → Previous bills → Preview / Print
Before you start Be online for the original server receipt format.
Steps
Open the existing confirmed invoice and choose Preview / Print.
Complete the offered web session/authentication if requested, and review the original server receipt.
Use the available system/browser print or PDF action with the configured printer. Supported devices/drivers determine the actual connection options.
Check the invoice reference matches the existing sale. Printing failures should be retried on this invoice, not by selling again.
After offline synchronization, print the confirmed server invoice if needed and distinguish it from the earlier provisional local receipt.
Check the result A copy of the correct confirmed invoice uses the web format.
IN PRACTICE
A practical example
An outlet can use a receipt roll while another uses A4. Both can bill the same product, but their location-specific layout and printer paper settings must be checked separately.
Common questions
Why does preview differ from paper?
Review printer driver, paper size, scale, margins and browser headers/footers.
Can an offline receipt be identical to a server invoice?
The current offline receipt is marked provisional. Exact original web output needs server confirmation and the online flow.